Cabin # 9: Root Cellar, Hearth, and Floor

The first cabin we built we used a dirt and spruce bough floor for 3 years before putting in a floor. This cabin would be waaay too many spruce boughs, so we decided to put the work in right away. The first obstacle was the most formidable: finishing the root cellar.

Root Cellar 1: The Big Dig II

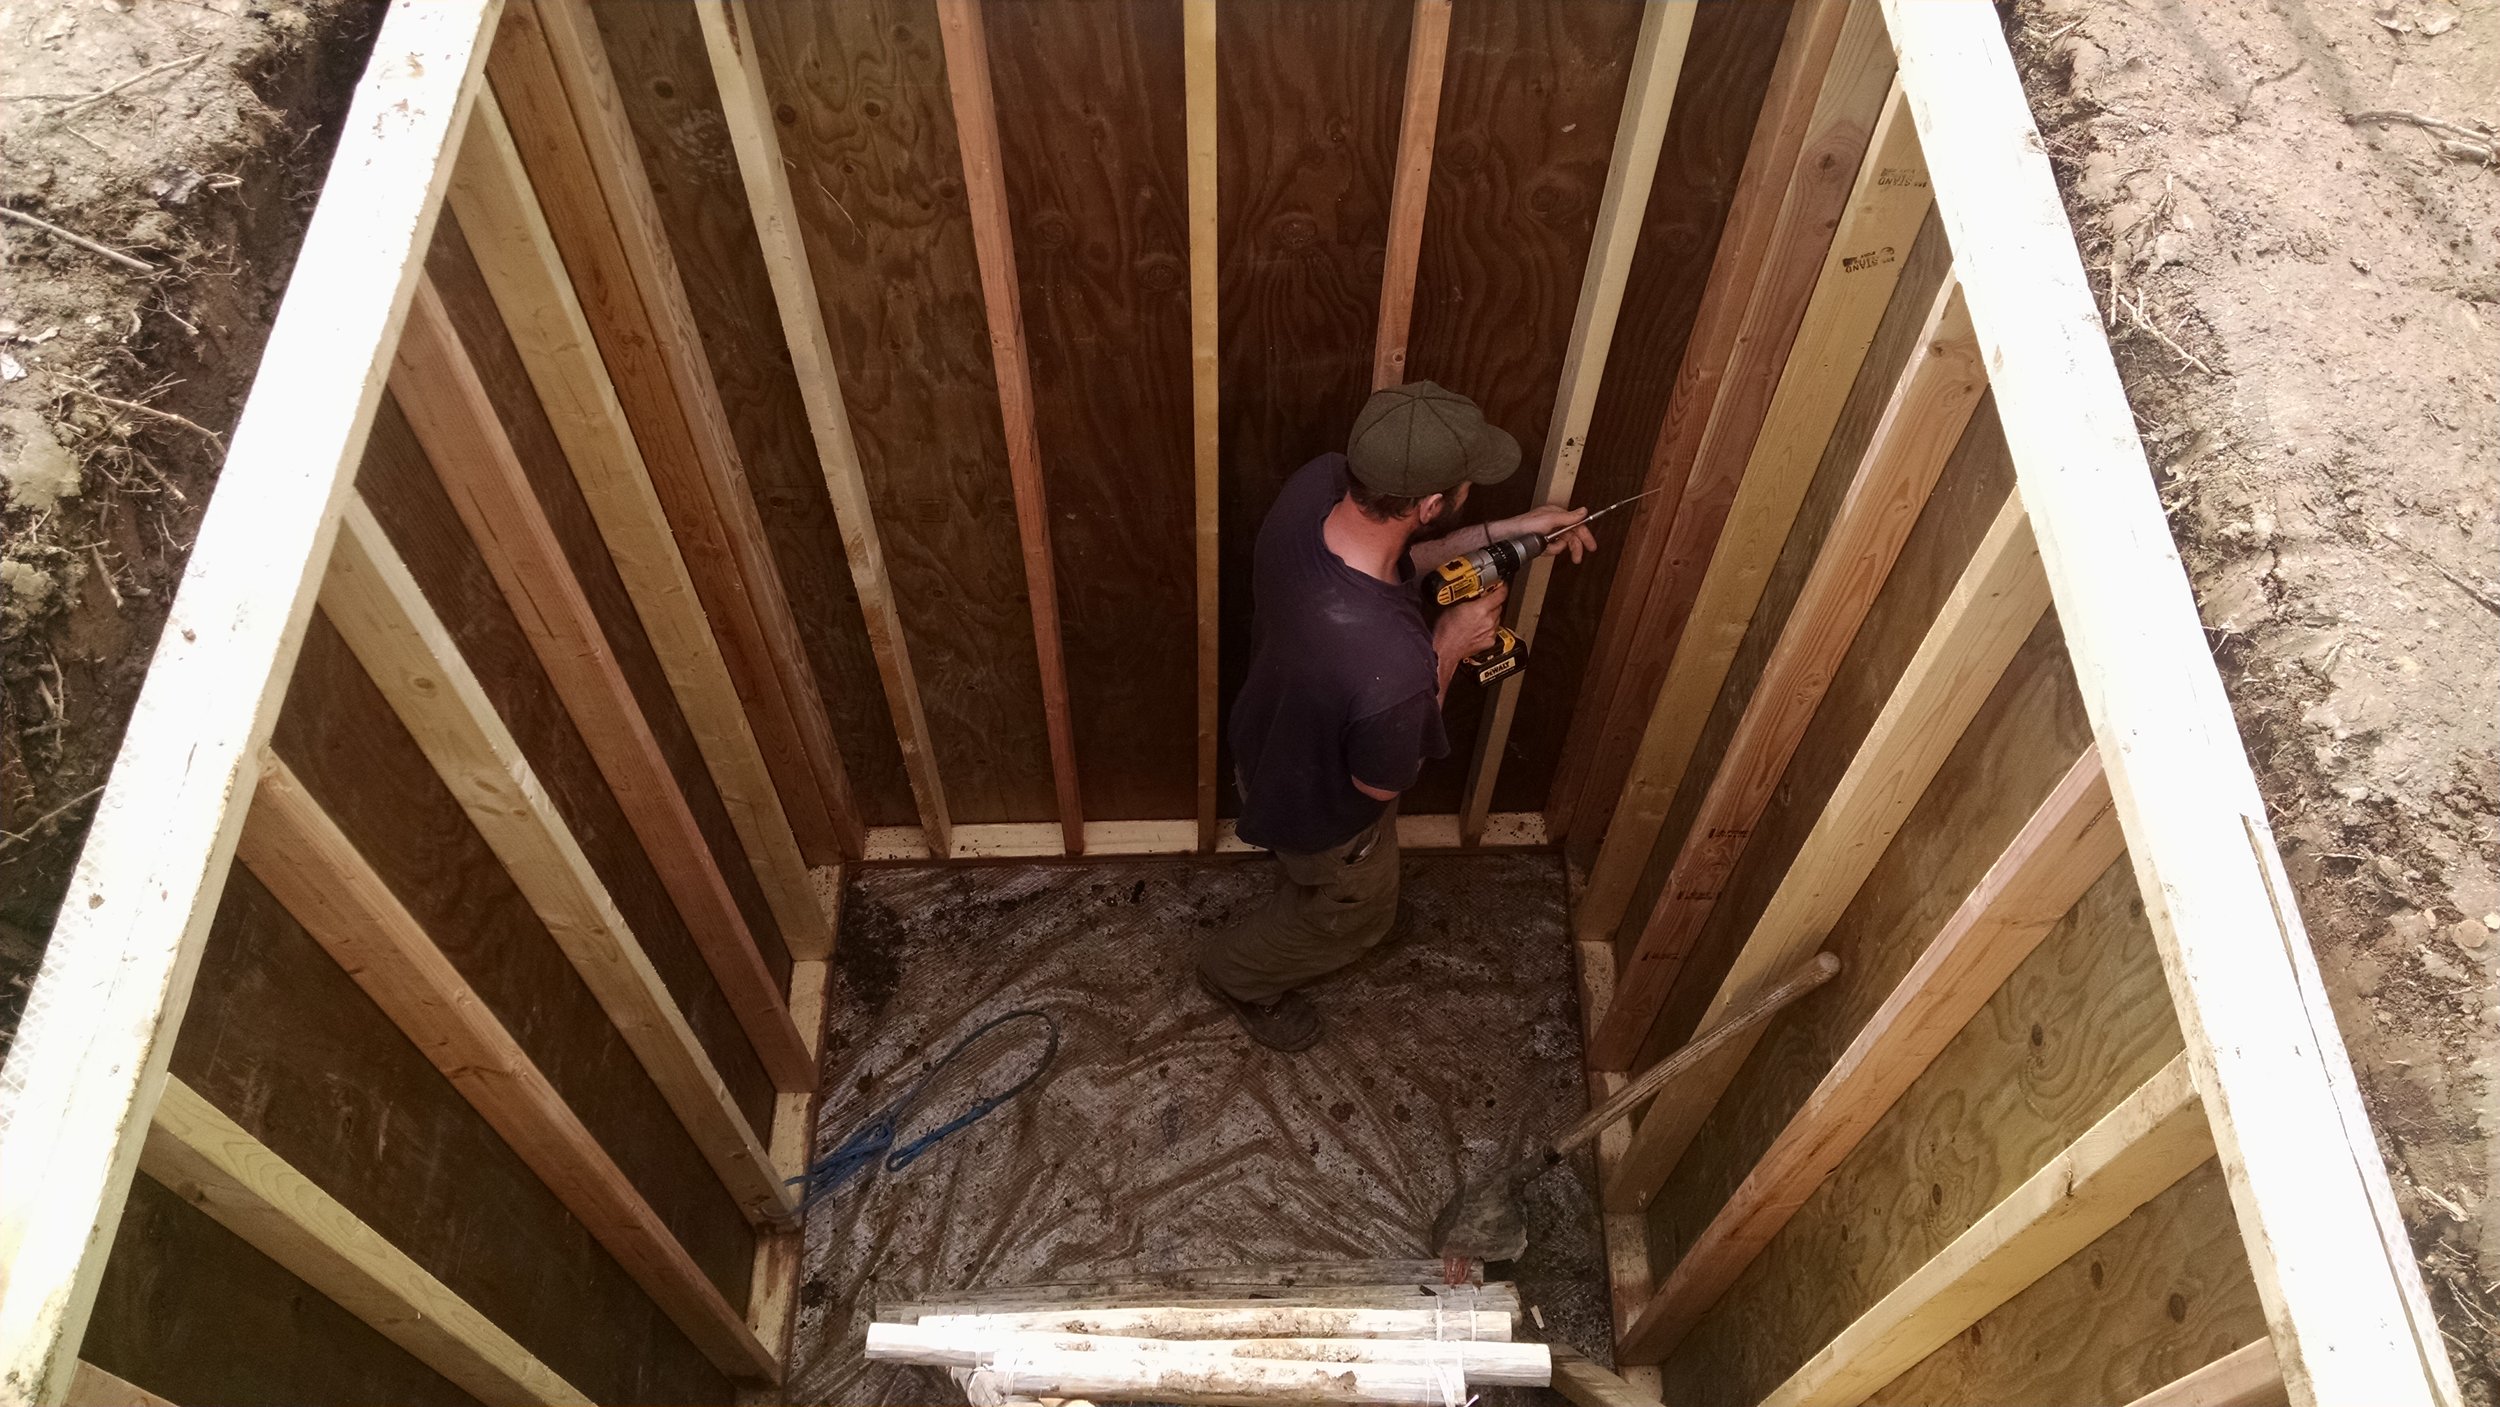
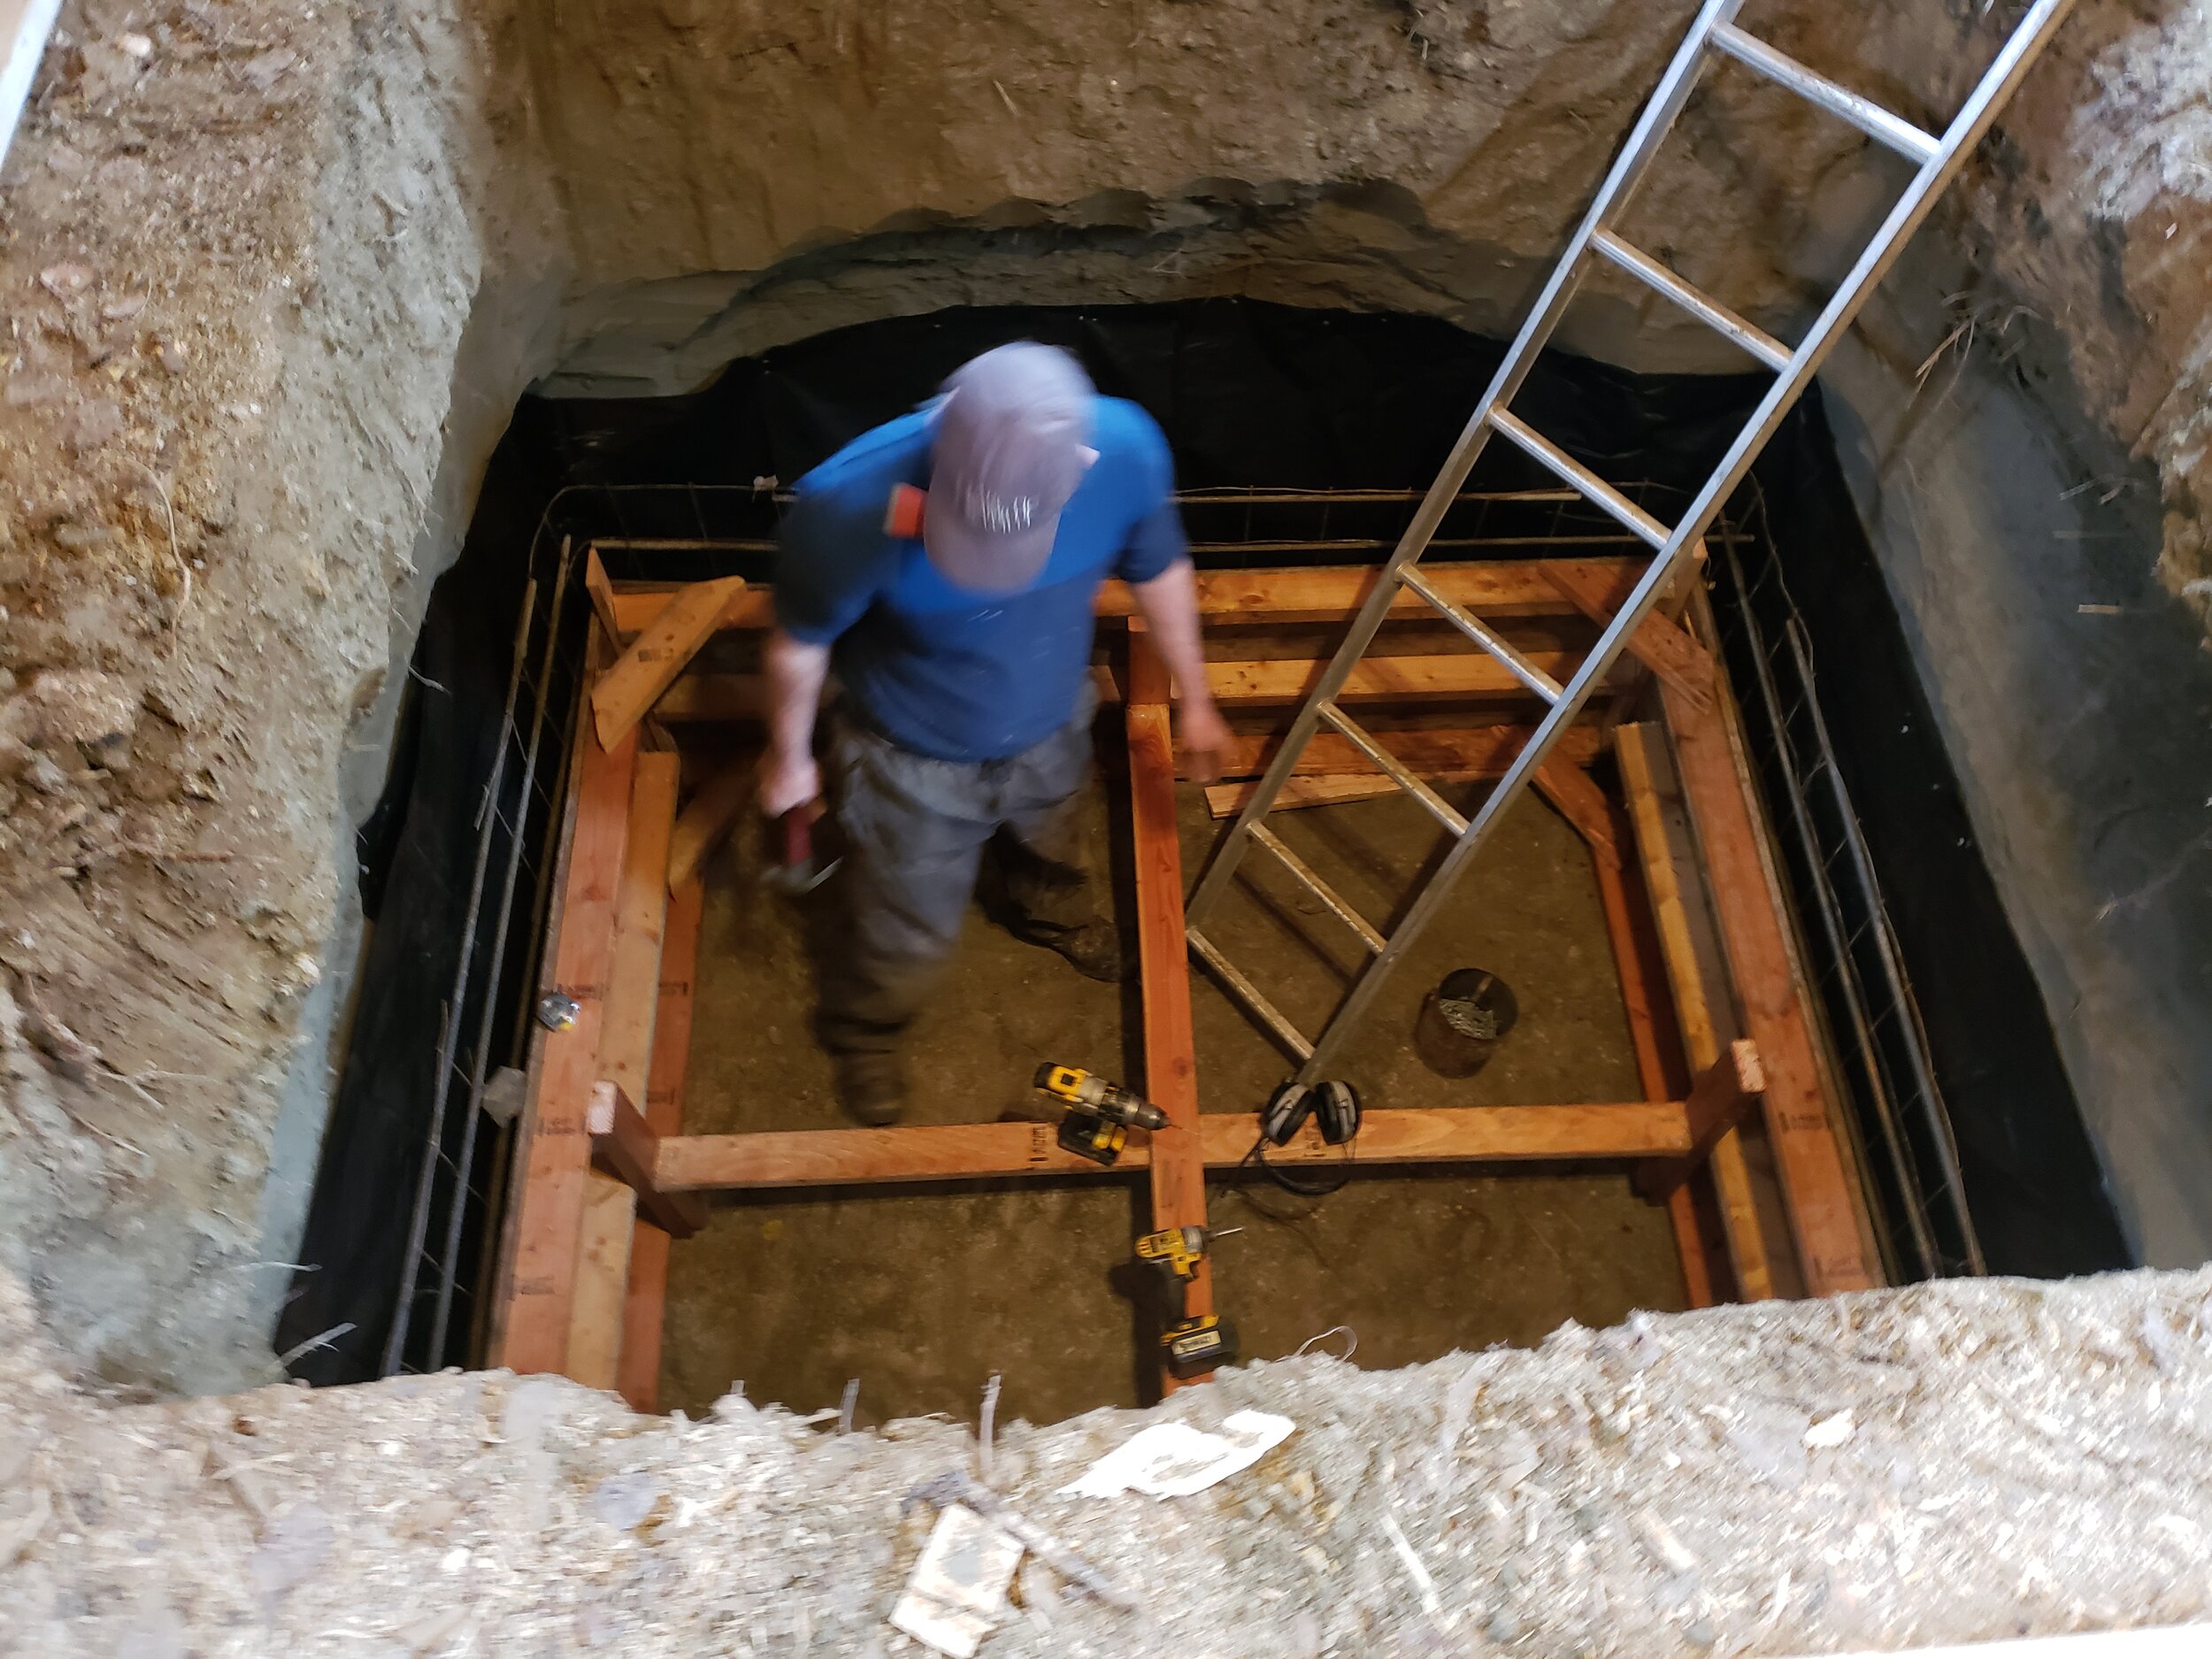
Digging the cellar was among the first things we did in the building process but we made a big mistake the first winter and didn’t adequately cover the hole over the winter. When spring thaw happened, the cellar got water in it, and one of the walls froze and thawed and moved. Not good. We decided that the treated plywood walls that we had made were not strong enough, so we removed them. This was a good thing because we discovered that the dirt walls had collapsed more than we thought. In order to have even, stable walls we had to remove a considerable amount of dirt, only now we had to take it out through the cabin. Thus began the second episode of the “big dig”. The original dimensions of the cellar were 6’ x 6’ x 8’ deep By the end of the big dig it was more like 8’ x 8’ x 7’ deep. Not many photos were taken during this period because it was super stressful and we didn’t dare get near the edge of the hole! Also, morale was low. Nothing like moving the same dirt four times.


Root Cellar 2: Concrete and Wood

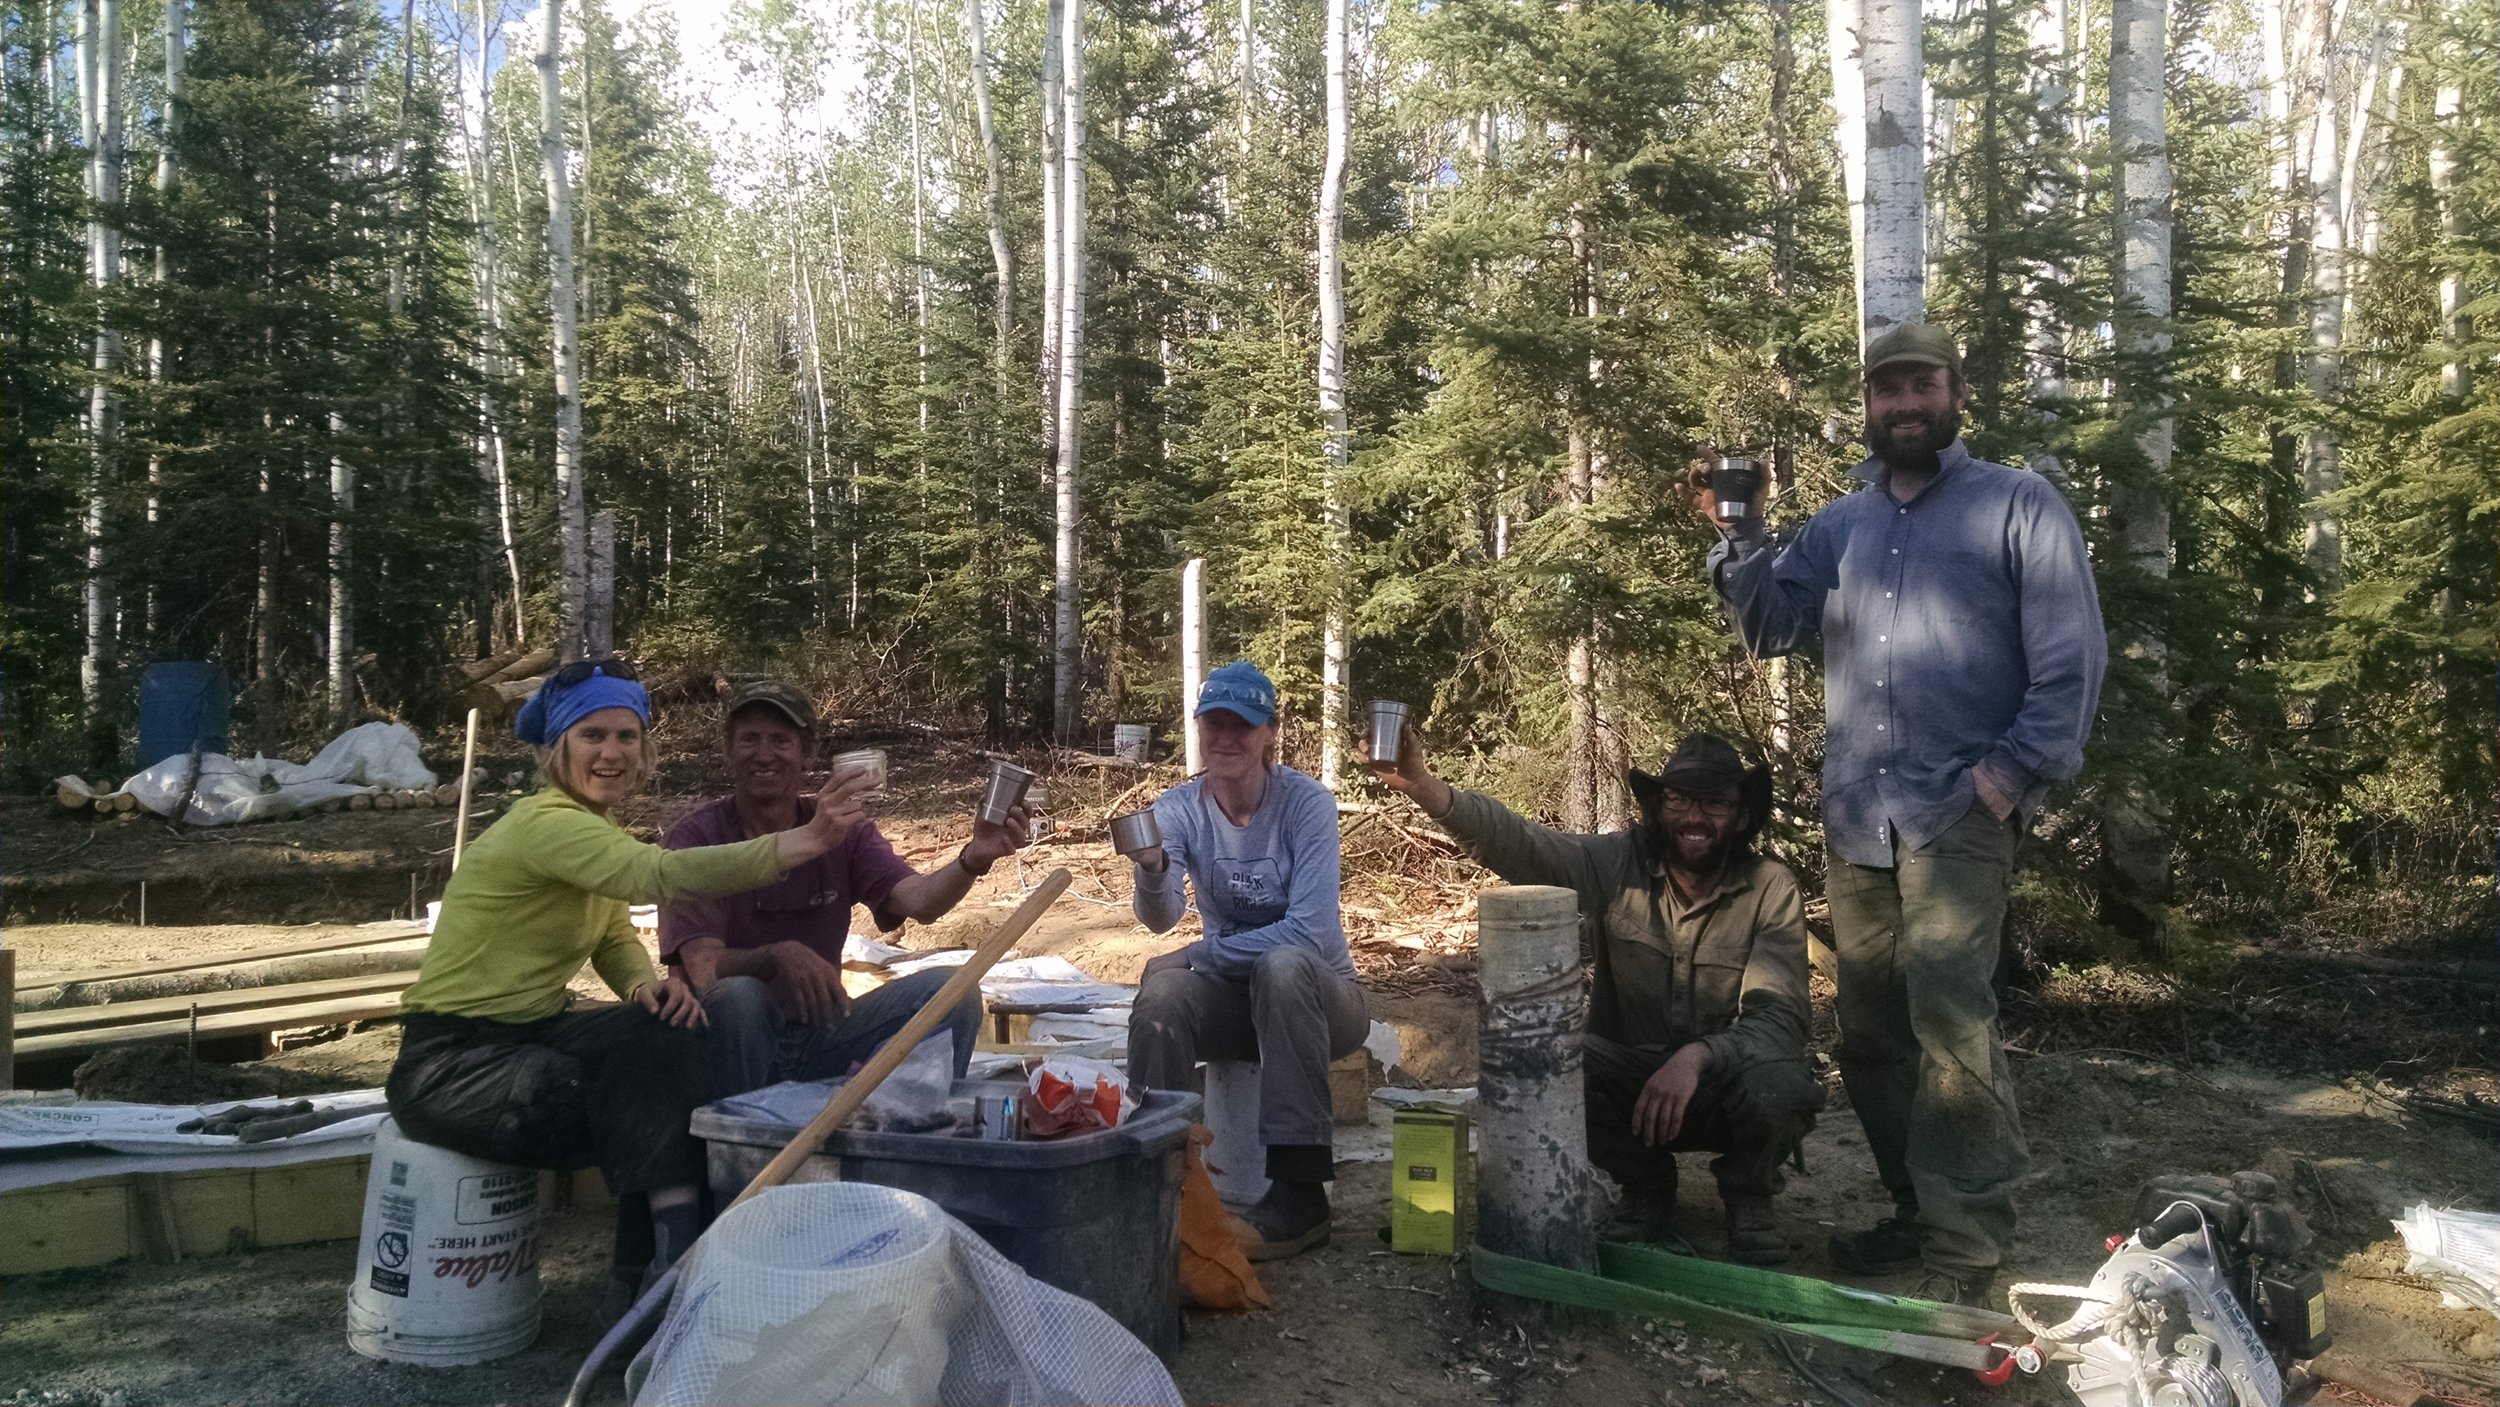
We were able to recycle pretty much all of the original pressure treated frame once we got it out. We then decided to bring in the big guns and pour concrete walls for as far up as our gravel supply allowed. We built a sturdy (look at the braces!) form and stretched our arm muscles for another concrete party. During the summer David decided that this was going to happen, so we gathered another 100+ bags of gravel from the river, hauled it with the winch and wheel barrow, and brought in portland cement by boat. The materials were there and our friends Heather and Mike came out to help with the concrete mixing and pouring.

20190921_133936.jpg

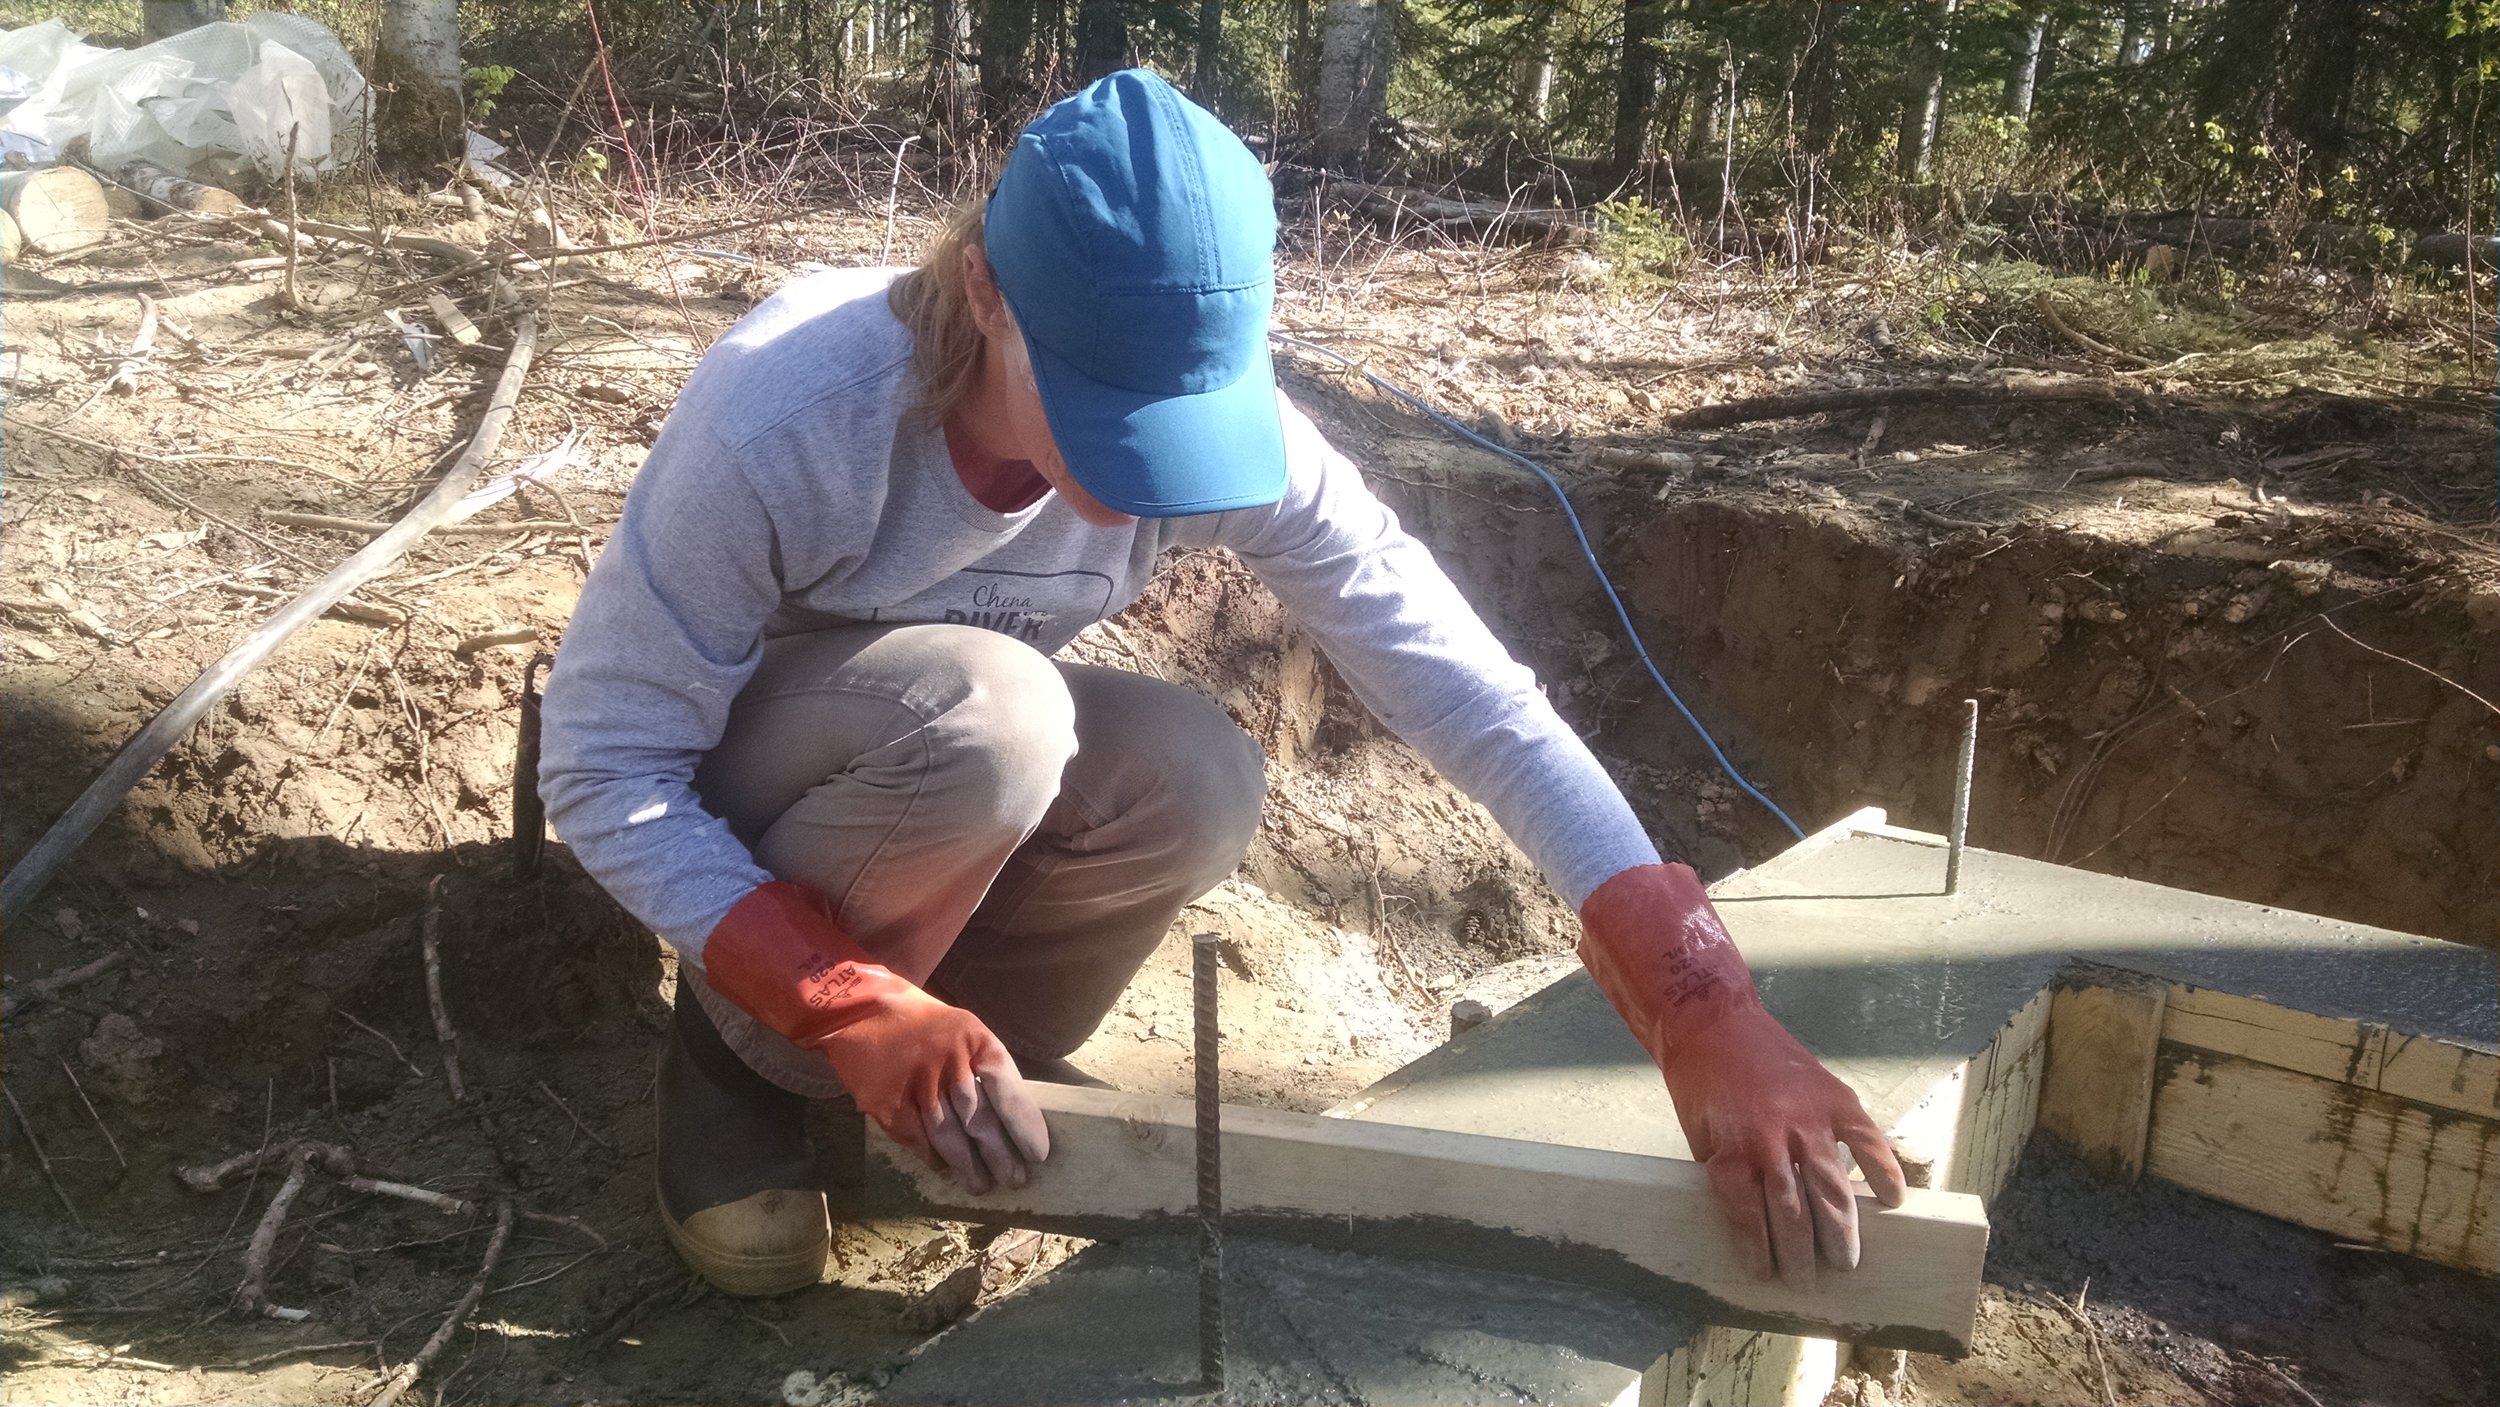
We used a wheelbarrow, shovel, hoe, and pop music to mix small batches of concrete. We set up a simple pulley to lower buckets of concrete into the cellar where David poured it into the form. The wall ended up being about 3 feet tall. Here is what it looked like:

20190925_200249.jpg

We made the remaining wall out of pressure treated plywood and reinforced it with two layer of shelving with 2 x 12 boards. Jenna immediately seized on the opportunity to fill the shelving with well-organized canned goods and tools. We have never really had a space that wouldn’t freeze and this was very exciting, but neither of us has really used a root cellar. David went to town to take a look at the long-functioning Mayo family cellar. He came back with tips and installed an air intake and outtake pipe that we use to alter the temperature. We are trying to keep the temp around 38 degrees (refrigerators are generally 35-40) to prohibit mold growth.

The next summer we poured a concrete floor which was a big improvement: easier to clean, drier overall, and no more mold!

20191024_120942.jpg

Hearth 1: The Rocks

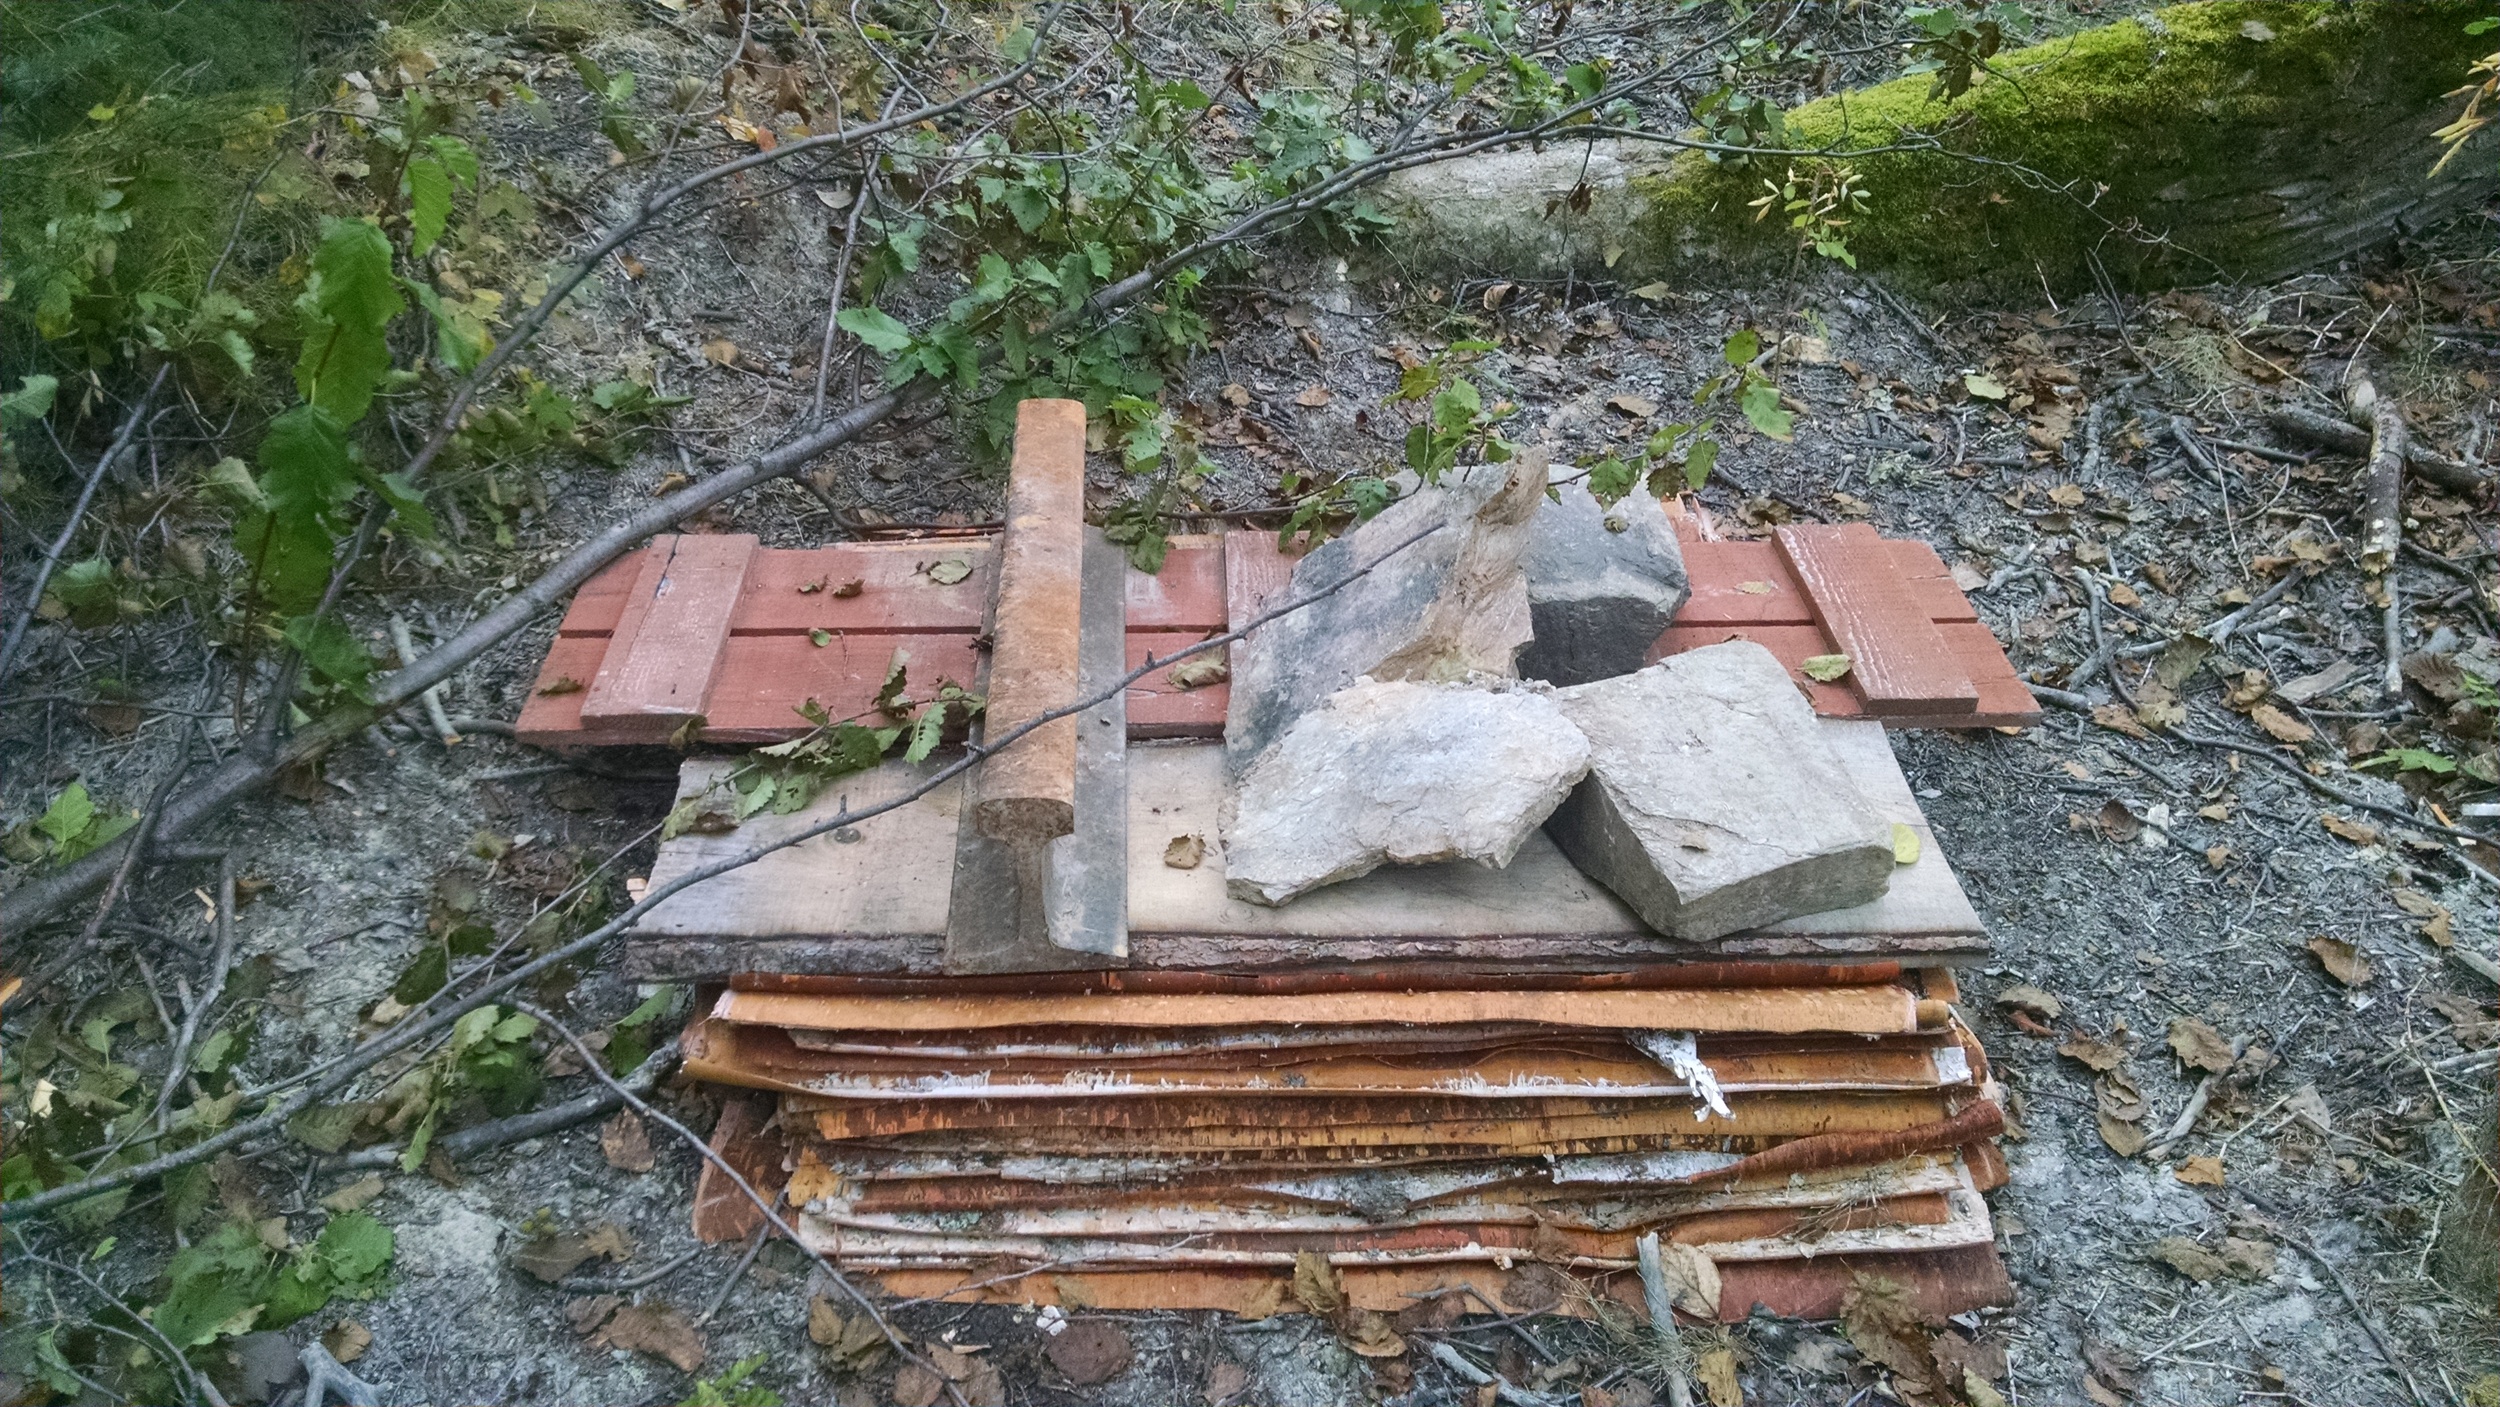
After all that concrete and digging we needed a fun task. Our friends John, Wesley and Phil came down just in time to make a late-season boat trip downriver to hunt for “the good rocks” for use in our hearth. We found set rocks at a highly secret location along the river and collected flat, fairly regular angled ones along the shore. To test their strength, Phil dropped them on other rocks. It really was quite fun.

20191005_153230.jpg

We boated back upriver in the middle of a snowstorm with Phil on the roof manually running the windshield wipers, Wesley tending the woodstove, and David and Jenna arguing over where the best channel was. we made it back just fine, mostly because John was driving.

20191006_123308.jpg

Step 2: Silt

While walking the dogs on the island across from our fish camp we found some really nice, soft silt. David’s eyes grew wide and soon we were hauling it back up to the cabin site, along the frozen river to mix with cement and water to make a filler for the hearth.

20191024_161335.jpg

Root Cellar 3: Fitting the Stones

By this point it was late September and getting chilly. We had bought and installed stovepipe and were very ready to go. We decided to do a basic placement (not leveled) of the rocks and hold off on sealing it up with cement and get a stove going pronto. Heating the cabin was very exciting and Jenna fought the urge to move in.

20191012_151502.jpg

Floor 1: Plumbing

We decided that it would be prudent to install some basic plumbing pipes before putting our floor in. We are dry cabin dwellers and this is the part of the project that we really knew next to nothing about. Luckily we have smart friends who have experience with this. We called Michael Wald and he basically planned out our plumbing: a basic 3-inch outtake pipe from the sink area to the outside (below) with an addition for a potential washing machine. There is also a pipe from the root cellar to the stove for an air intake, 2 pipes from the wall to the root cellar for electrical lines, and copper pipes from the sink area to the second floor for a water tank. The water pipe drops as it exits the building. We will probably use it seasonally in the warmer months and just use a bucket system in the winter, but the pipes are there if we need them.

20191011_145946.jpg

Floor 2: Leveling

David decided that since our cabin was on the ground anyways it would be warmest to do a “floating” foundation, basically flattening the floor and then adding layers of plastic, foam, and wood rather than a traditional floor on joists. This sounded good, but required every ounce of his impressive supply of perfectionism to make the dirt floor level. He “invented” several tools to help him with the leveling and did the detail work while Jenna wheeled around dirt inefficiently and tamped dirt down once it was leveled. One of the best tools is pictured below, it uses the root cellar joists (on the thin part of the board) and a sharpened edge (near his hands) to gauge the level and move dirt incrementally. This was a pain in the rear.

20191012_151508.jpg

Floor 3: Layer Cake Round 2

Finally it was time to put down the layers. We started with a vapor barrier, just basic black plastic, taped at the seams.

20191014_114522.jpg

Next came 2 layers of foam, this was not as easy as we had originally envisioned. We had to account for the pipes (below) and make sure the seams were in different spots on each layer. We cut the foam with kitchen knives and used small wooden wedges to hold it in place along the edges.

20191015_131137.jpg

Finally came the subfloor. We used tongue and groove OSB because it was cheaper than plywood. We ended up miscalculating slightly and David got to hike in a sheet of this. Not good. When we laid the OSB some areas weren’t perfectly flat, so we shimmed them. We were approaching the “good enough” mentality at this stage.

20191121_211209.jpg

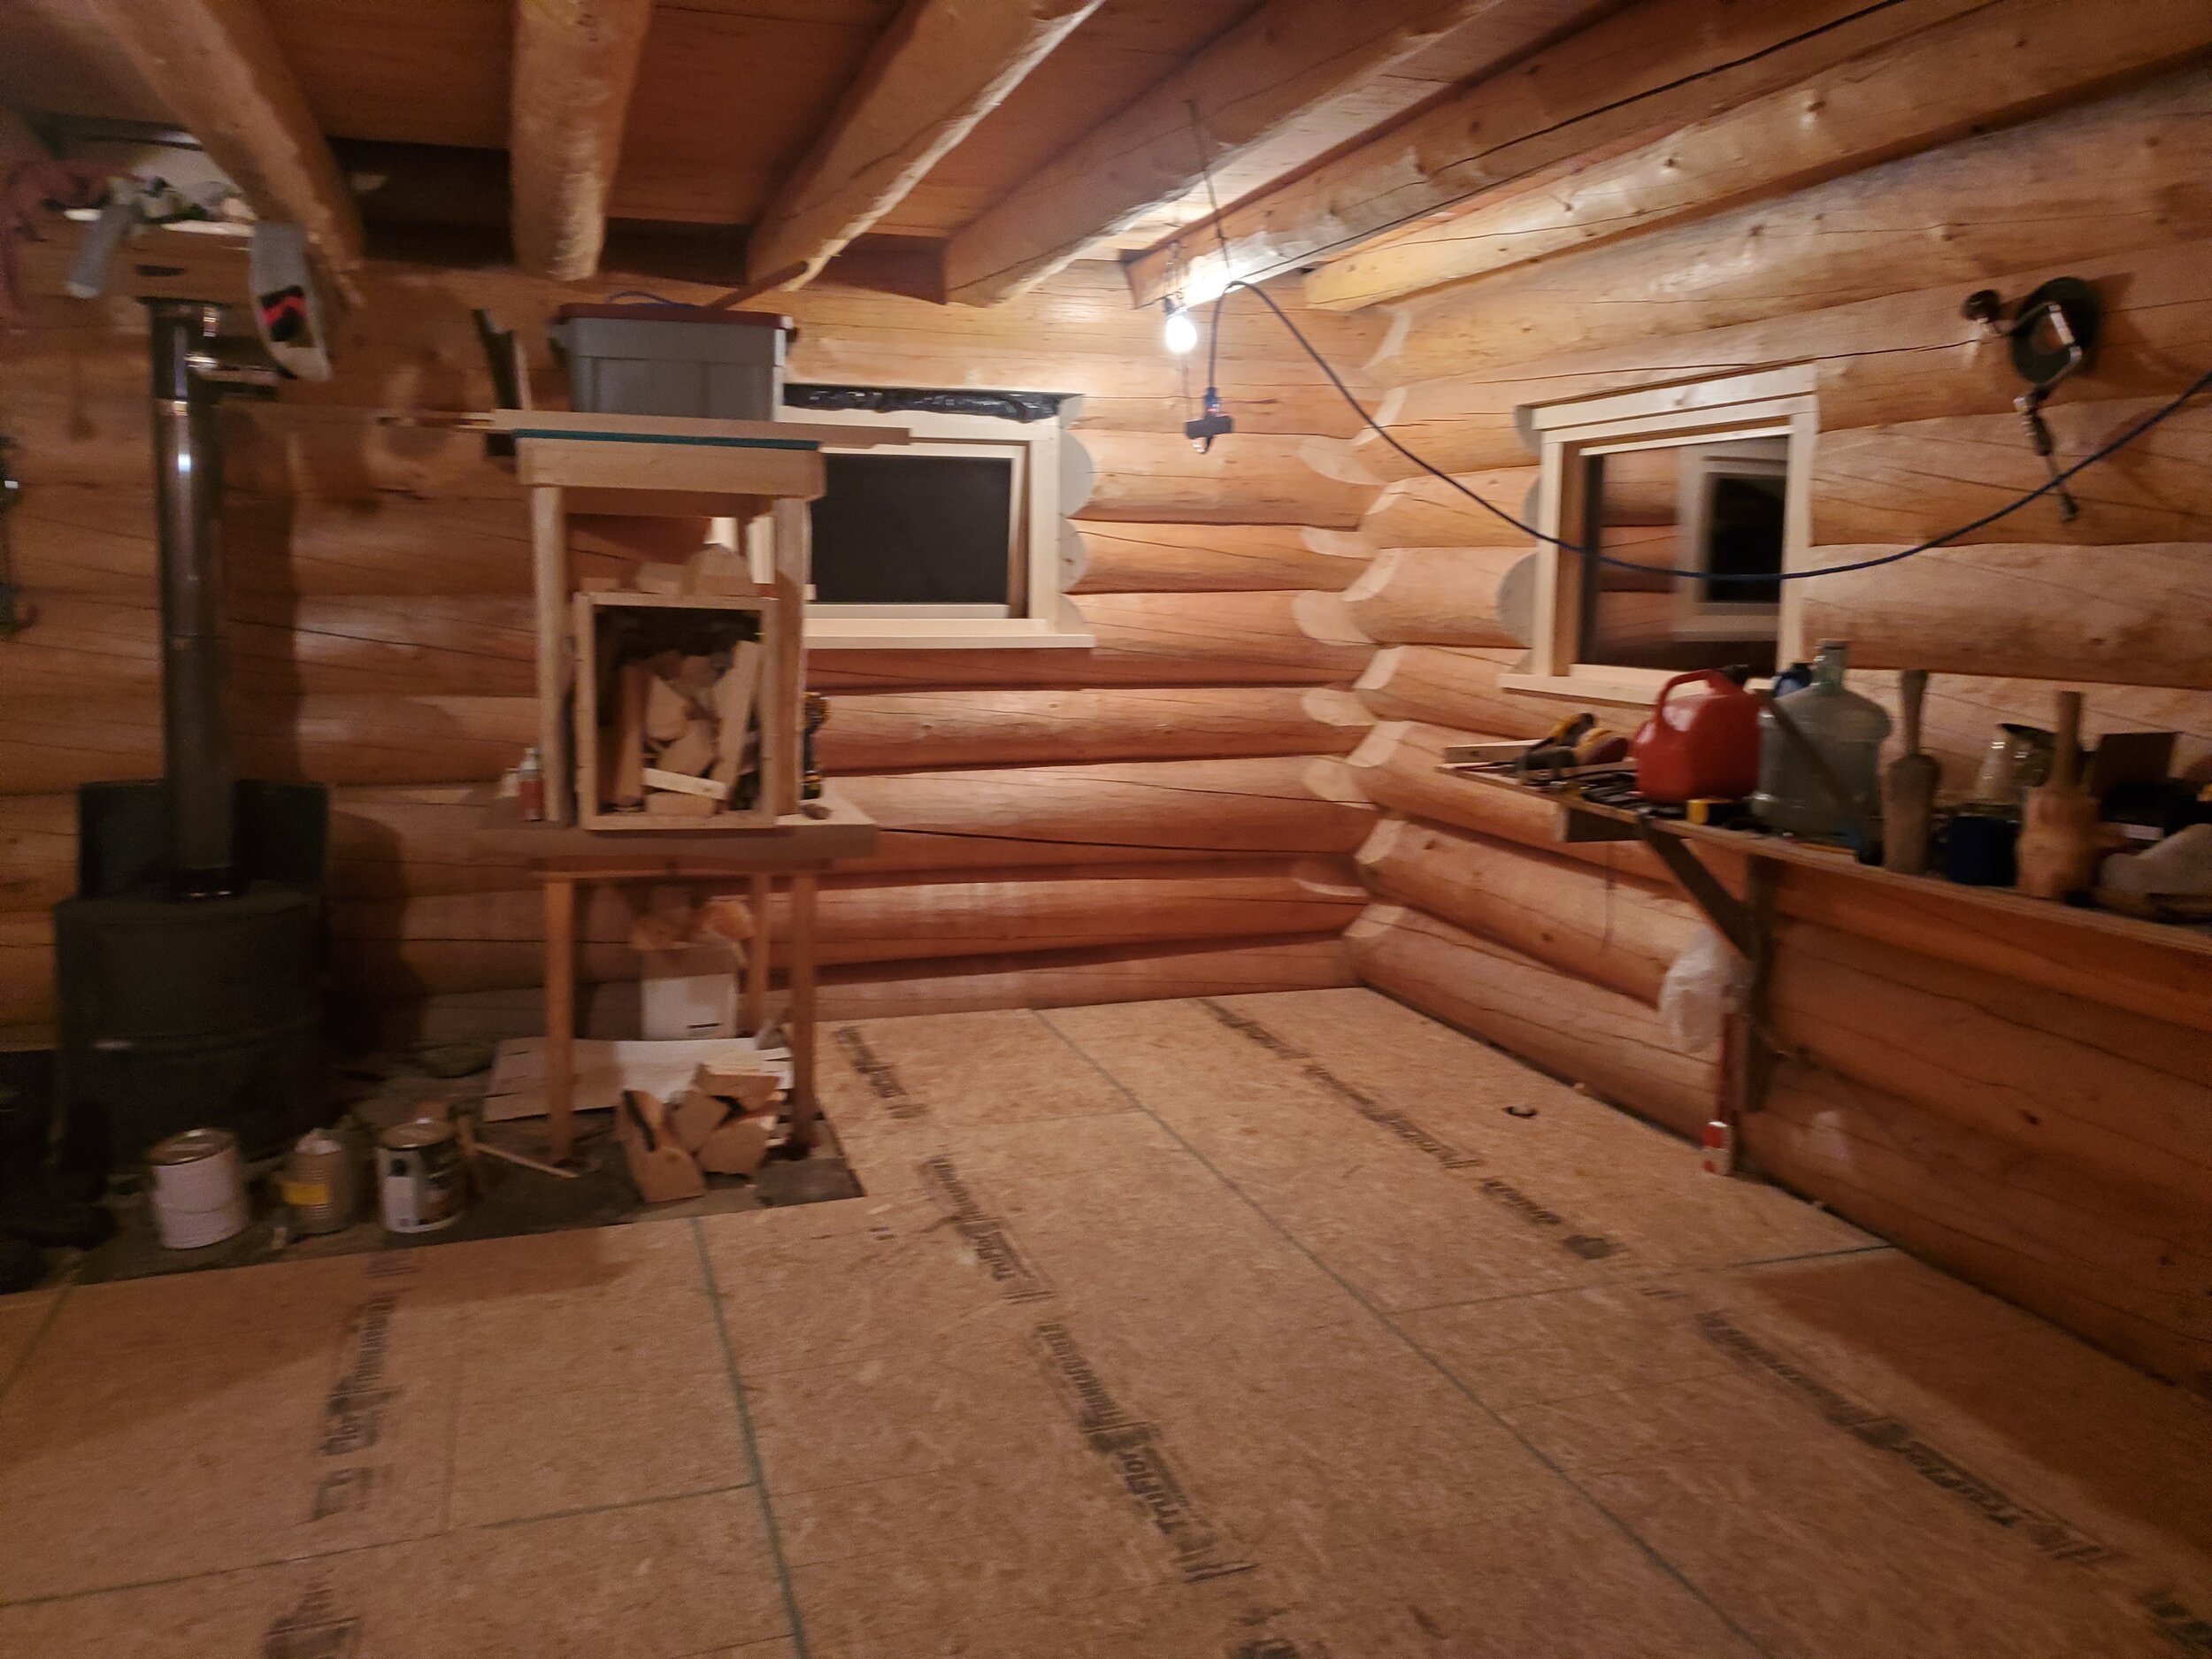
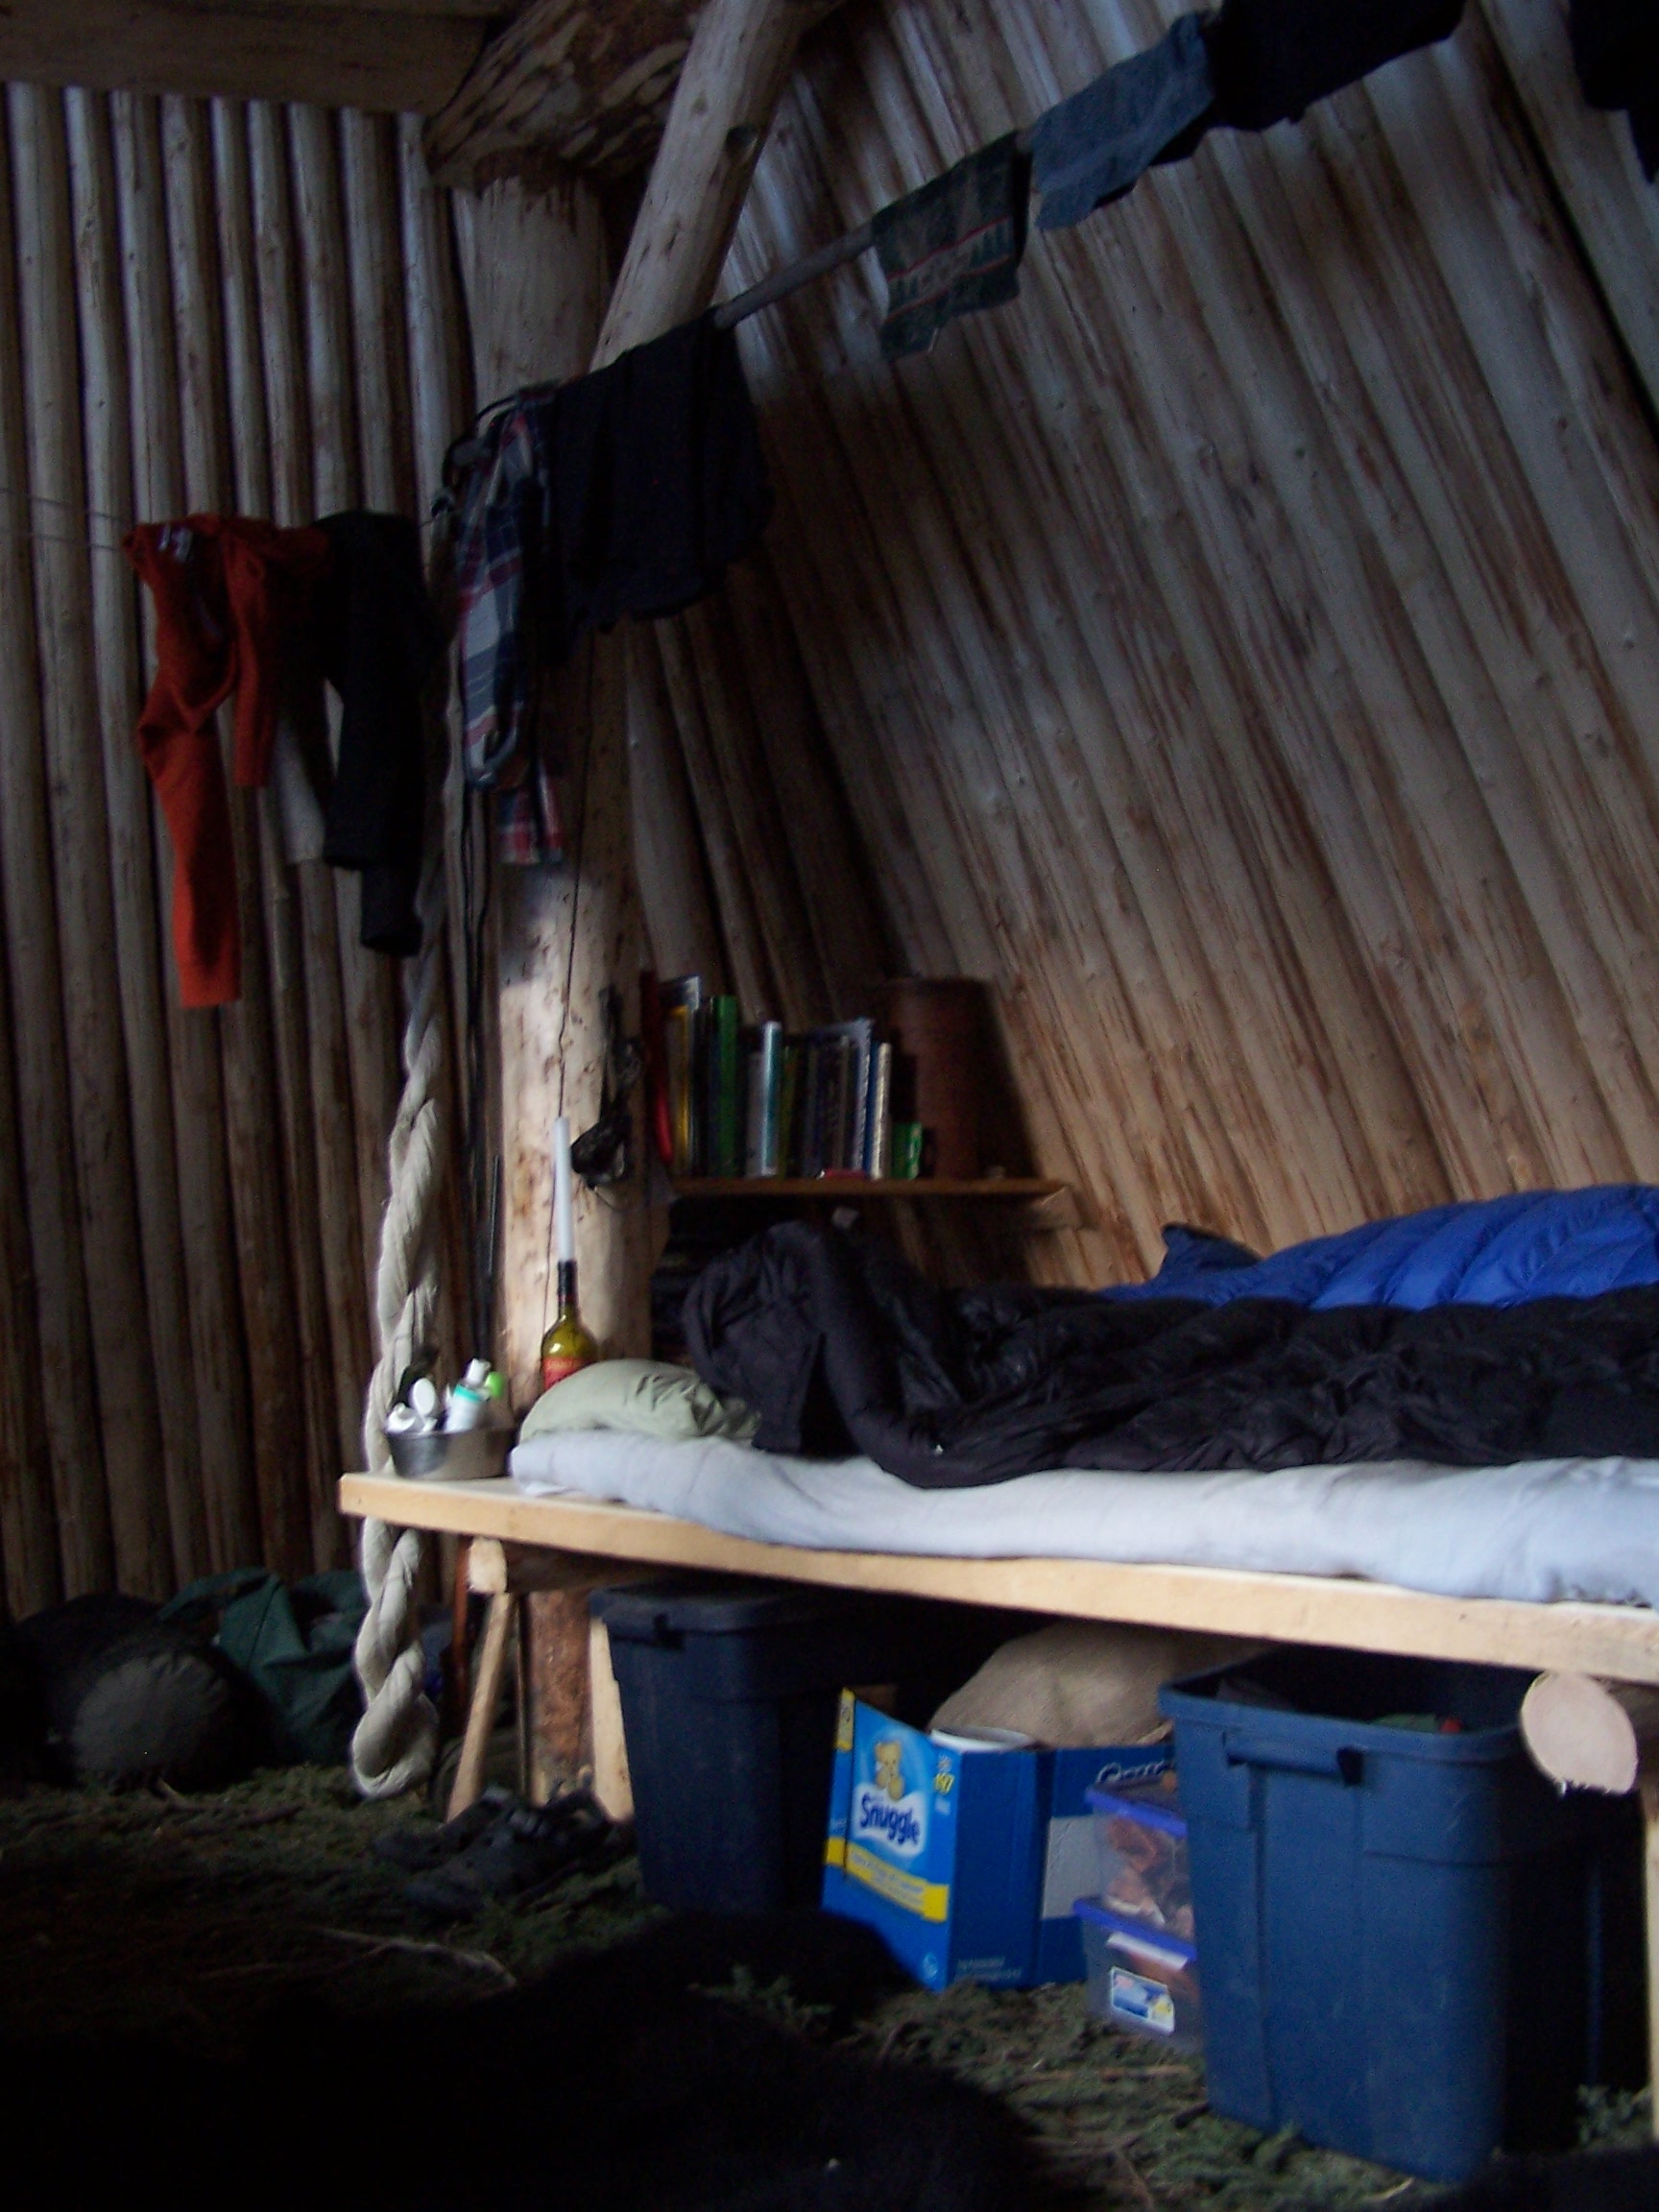
Once the subfloor was in we used the cabin like a workshop for the month of October and much of November. We were able to build window frames and furniture in this big, heated space and it was awesome. Just before we left to visit family in November we did a big sawdust cleaning job and painted the floor with 2 layers of “mixedleaf green” which David picked but ended up looking a bit like astroturf. Good motivation to put the real floor down once the boards dry, and kind of funny for now.

20191122_100756.jpg

After one week of astroturf, Jenna went to the store and bought a different color floor paint. After 2 years in the cabin the floor is warm but hard to clean and slightly uneven so we’re gearing up to put the actual floor in this summer.
Cabin #8 Sod Roof!

There is nothing quite as satisfying as putting a real (not tarp) roof over a log cabin. By the time our roof was finished, we had spent 3 years worrying about our logs rotting and the roof gave us a sense of relief- finally our work was safe. We decided on a traditional sod and pole roof because (1) it makes good use of materials that are locally available and (2) using logs allowed us to stay with the theme of non-dimensional lumber, it would have been hard to fit a dimensional roof onto a non-dimensional cabin. (3) Growing raspberries on the roof!

logging for roof

Step 1: Poles (yes, more poles).

We harvested small white spruce poles for the roof from a nice stand about 1/3 mile above the cabin. We hauled them to the building site in the winter and peeled them in the spring and put them in a rack (below) to dry vertically in the sun for a year. By the next fall fall they were dry but slightly discolored so we began round 2 of peeling.

20190523_125720.jpg

Just when Jenna thought the peeling was over, David decided that we also needed some very thin poles to put in gaps. It was summer at this point, so we got an additional 140 or so small poles by boat and hauled them up the hill, peeled them, and let them dry on the south face of the cabin. Even these well-cared for poles did end up molding some and we didn’t end up needing many of them for the cabin roof. Luckily, the dried and peeled spruce pole is the 2”x 4” of the woods and we used this stash for a variety of projects including: compost bin, stool legs, drying racks, railings, steps, poling poles for boats, ice chisel poles, seedling rack, chin up bar, we still have some years later!

20190523_141206.jpg

Step 2: Ridgepole and Purlins

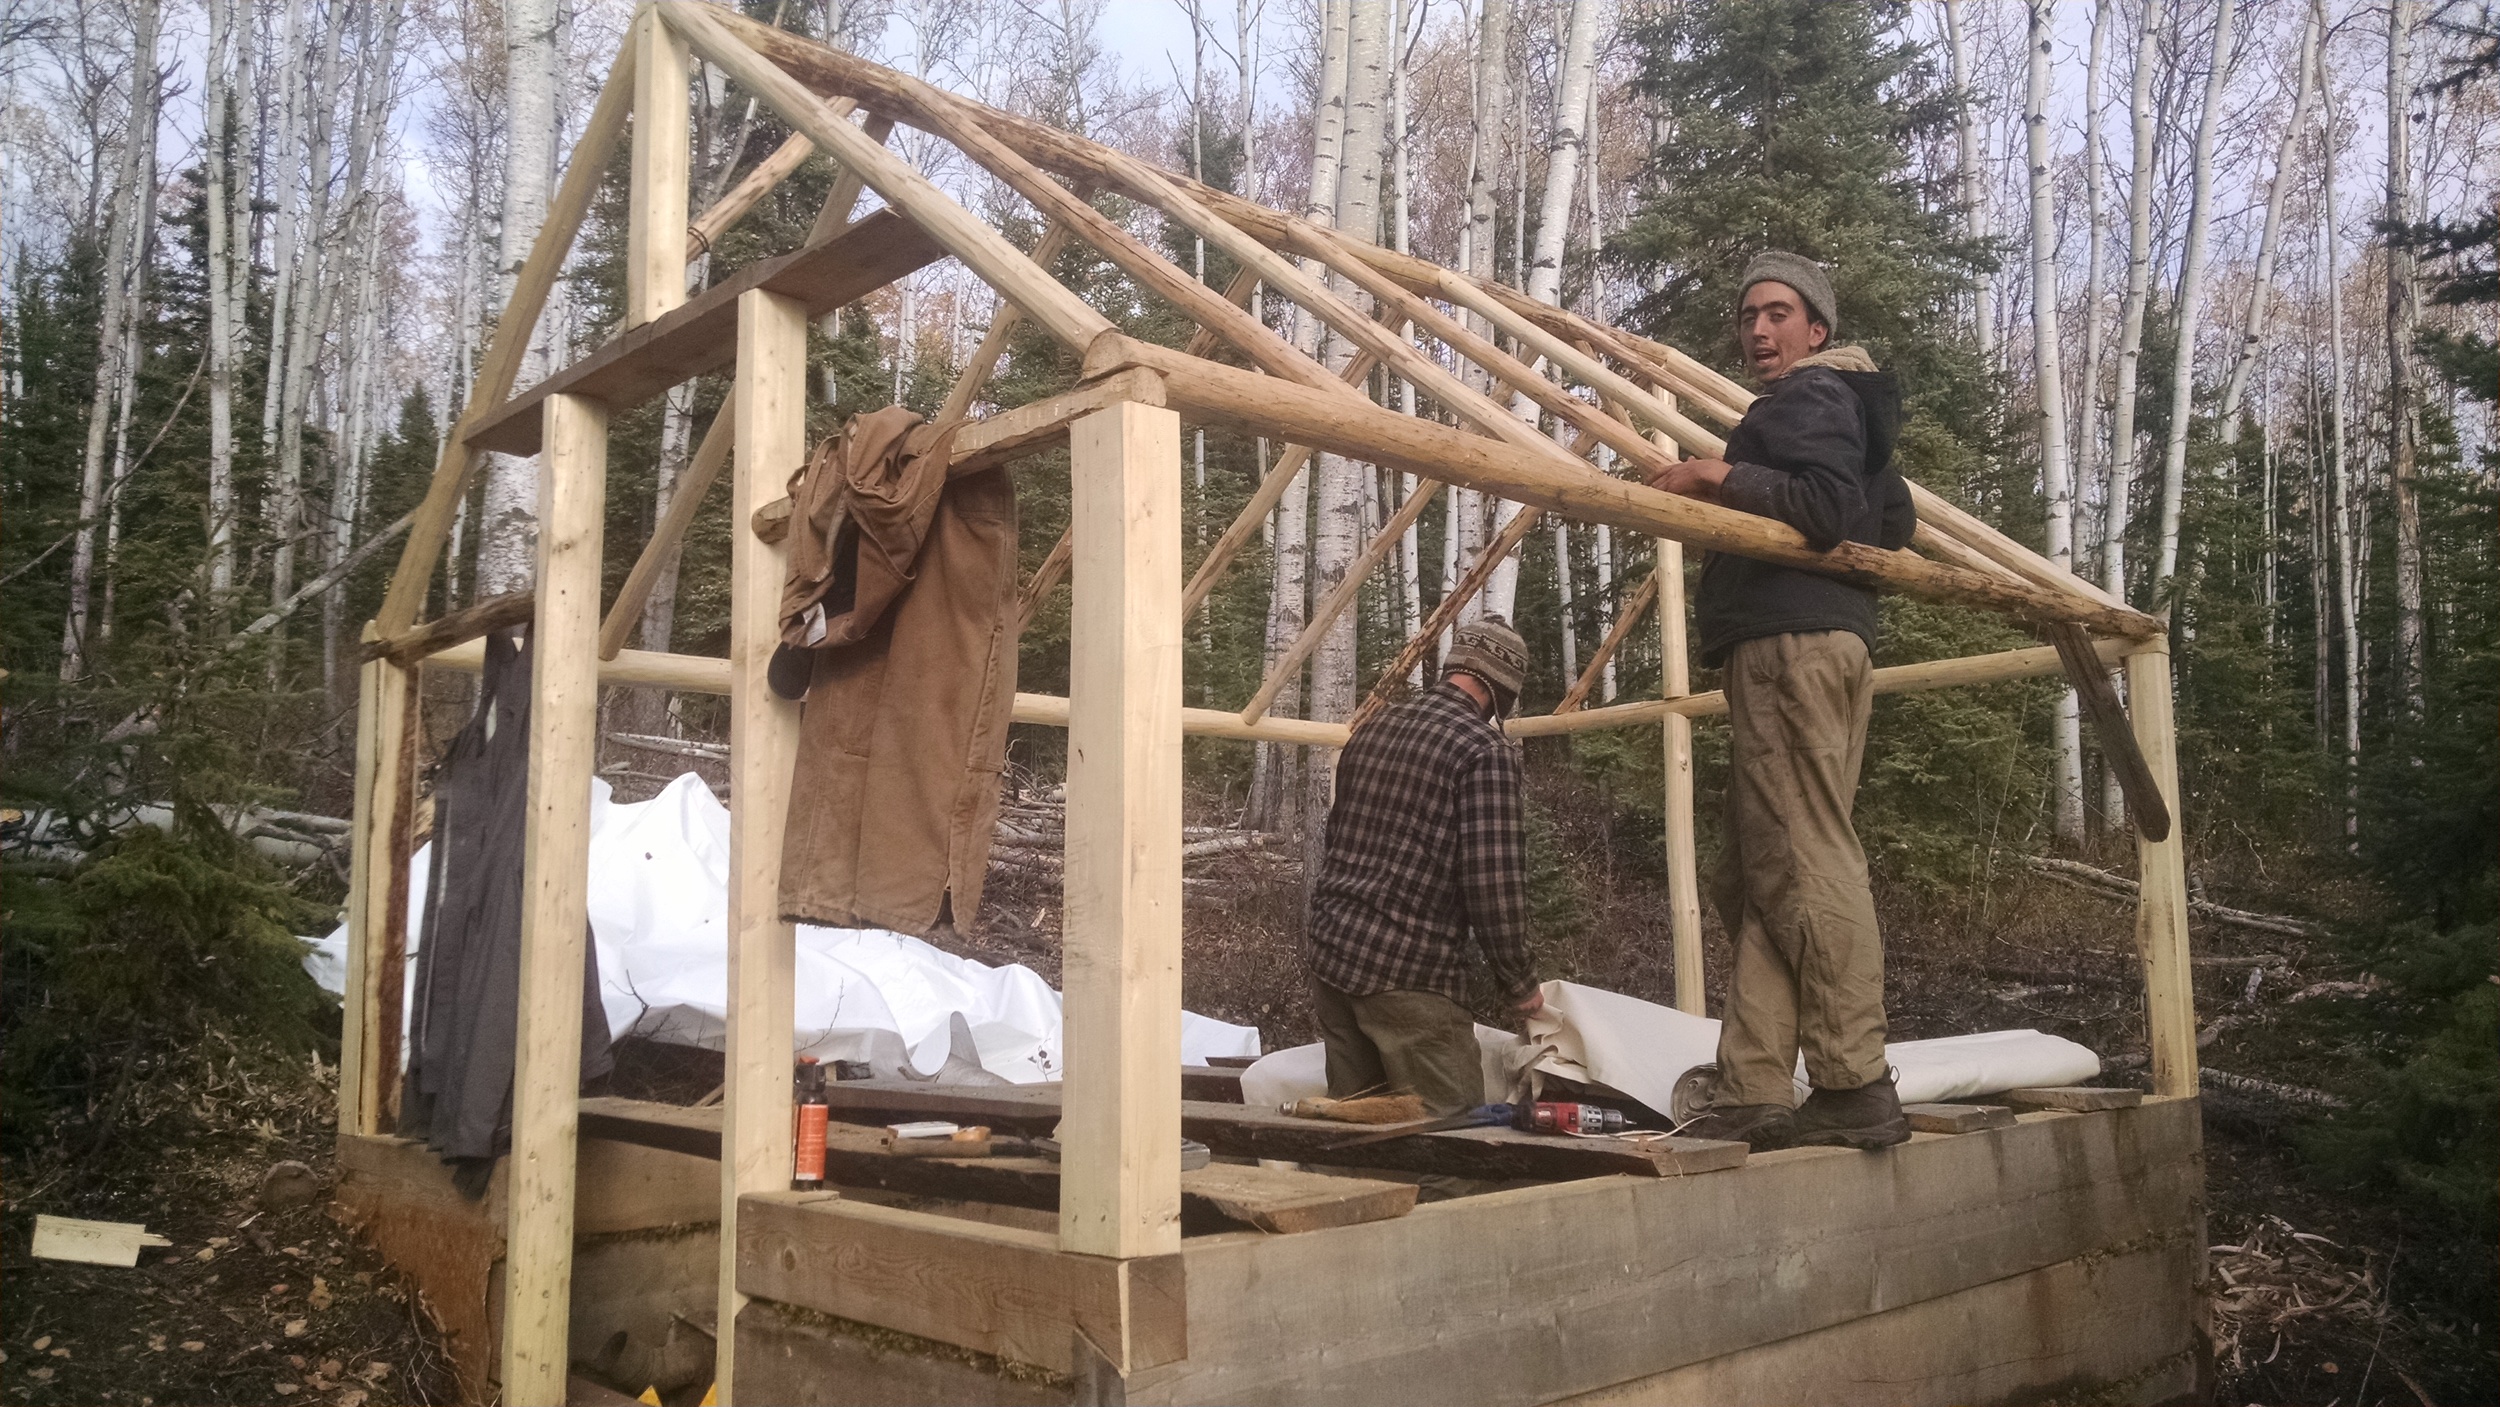
While Jenna was peeling, David got the big ridge pole (center) and purlins (sides) up. This was the last “big lift” for the gin pole. These 5 logs were the largest and heaviest and they had to get lifted up the highest. David was able to pull them up with the gin pole while Jenna controlled the other end of the log from the ground to prevent it from swinging. We screwed in blocks on the top log to help keep the log from swinging as well. Our friend John Manthei has excellent timing, he showed up just a we were preparing to lift the ridgepole, the heaviest log of the project, and he helped pull it up standing on the first floor while David was on the second, both of them pulling simultaneously. In case his spouse is reading this, John was NOT on the roof.

20190522_155515.jpg

We decided on a fairly shallow roof to (1) maximize head space on the second floor (2) support the dirt on the roof, and (3) be able to hang out on our roof! We don’t get a large amount of snow in Alaska’s interior so we didn’t need to do a super steep, slippery roof for snow to fall off of. We will likely have to shovel it some, but it is really fun being up there. We wanted a substantial overhang on the cabin to protect the logs and foundation from water and to be able to store things. We didn’t go in with specific sizes or angles in mind, we just worked with what we had. My favorite piece of advice we got came from John, I asked him “what do you think of the overhang, is it big enough?” and he replied “Jenna, its the overhang that you’ve got.”

20190724_165818.jpg

Step 3: Fitting the Poles

We used the gin pole to lift 2-4 roof poles at a time to the roof. David fit them together with an axe and chainsaw and timberlocked them into place. Many, many timberlocks.

20190724_162853.jpg
20190523_125140.jpg
20190724_162812.jpg

Step 4: Vapor Barriers and Foam and Vapor Barriers and Sprayfoam

We built the rest of the roof like a layer cake.

Spruce Poles, with sprayfoam over the walls to make a seal.

Brown paper to pad the vapor barrier.

Vapor barrier- 6 mil poly sheeting, 1 layer with seams taped.

Foam- We used 3 layers (6 inches total) of R-Tech foam insulation. We used contact cement to glue the layers together so they wouldn’t blow off the roof.

Pit Liner- we got heavy duty reinforced vinyl material designed to line ponds from Alaska Tent and Tarp. Its the same stuff we used on our original cabin out here and its holding up great.

Sod

20190910_164844.jpg
20190909_153239.jpg
20190916_195615.jpg

Step 5: Sod, the workout

When we dug out and leveled the cabin site, we saved a big pile of the sod, the top about 6 inches of the soil with most of the roots in it. We made the gin pole a new accessory, a plywood box and used it to lift loads of heavy sod onto the roof.

Once it was on the roof we put the sod into a sled and sledded it to its destination, then dumping the sled. We started with the perimeter to secure the final vapor barrier and keep it from blowing or moving. Then we concentrated on the area around the chimney to protect from sparks.

20191010_132748.jpg

Of all of the steps of the cabin, this was probably the most physically involved, Jenna nicknamed this step “crossfit” because it involved digging up sod, hauling sod to the box, lifting the box, climbing the ladder, transferring sod to sled, sledding then dumping. There was a lot of musical aid going on. We ended up covering most of the roof before the ground froze and finished the following spring. The roof held heat remarkably well its first winter which featured a healthy amount of -40 temperatures. By mid-summer, fireweed was blooming on the roof and it proved a great place for a picnic.

20191010_132149.jpg
20200817_213642 (1).jpg

Cabin #6: Gin Pole (Boom Derrick)

A Gin What?

The cabin that we drew out on graph paper was two full stories high. Building up rather than out allowed us to minimize the expensive parts (roof and foundation) and get more space out of shorter logs. Easy to dream up on paper, hard to imagine how, exactly, we were going to hoist logs up and build while 17 feet in the air. If we were building in town or on the road system, we could have rented a boom truck or crane to lift the logs. Our remote location meant that we had to think harder and dig into some older technology. David did some research and came across an old military drawing of a gin pole. Technically, a gin pole does not have a boom. Our “Gin Pole” is actually called a “Boom Derrick”, However, the term “Gin Pole” is widely used in our area to refer to these things, plus we really like Gin and it is one less syllable. Below is the drawing that we used to build our gin pole:

This is a drawing fromUS Army Rigging Manual - - or, "How to Lift Things (the low-tech way)" http://logbuilding.org/GinPoles.ch5.pdf

This is a drawing fromUS Army Rigging Manual - - or, "How to Lift Things (the low-tech way)" http://logbuilding.org/GinPoles.ch5.pdf

Building the Gin Pole

The gin pole is made with fairly primitive construction, using White Spruce poles, steel spikes, and rope. 2 pair of block and tackle (3x3) allowed us to lift and position logs vertically from the end of the boom as well as by horizontally by increasing and decreasing the angle of the boom. We had to wear grippy gloves to pull down on the lines, and while it did work, if the logs were any heavier we would have needed 4x4 blocks at least. Pictures below show the base of the boom where it attaches to the mast. The boom angle is adjustable by using the block and tackle that goes between the top of the mast and the top of the boom.

IMG_20171014_180413147.jpg
IMG_20171014_180351945.jpg

Securing a Gin Pole

Getting a gin pole to be vertical is quite the task. We used David (pole climber) and 4 ropes tied off to trees as high as possible to allow the boom to swing under the lines.

david up pole
IMG_20170918_175431215_HDR.jpg

Good Guy Lines

The above photo is of David climbing the gin pole to replace the guy lines (the original guy lines were nylon and they were too stretchy. We replaced them with 1/2" blue steel rope (6600 lb. tensile strength non-stretch). They have end loops with steel eye inserts spliced in which fit over a 5/8” rebar pin set in the top of the mast. this allows the mast to rotate 360 degrees while being supported by the 4 guy lines.

IMG_20171011_172820743.jpg

Using a Gin Pole

We started out by putting the gin pole at the bottom of the root cellar (photo above) and then moved it to the first floor, and finally outside of the cabin. We used it to lift basically every building material that we used: logs, poles, sod, tools, the scaffolding etc. David was fond of raising and lowering himself to the roof level using the gin pole and we found that it makes an excellent swing. The video below shows the basics in action.

Overall we were continually impressed with how versatile a tool the gin pole was for our cabin project. We made sure to stay out from under the things that were being lifted but never had any safety issues or injuries using it. The below photos show gin pole in the center of cabin (left) and outside of cabin (right).

jenna eowyn and cabin with gin pole
20190523_135023.jpg

Just for fun..

Here are some videos of non-building uses of a gin pole :)

Alaska Range Adventure 2019

20190131_152042.jpg

At least once a winter, David and I make an effort to go somewhere new with our dog team. These trips are a way to test out new areas for trips, to train our dogs in different conditions, and those are some excuses, it is mostly for fun. We spend a lot of time at our Tanana River home staring across about 40 miles of flats at the Alaska Range mountains. We have made several trips to explore our “big front yard” but this time we wanted to really get in there. I had been corresponding with a new pen pal, Bonni Burnell since the fall. Bonni and her husband Bruce have lived on the Upper Wood River for over 30 years and they have an intimate and impressive knowledge of the place. Bonni and I had a lot to talk about and we really wanted to get to see their place in person and we wanted to bring our dogs along. So in late January we loaded up our sled and hit the trail.

20190202_121425.jpg

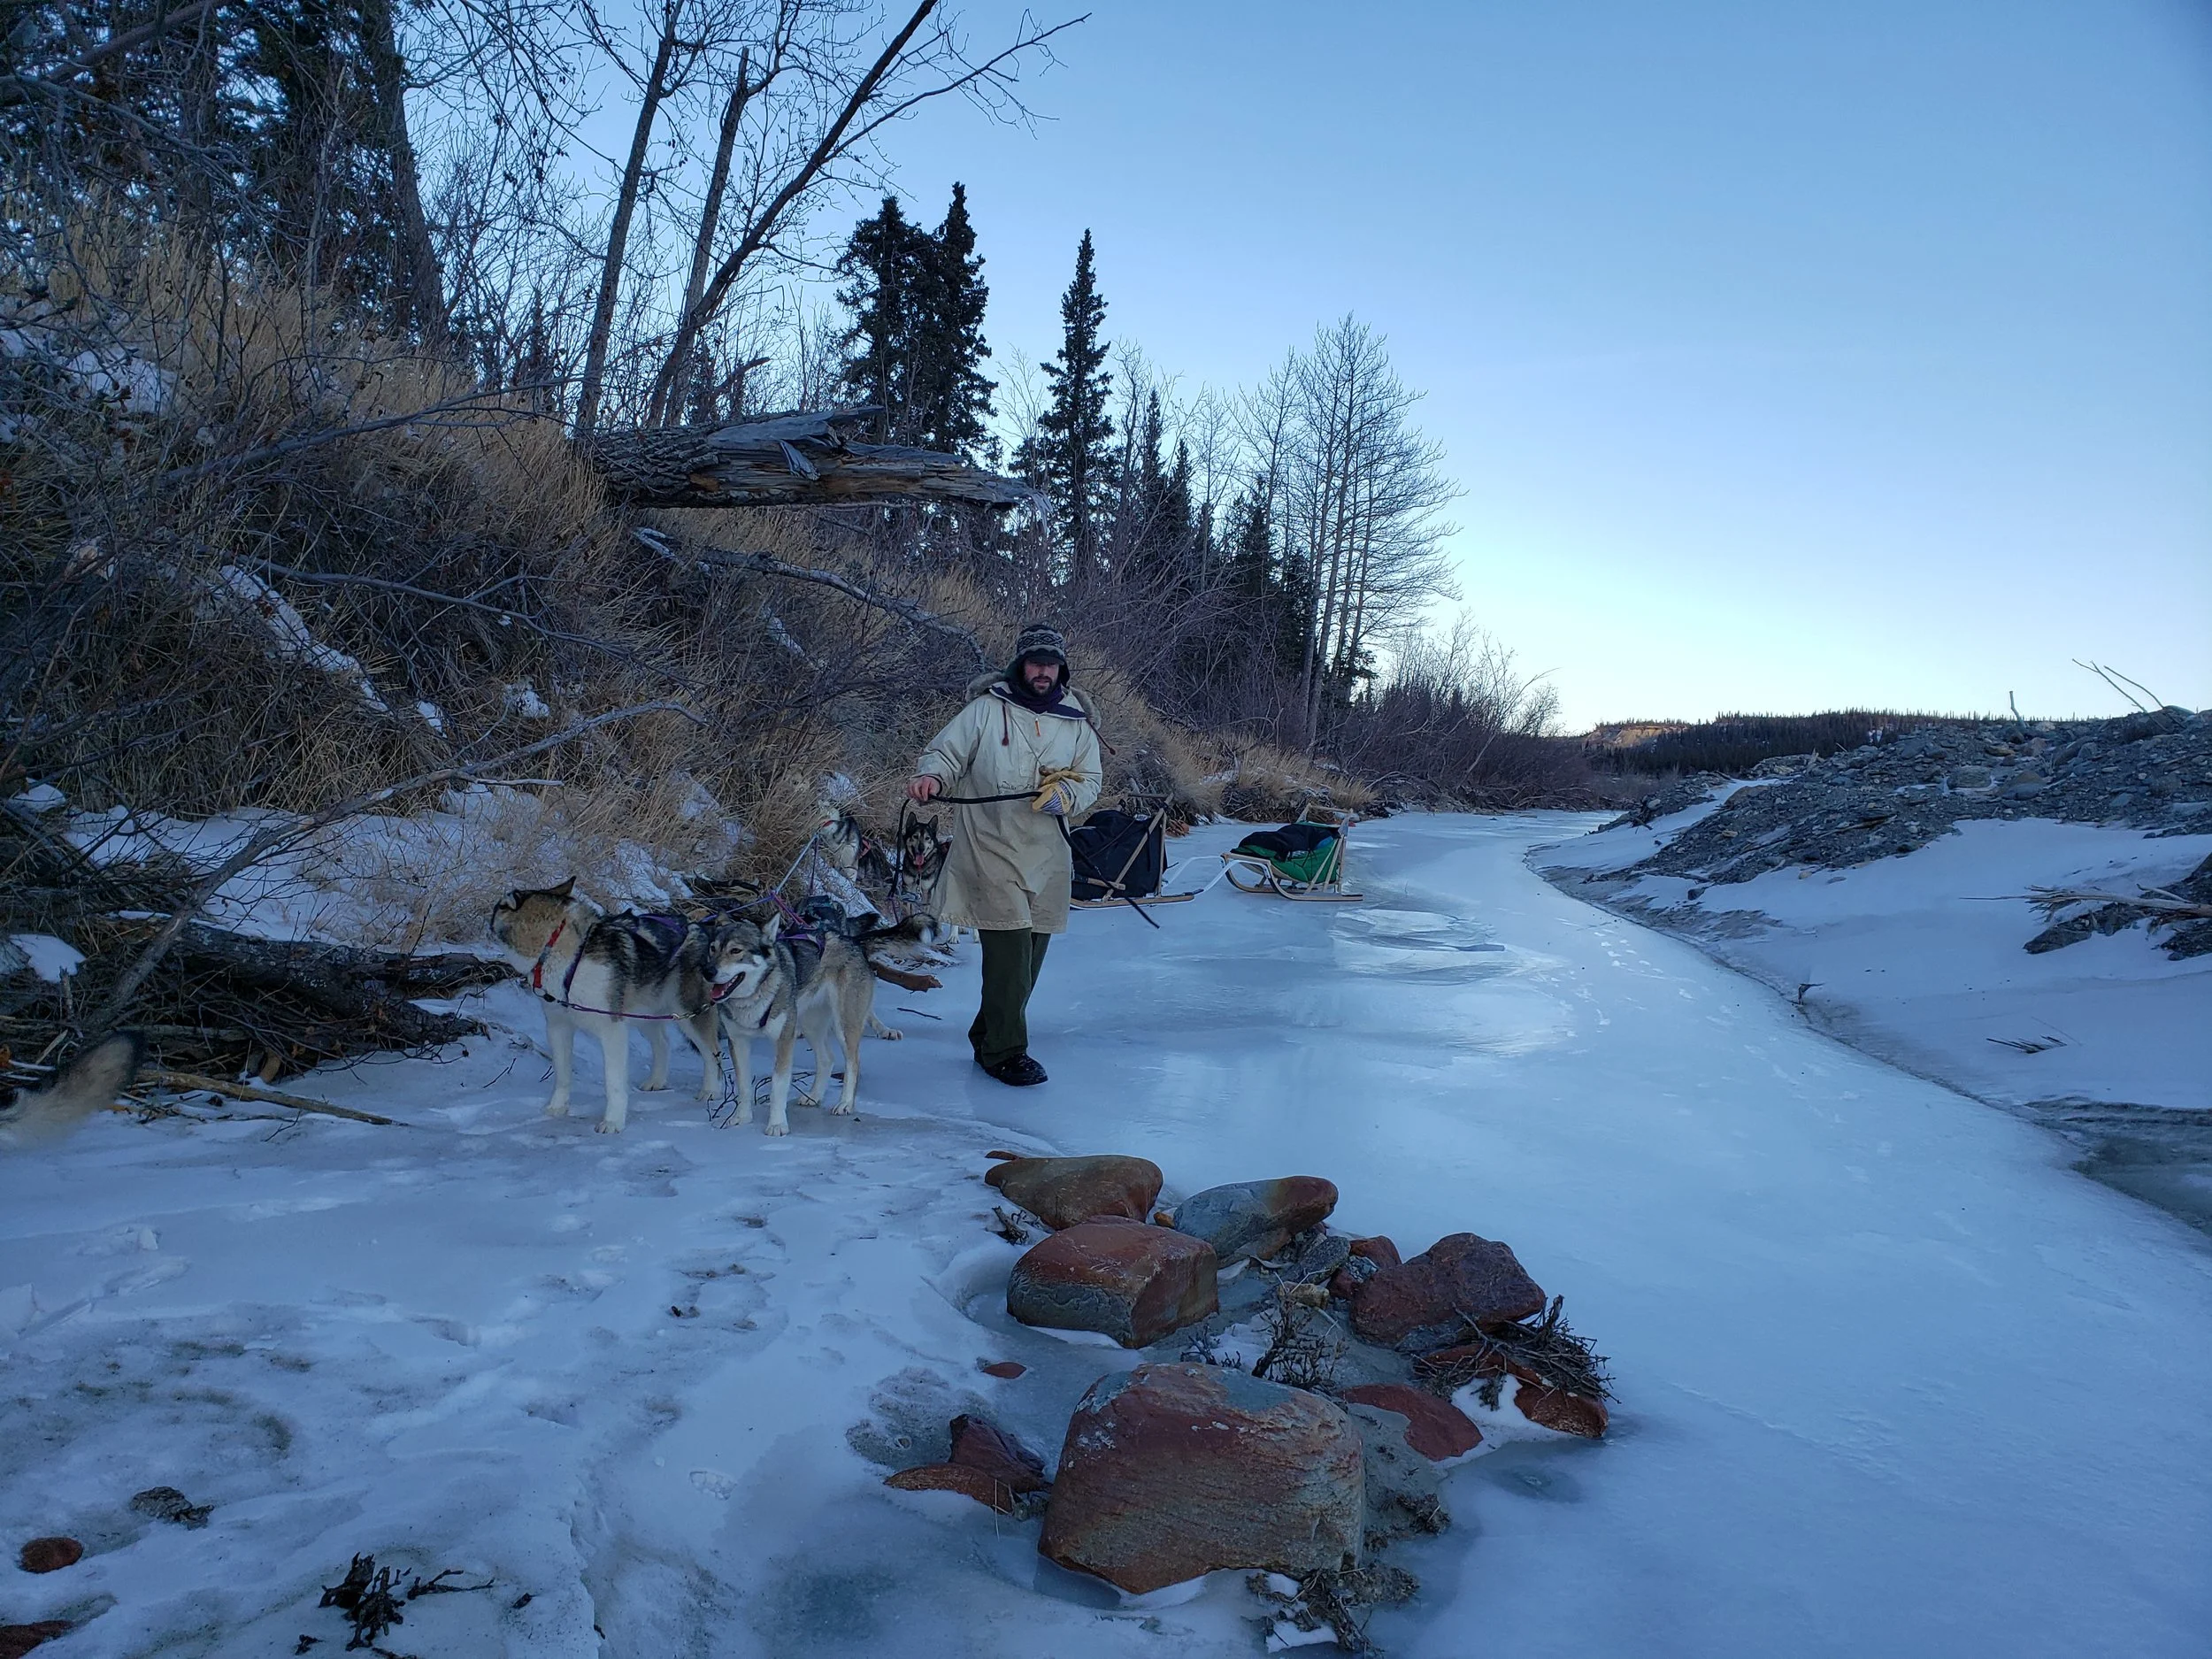
Conditions were, well, horrible. It was already one of the lowest snow years on record and unbeknownst to us, the route that looked so good on google earth was actually a documented chinook (“snow eater”) area of the Alaska Range where warm, dry winds blast mountain passes keeping them all but free of snow. The Wood River, which Bonni and Bruce usually use to access the larger and more reliable Rex trail to haul supplies in from town, was in unusually bad shape too. Huge stretches of the river were just gravel and open water, not ideal for really any sort of winter travel, much less hauling large loads by snowmachine. As a result, most of the people who generally travel the country (trappers, locals, recreationalists) were smart enough to lay off of it until more snow came around. We did not fit into that smart folks category. This was our first trip without our old guard of trusted lead dogs (Skookum, Minto, Tanana and Polar sat this one out at a friend’s house) and we wanted to know what kind of team we had and how they could work together in challenging conditions. Plus, when you work as guides you are always always always making safest, most conservative decisions for your guests. We wanted to make a few more adventurous ones with only our selves at stake.

20190127_151739.jpg

We left Fairbanks with 11 days of supplies and 7.5 dogs (Mukluk was 5 months old at the time so he mostly ran along loose). David had built a nice new freight sled for the trip but when we considered the snow levels, or lack thereof, we decided to give our trusty tag sled setup a go instead. That was a good thing, as by the end of the trip we got so accustomed to hitting rocks with our sled that it was almost fun rather than stressful.

We initially planned to leave from our home on the Tanana and mush up the Tatlanika River, as we had done in 2013, but as I mentioned the conditions were bad and we decided to take a faster approach. We parked at the base of the Rex Trail as we had in 2018 and mushed an easy initial 30 miles along the packed trail. The adventure began when we turned on an old trail that goes up a pass and allows you to access the upper Tatlanika. Here is where the trailbreaking began. There wasn’t much snow, so the dogs were able to run over frozen tussocks and navigate the pass pretty well. After our second night we dropped down onto the upper Tatlanika and got everyone re-aquainted with miles of glare ice.

Miles and miles of polished glare ice as we made our way up the Tatlanika River

Miles and miles of polished glare ice as we made our way up the Tatlanika River

We try to train all of our dogs to run confidently on glare ice, but its not an easy task. David and I realized the important piece of gear that we forgot to bring- ice cleats! It was about all we could do to stay upright on the ice, and our thighs and shins got the brunt of constantly balancing. Luckily, at this point one of our dogs pulled through. We have had Yawp for a long time and for a few years we ran him in lead next to Skookum, hoping to train him to lead. By himself, he isn’t much of a leader. He will shrink back and lacks the confidence so we have focused on training Eowyn and Bruce Lee to lead in the past few years. On a trip like this we tried about every possible configuration of our dog team. On a whim, I put Yawp up in lead with Eowyn he surprised the heck out of us. It turns out he DID learn some things from Skookum. He navigated the most challenging ice sections almost flawlessly. It was like he knew exactly where we wanted to go to weave around rocks, choose the safest places to cross ice bridges, everything. We were totally impressed at our unknown secret weapon.

Yawp (right) and Eowyn (left) in lead on the ice.

Yawp (right) and Eowyn (left) in lead on the ice.

As we got higher on the Tatlanika we approached an area that had been pretty heavily mined. We noticed because all of a sudden the river wasn’t behaving like a river. There were weird channels and huge piles of tailings. This part was especially hard to navigate, and David and I played lead dog quite a bit.

As we approached an area that had been heavily mined the river started making less sense. We got stuck a few times on this kind of stuff where the dogs wanted to run on land but the sled could not follow.

As we approached an area that had been heavily mined the river started making less sense. We got stuck a few times on this kind of stuff where the dogs wanted to run on land but the sled could not follow.

We then hung a left onto Moose Creek. One of the many many Moose Creeks in Alaska, this creek was the part of the trip where we decided that we were NOT going to be making a loop. It was one thing to go up the steep, sloping, punchy ice, but it would have been pretty nasty to retrace our steps and go back down. Thus we entered the stage in our trips where we started saying “gotta find something better than this” and gradually lowering our standards for trail conditions as we raised our estimation of what our dog team was capable of.

The river ice was not without its hazards, mostly I held on when chasms like this one approached but I managed to get some pictures of this sloping, hole-laden ice.

The river ice was not without its hazards, mostly I held on when chasms like this one approached but I managed to get some pictures of this sloping, hole-laden ice.

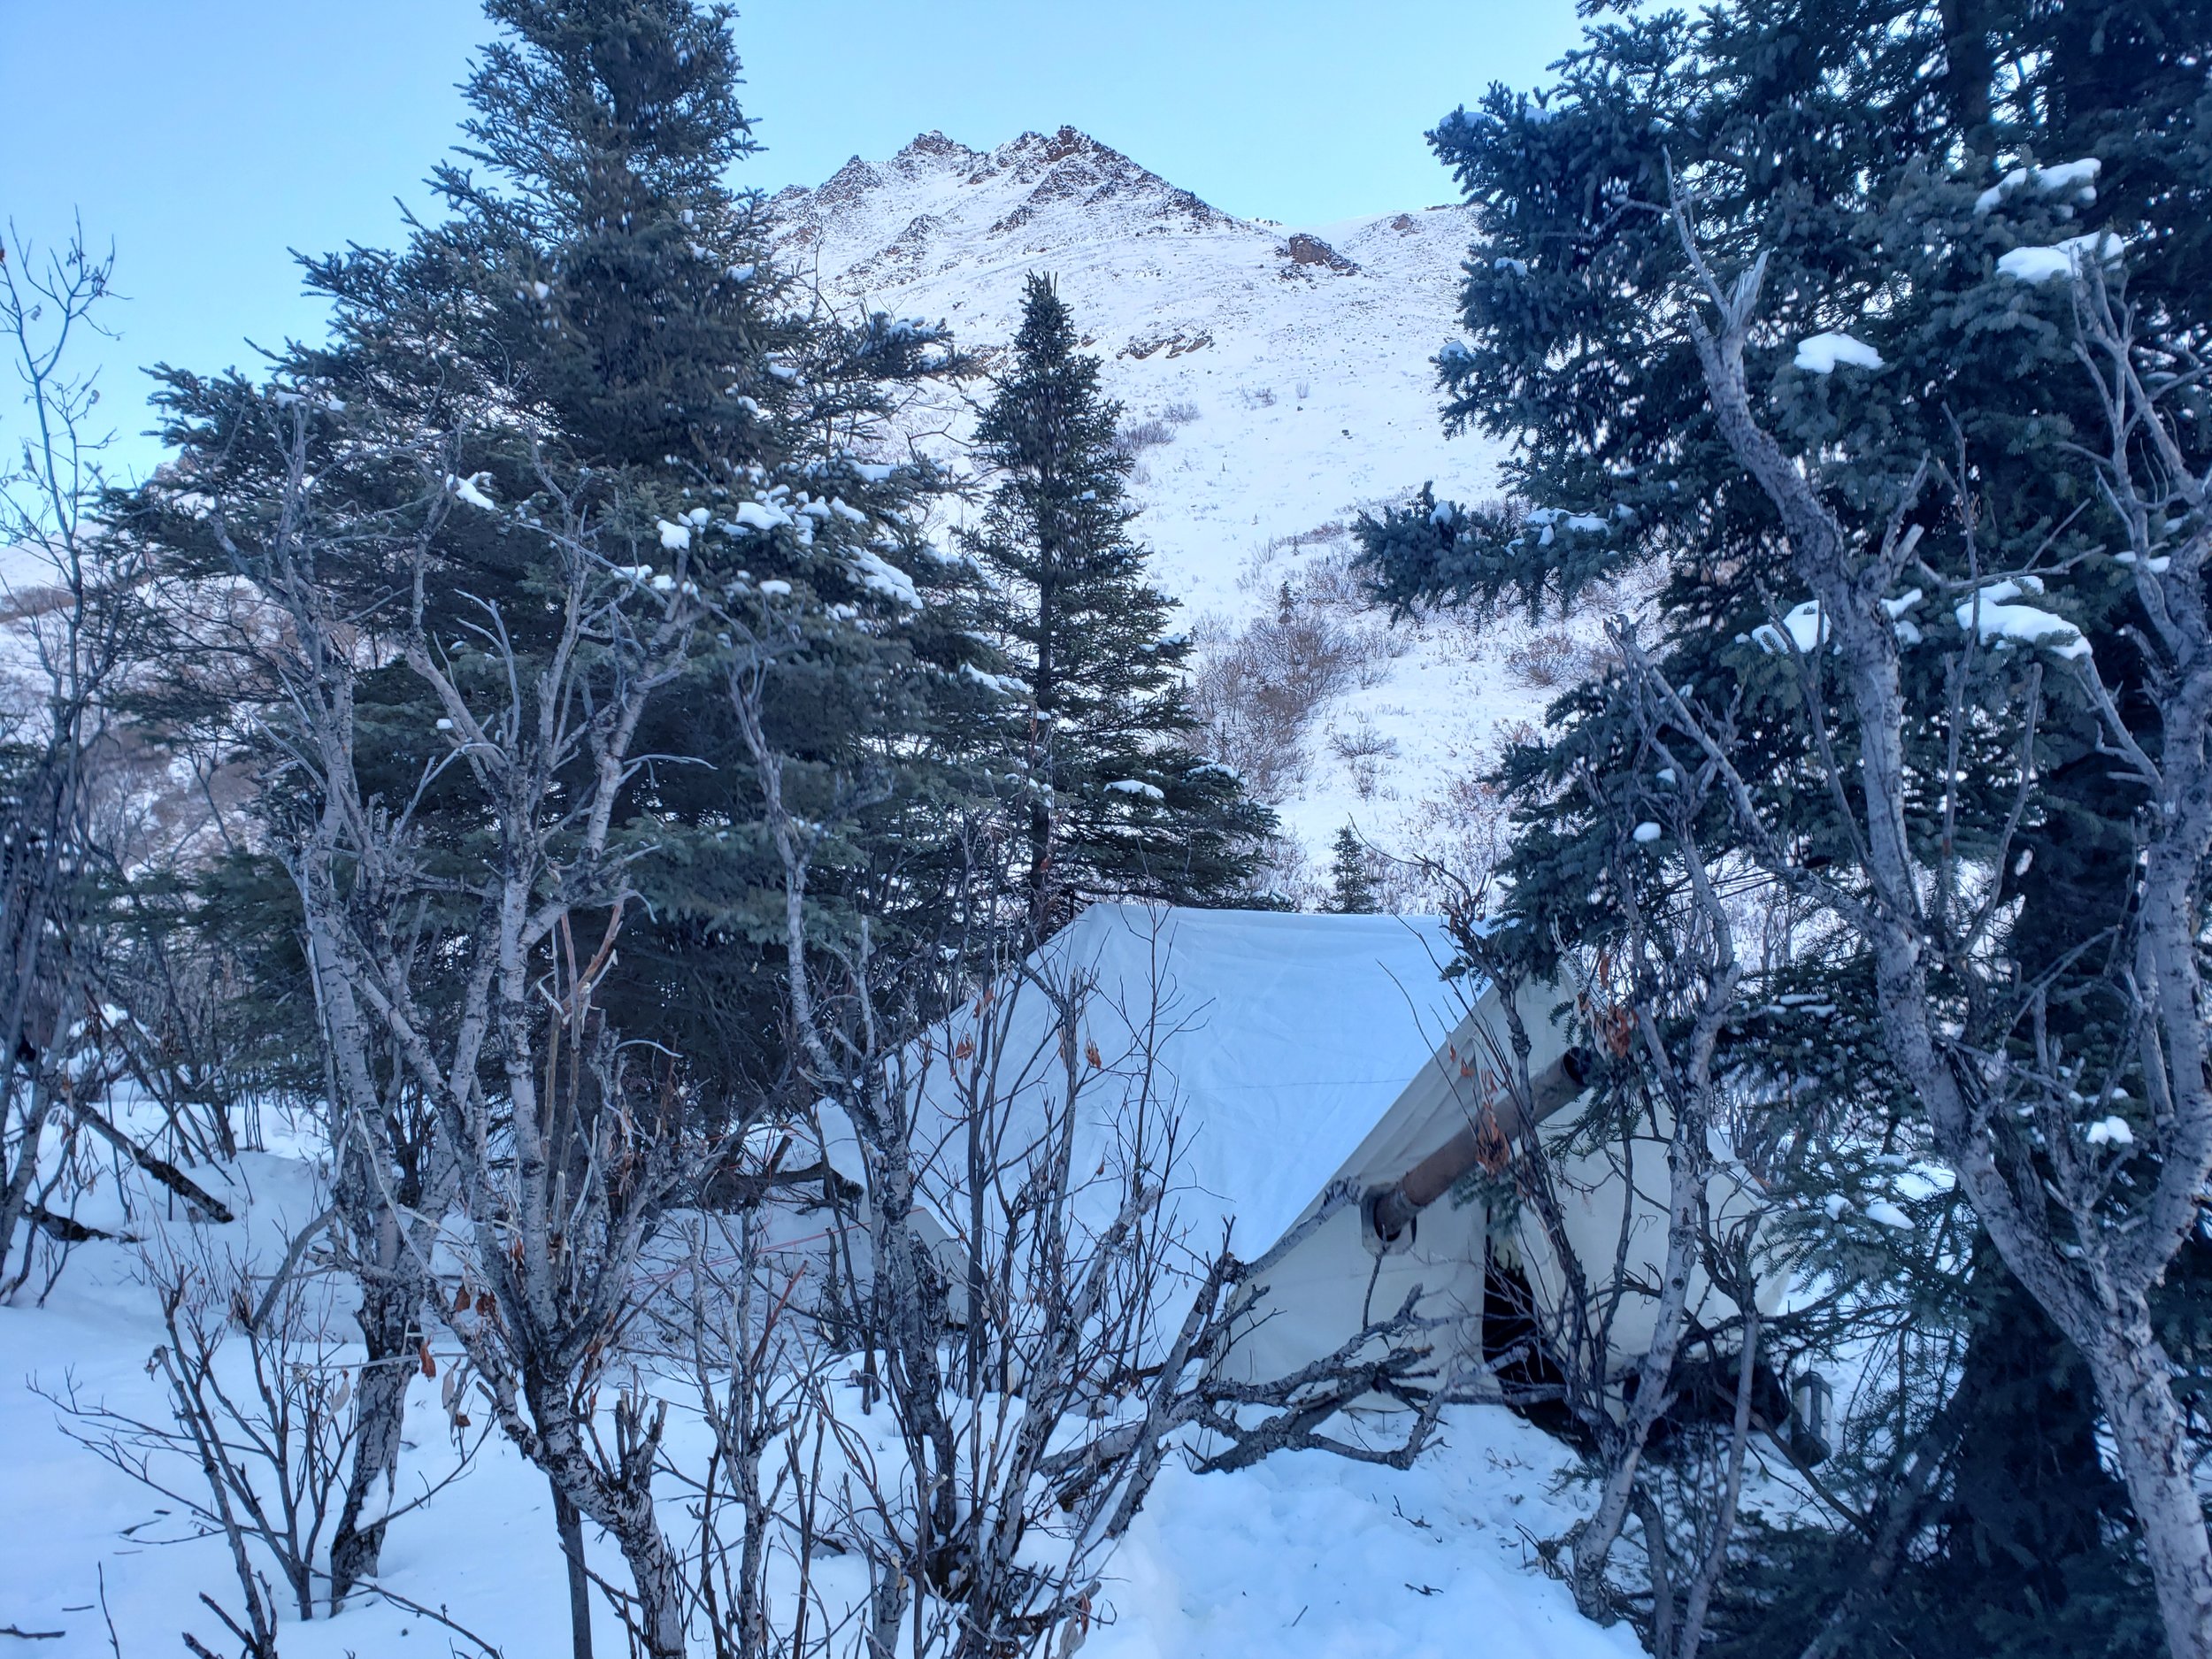
Our journey on Moose Creek ended rather abruptly. We ran out of water. Ahead of us was gravel, gravel, and more gravel. We decided to stop for the night and camp on a protected bench above the river. Once we got the dogs settled in, David and I snowshoed farther up the hillside to try to see where our creek had gone. We found a big tussocky tundra hillside that seemed passable. It was the first of our many plan B’s. The next morning we hauled our gear up the steep hillside and re-packed the sled for an overland lug.

The dogs prepare to pull a mostly empty sled up the steep hill.

The dogs prepare to pull a mostly empty sled up the steep hill.

We hooked the dogs in single-file to make the trail breaking easier on them. One of us walked ahead on snowshoes choosing the trail and away we went. As we headed toward the distant pass we noticed the snow beginning to thin.

20190127_110158.jpg

We zig-zagged up the valley and eventually climbed about 6 miles up to a broad pass. The higher we got, the less snow we had. It was a windy, warm day and the colors were AMAZING. We saw small bands of caribou as we climbed, they were taking advantage of the lack of snow to get to their winter food.

20190127_151705.jpg

This was the most physically challenging part of the trip. We had a very full sled and progress was slow. Most of the time David put himself in harness up front and pulled while Jenna pushed the back sled. We kept getting stuck on tussocks and it was about all we could do to move forward. Lots of breaks to rest and pet dogs. Our dogs were remarkably game for this, they didn’t once try to turn around, they just kept going. I guess wanting to see what is on “the other side” is a thing for dogs as well as people.

20190127_151732.jpg

The trek was worth the effort, the pass was probably the most beautiful place I have ever seen. The lack of snow made every color pop and there were small lakes and a distant glacier at this pass from which 3 creeks share as headwaters.

20190127_152540.jpg
20190127_152938.jpg

You can tell how much we were working by the lack of clothing in this picture- most of the hike up I wore a single layer and baseball cap despite strong winds.

20190127_153110.jpg

As you might imagine, all of this was quite an adventure for little Mukluk, who took it in stride. He ran loose along the team except for in places with scary ice, we hooked him in for that. He is a natural sled dog and was good at conserving his energy by napping on exposed dry grass beds. He was also a very good tent puppy, if a little sneaky. He acted like a big dog who didn’t want to sleep in our sleeping bag, but each night he would settle down by our heads and gradually slither his way into the bag as the night progressed, one morning he was all the way at our toes.

20190127_153016.jpg
20190128_082201.jpg

From the headwater pass we started down Mystic Creek. We thought the hard part of the trip was over but we had no idea. The creek was really spectacular, I wish I had taken more pictures but it was about all I could do to stay vertical on the slippery, sloped, and now DOWNHILL ice. We unhooked the tug lines from most of the dogs and I ran in front of the lead dogs winding a path along the ice that avoided some of the many rocks. David was able to use the carbide tipped sled break to keep the whole team at a slow pace for this new chapter of river. We camped at the first spruce trees we found and woke up to wolves howling. Our dogs responded but their song was mangy and amateur compared to the grace of the wolves. As we were breaking camp the chorus continued as the curious wolves approached. It was quite the sendoff.

Bonni and Bruce had warned us about a spot on Mystic Creek that they called “the waterfall”. As we made our way down we encountered a few things that we thought “was that a waterfall?” When we arrived at a 4 foot drop with boulders on both sides we figured had found it. We tied the dogs to some willow on the side of the creek and David went down to clear some trees out of our precarious path. Again, safety was the focus rather than photography, but you can see the beginnings of the approach in the photo below, the main drop is between those two rocks. As David was swinging away we heard an unfamiliar sound- a snowmachine! We had sent Bonni a message with our inreach the night before and here was Bruce, with a chainsaw and a snowmachine to help clear the rest of the way. I believe his introductory words to us were “Well isn’t that a &W#$#?” It was. We were really grateful for his help and the dogs were overjoyed to have a trail to follow. It was a perfect meeting point, he would not have been able to get up the waterfall on his machine and we would have had a lot more chopping if he hadn’t showed up just then.

20190128_121450.jpg

We followed Bruce down the rest of Mystic Creek and across a much more challenging than expected Wood River. They had a trail that ran along the river and it was easy going through the forest right into Bonni and Bruce’s little slice of heaven which included a warmed up guest cabin and water for our dogs. After wall tent camping cabins always feel huge, and just as we arrived, it started to snow for the first time in a long time. Perfect weather for a visit.

We spent the next 2 days talking, eating, talking, eating, Jenna even took a SHOWER (first in months). Bonni and Bruce really have comfortable bush living figured out. We took lots of notes and shared stories. I won’t post pictures of their beautiful home to protect their privacy but if you are in the area, they are the most wonderful folks.

Bruce, David, Jenna by a packed sled on the day that we headed out.

Bruce, David, Jenna by a packed sled on the day that we headed out.

While at Bonni and Bruce’s we took advantage of their knowledge and maps and charted a new route out of there. The Wood River, our former plan, was in nasty shape still so we decided to continue up the Wood and take Quartz Creek up and over to Dean Creek, crossing over the the Yanert River valley. This route would dump us off a ways from our truck, but in very close range to Jenna’s favorite restaurant, 229 Parks. We figured David could hitch a ride back to the truck and Jenna could order food. So we headed up the Wood and as we were told, we found snow there!

20190130_115031.jpg

Thanks to our very good instructions, we were able to find a horse trail used in the summer and used it to connect onto Quartz Creek. Now our problem switched from not enough snow to too much. You can’t always get what you want. Out came the snowoshoes and up we went.

20190131_101137.jpg

We camped in the last patch of willows on the way up and the next morning started another trip up and over a mountain pass. The temperatures dropped and we kept expecting to eventually find a trail, but again, no one had been silly enough to get out in these conditions yet. Except for the moose. We saw 9 moose way up in the alpine. We were able to use stretches of their trail. The going was again slow and we had to break trail for the dogs with snowshoes. We developed 2 lead dog teams: Yawp and Eowyn were more experienced and had good judgment for non-trails and ice. Bruce Lee and Kathul were all energy and they were the “big guns” that we put up there when we needed to power up a mountain pass. Check out the photo of Kathul below, leaping her way up the mountain and loving it.

Bruce Lee and Kathul serve as a badass trail breaking lead team. Either that or they want to play with mukluk (ears).

Bruce Lee and Kathul serve as a badass trail breaking lead team. Either that or they want to play with mukluk (ears).

Up up up and over. The views were spectacular, but mostly we were excited for some hard-packed downhill and the sight of more trees for our wall tent.

Breaking trail up the pass with snowshoes

Breaking trail up the pass with snowshoes

We set up camp on Dean Creek in a beautiful patch of spruce and the dogs enjoyed bushy spuce bough beds.

20190201_111205.jpg
20190201_120605.jpg

The next day we continued to hopscotch our way down Dean Creek, using Moose trails (below) but mostly just breaking trail. At David’s suggestion we followed one moose trail way up the side of a bluff and had quite a wild time coming back down.

20190201_123301.jpg

When we thought that it couldn’t get more challenging, Dean Creek reminded us that it could. We middle and lower sections of the creek were full of chasms and unstable ice covered in snow. We basically could not run on the river and ended up cutting trails through the woods for large sections of it. At the end of a day of doing this we camped in a state of exhaustion. The next morning David went to cut new trail while I packed up camp and he came back with “bad news and good news”. Good: he had cut a trail, Bad: there was a snowmacine trail in sight of our camp.

20190202_120620.jpg

We enjoyed the rest of the trip out on established trails on the Yanert River. Compared to what we had been doing, this was almost a boring way to end the trip. We had to put on a lot more clothing because we weren’t constantly running. The closer we got the the Parks highway the more confusing the trail became. We took out Jenna’s phone and used a combination of google maps and guesswork to navigate the trail network and ended up popping out on the highway just a half mile from 229 Parks, our new destination. As it would happen, we had to break trail that last section along the highway, but we were able to picket our dogs out at a gourmet restaurant rather than a patch of spruce forest at the end of this final day. Jenna stayed with the dogs (and the wine) while David hitchhiked and just plain hiked back to our truck. We enjoyed a very fresh and delicious gourmet meal before heading back to Fairbanks that night with irrepressible smiles stretching out our faces.

20190202_202546.jpg

DIY dog house

We've got what we think is a really great design for a dog house and it being the holiday season and all, it seems like a good time to share it!

These dog houses work for us because:

  • It's a material-efficient design, just one piece of plywood with very little wasted pieces.

  • They're durable and long-lasting.

  • They're pretty big, we have big dogs but even the small ones seem to like a little extra room in their house.

  • They're pretty inexpensive to make.

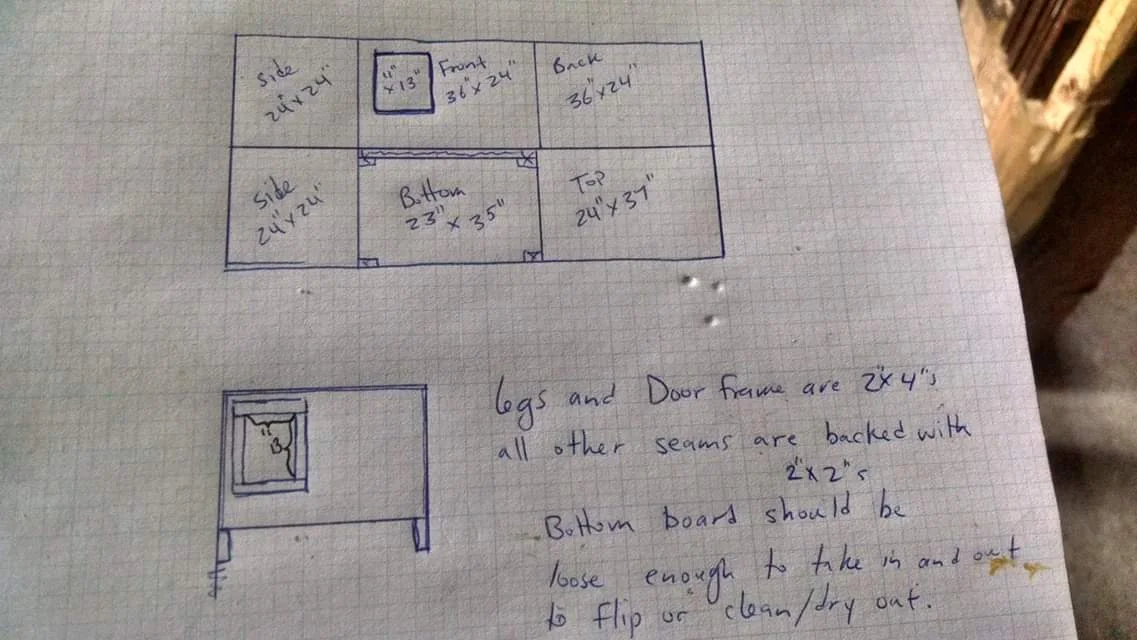
Here is the basic blueprint:

Dog house plans

Materials:

Plywood

  • 1 piece 1/2"

Legs (2x4s)

Drill a
  • 4 pieces 30"

Door frame (2x4s)

  • 1 piece 14",

  • 1 piece 10.5",

  • 2 pieces14.5"

Lining (2x2s)

  • 4 pieces 28"

  • 4 pieces 14"

Screws:

  • 8 x 3'“ screws for door frame

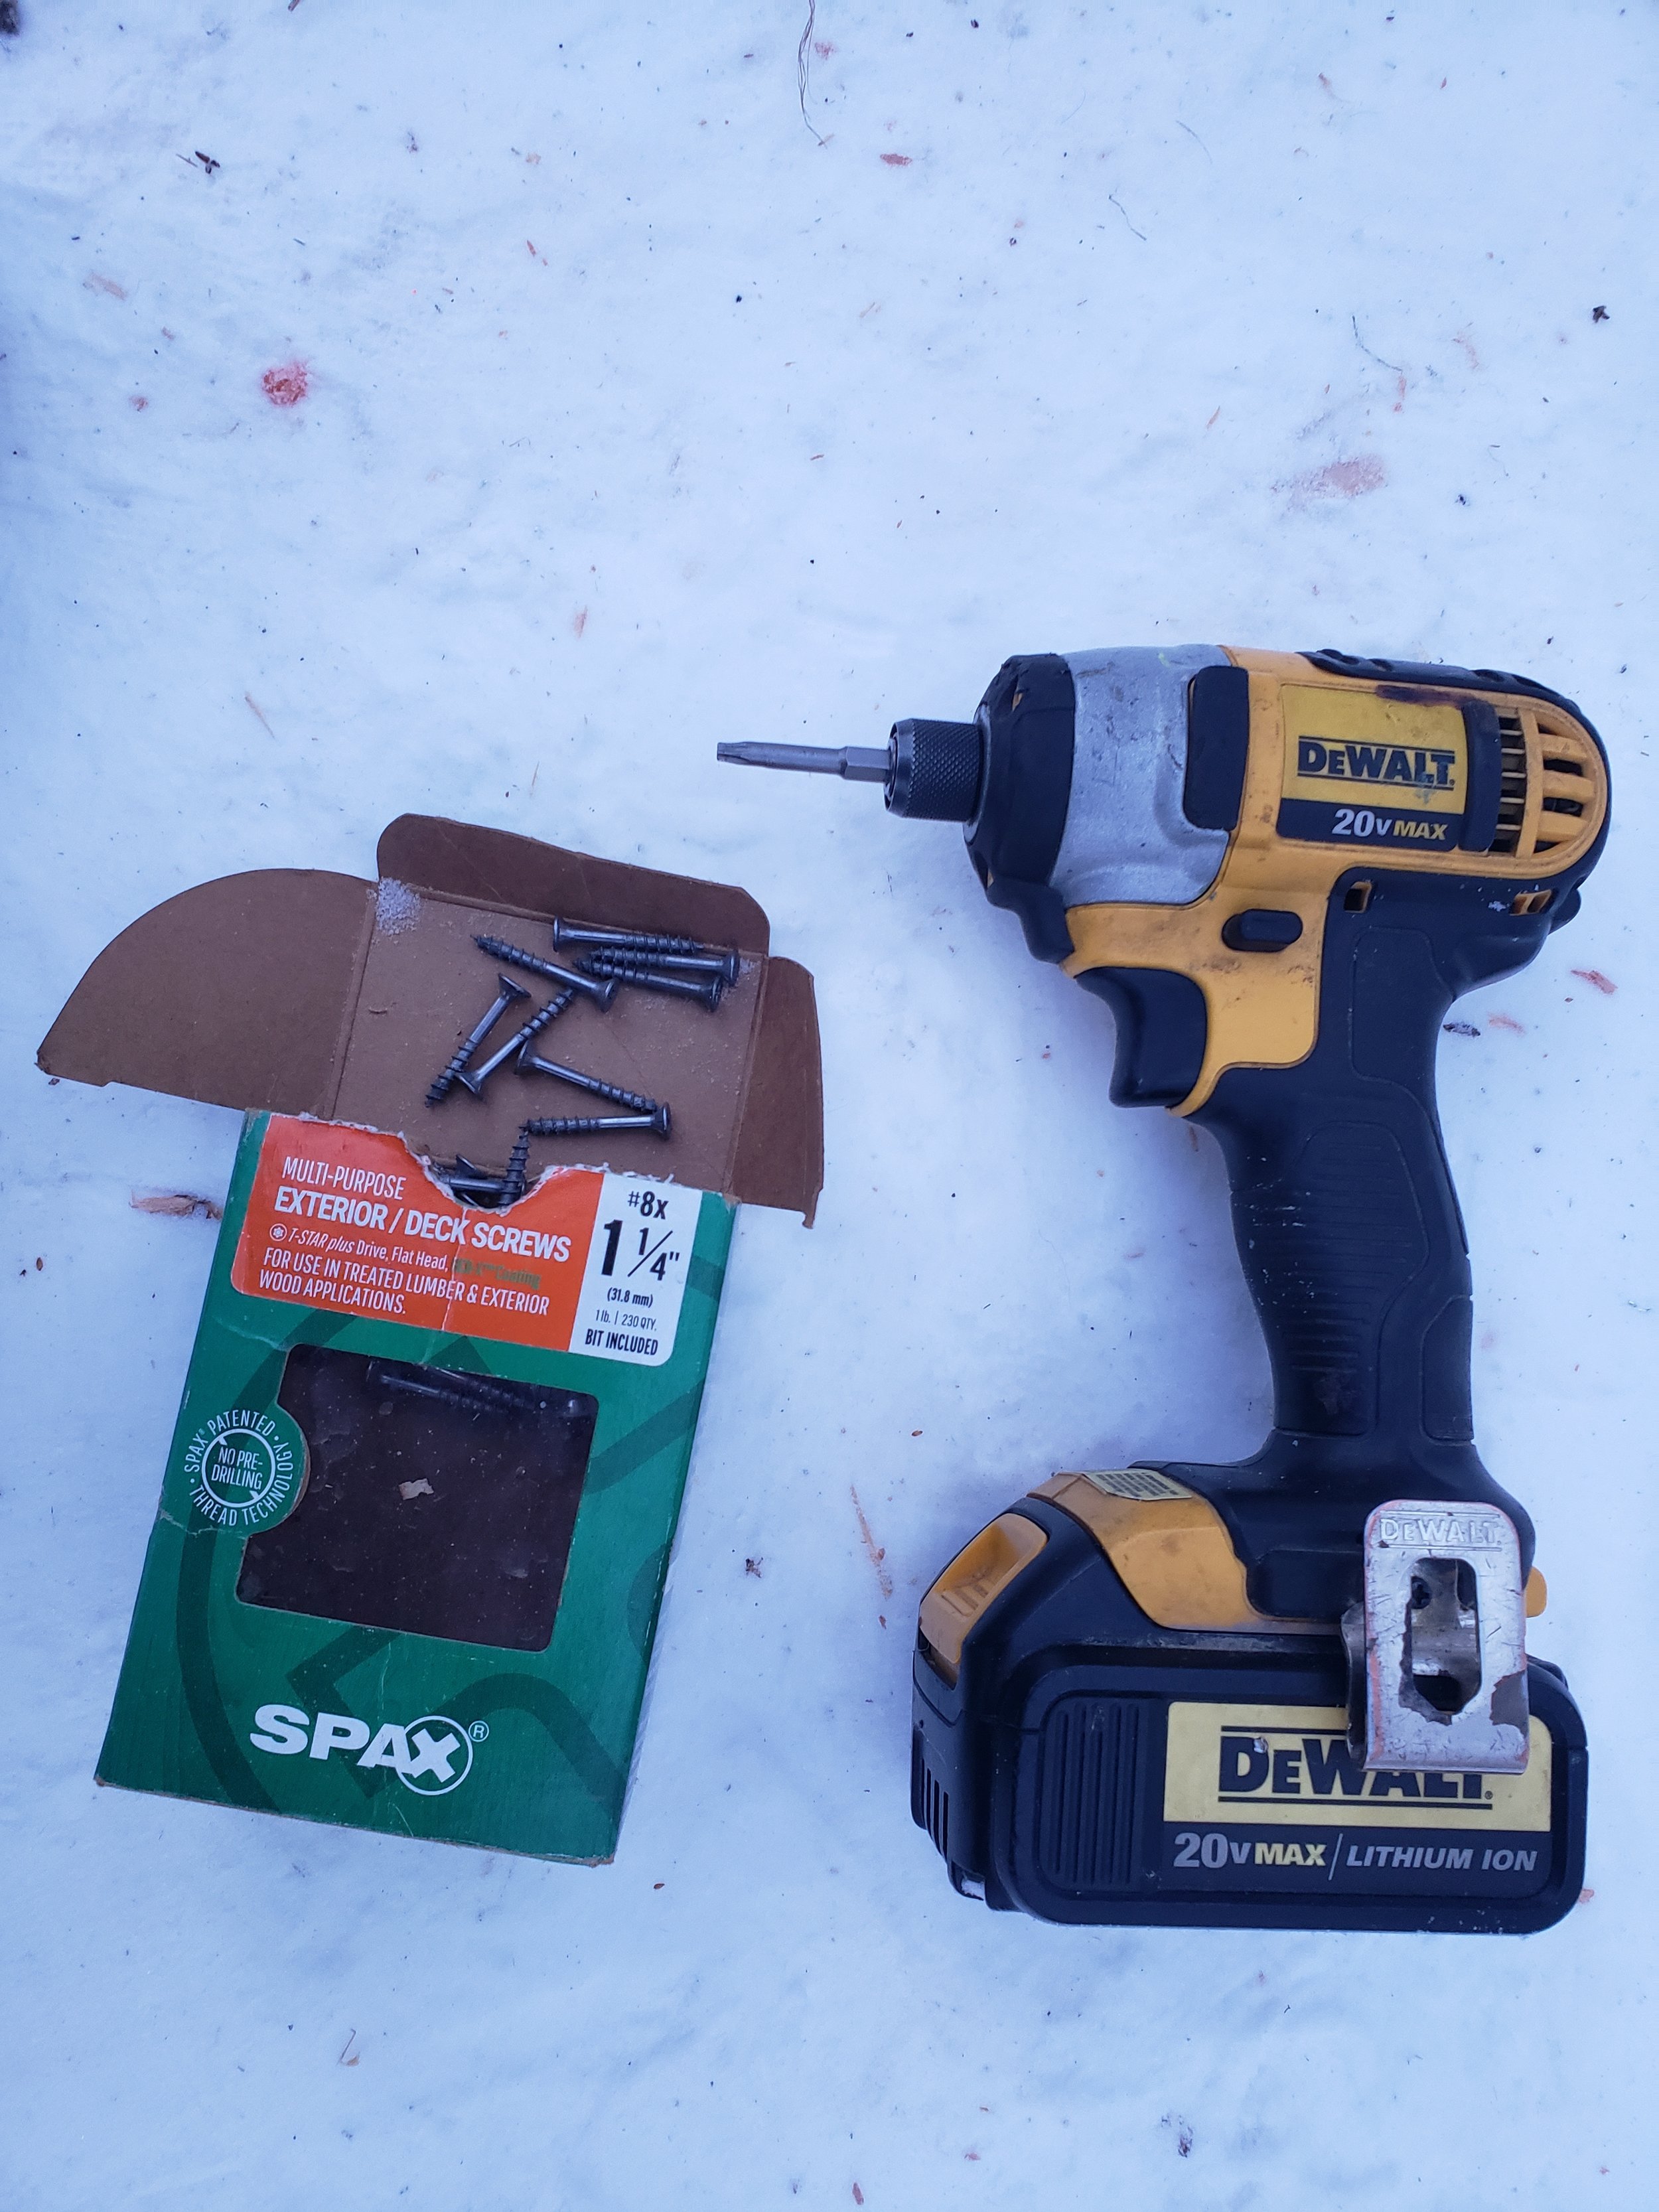
  • Box of 1 1/4” exterior deck screws

Tools:

  • Saw

  • Impact driver

  • Measuring Tape

  • Pencil

Pretty simple!

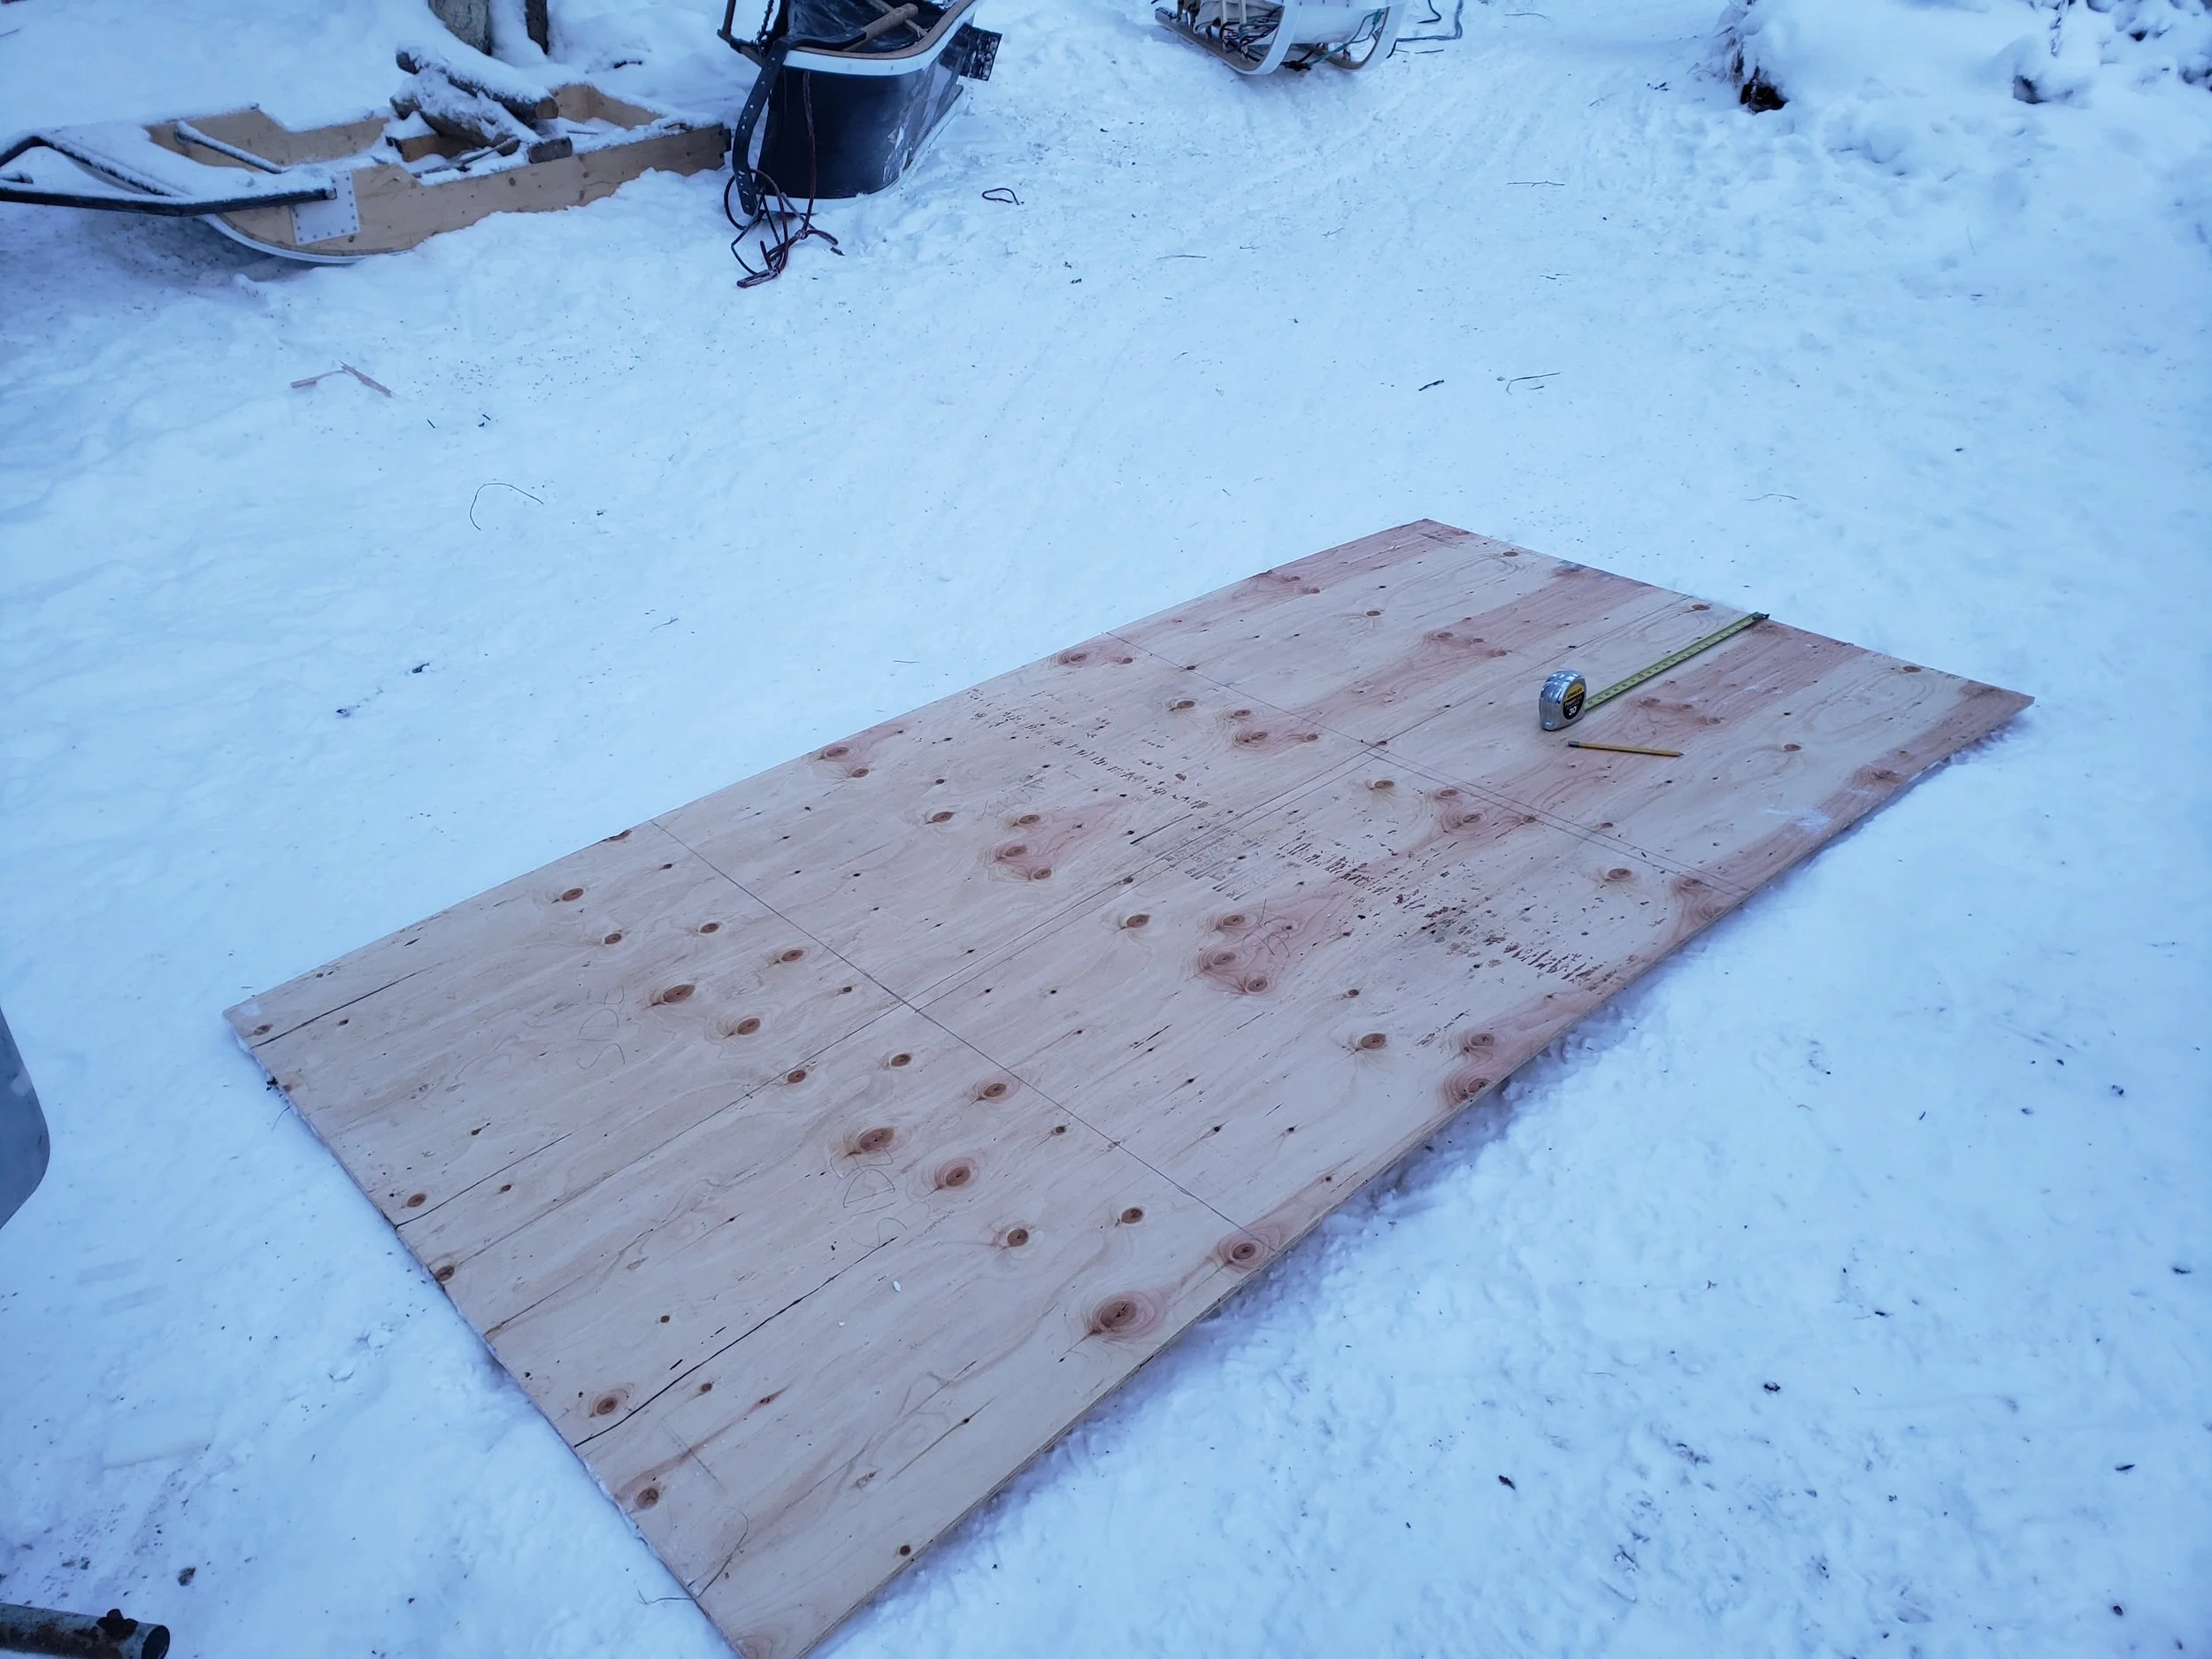
Step 1: Draw out your lines and cut the plywood. We have a portable table saw, so we used that. I’ve also done it with a skill saw.

Plywood
Cutting plywood

Step 2: Cut your 2 x 4s and 2 x 2s to length. We just cut a 2 x 4 in half to make 2 x 2s. Lay out all of the pieces, they should look like this:

Pieces cut out

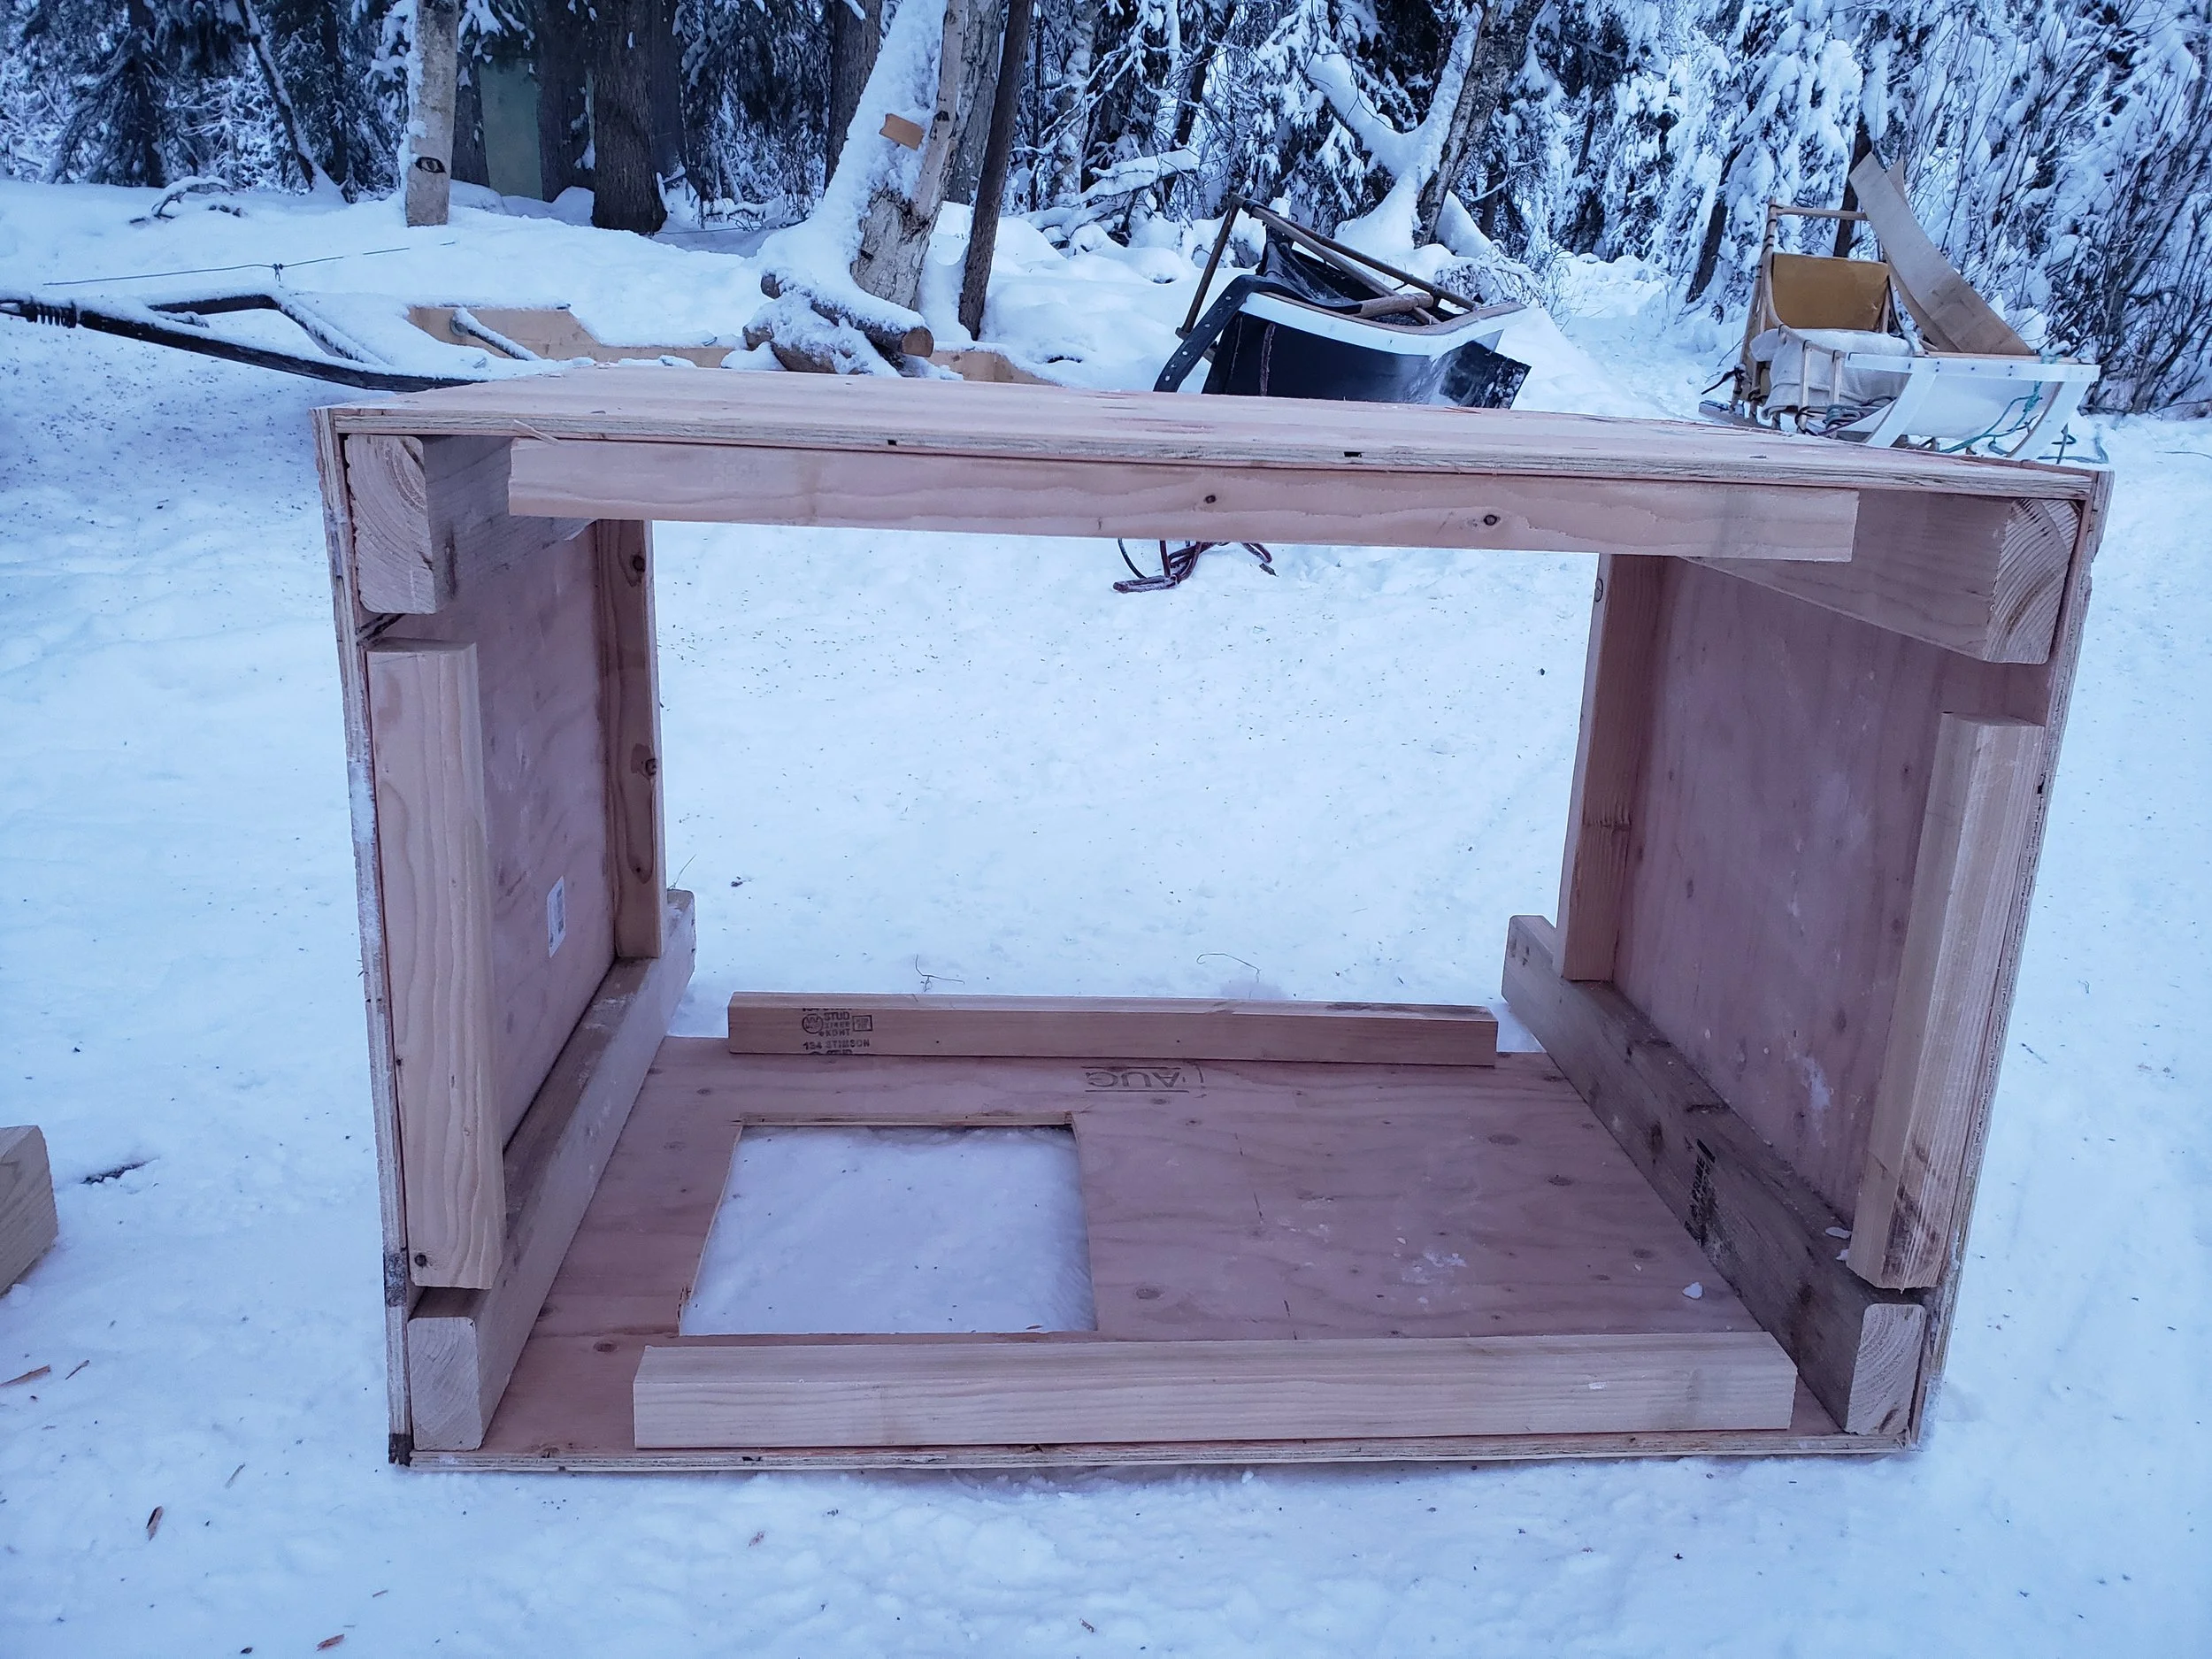
Step 3: Start screwing it together. I start with the legs to form the basic shape and then put the interior pieces in (see below). The top is the last thing to get screwed in, make sure that it covers the endgrain of the pieces below it. The bottom is a loose piece that should fit in (but not easily). This makes the house easy to clean.

Insides

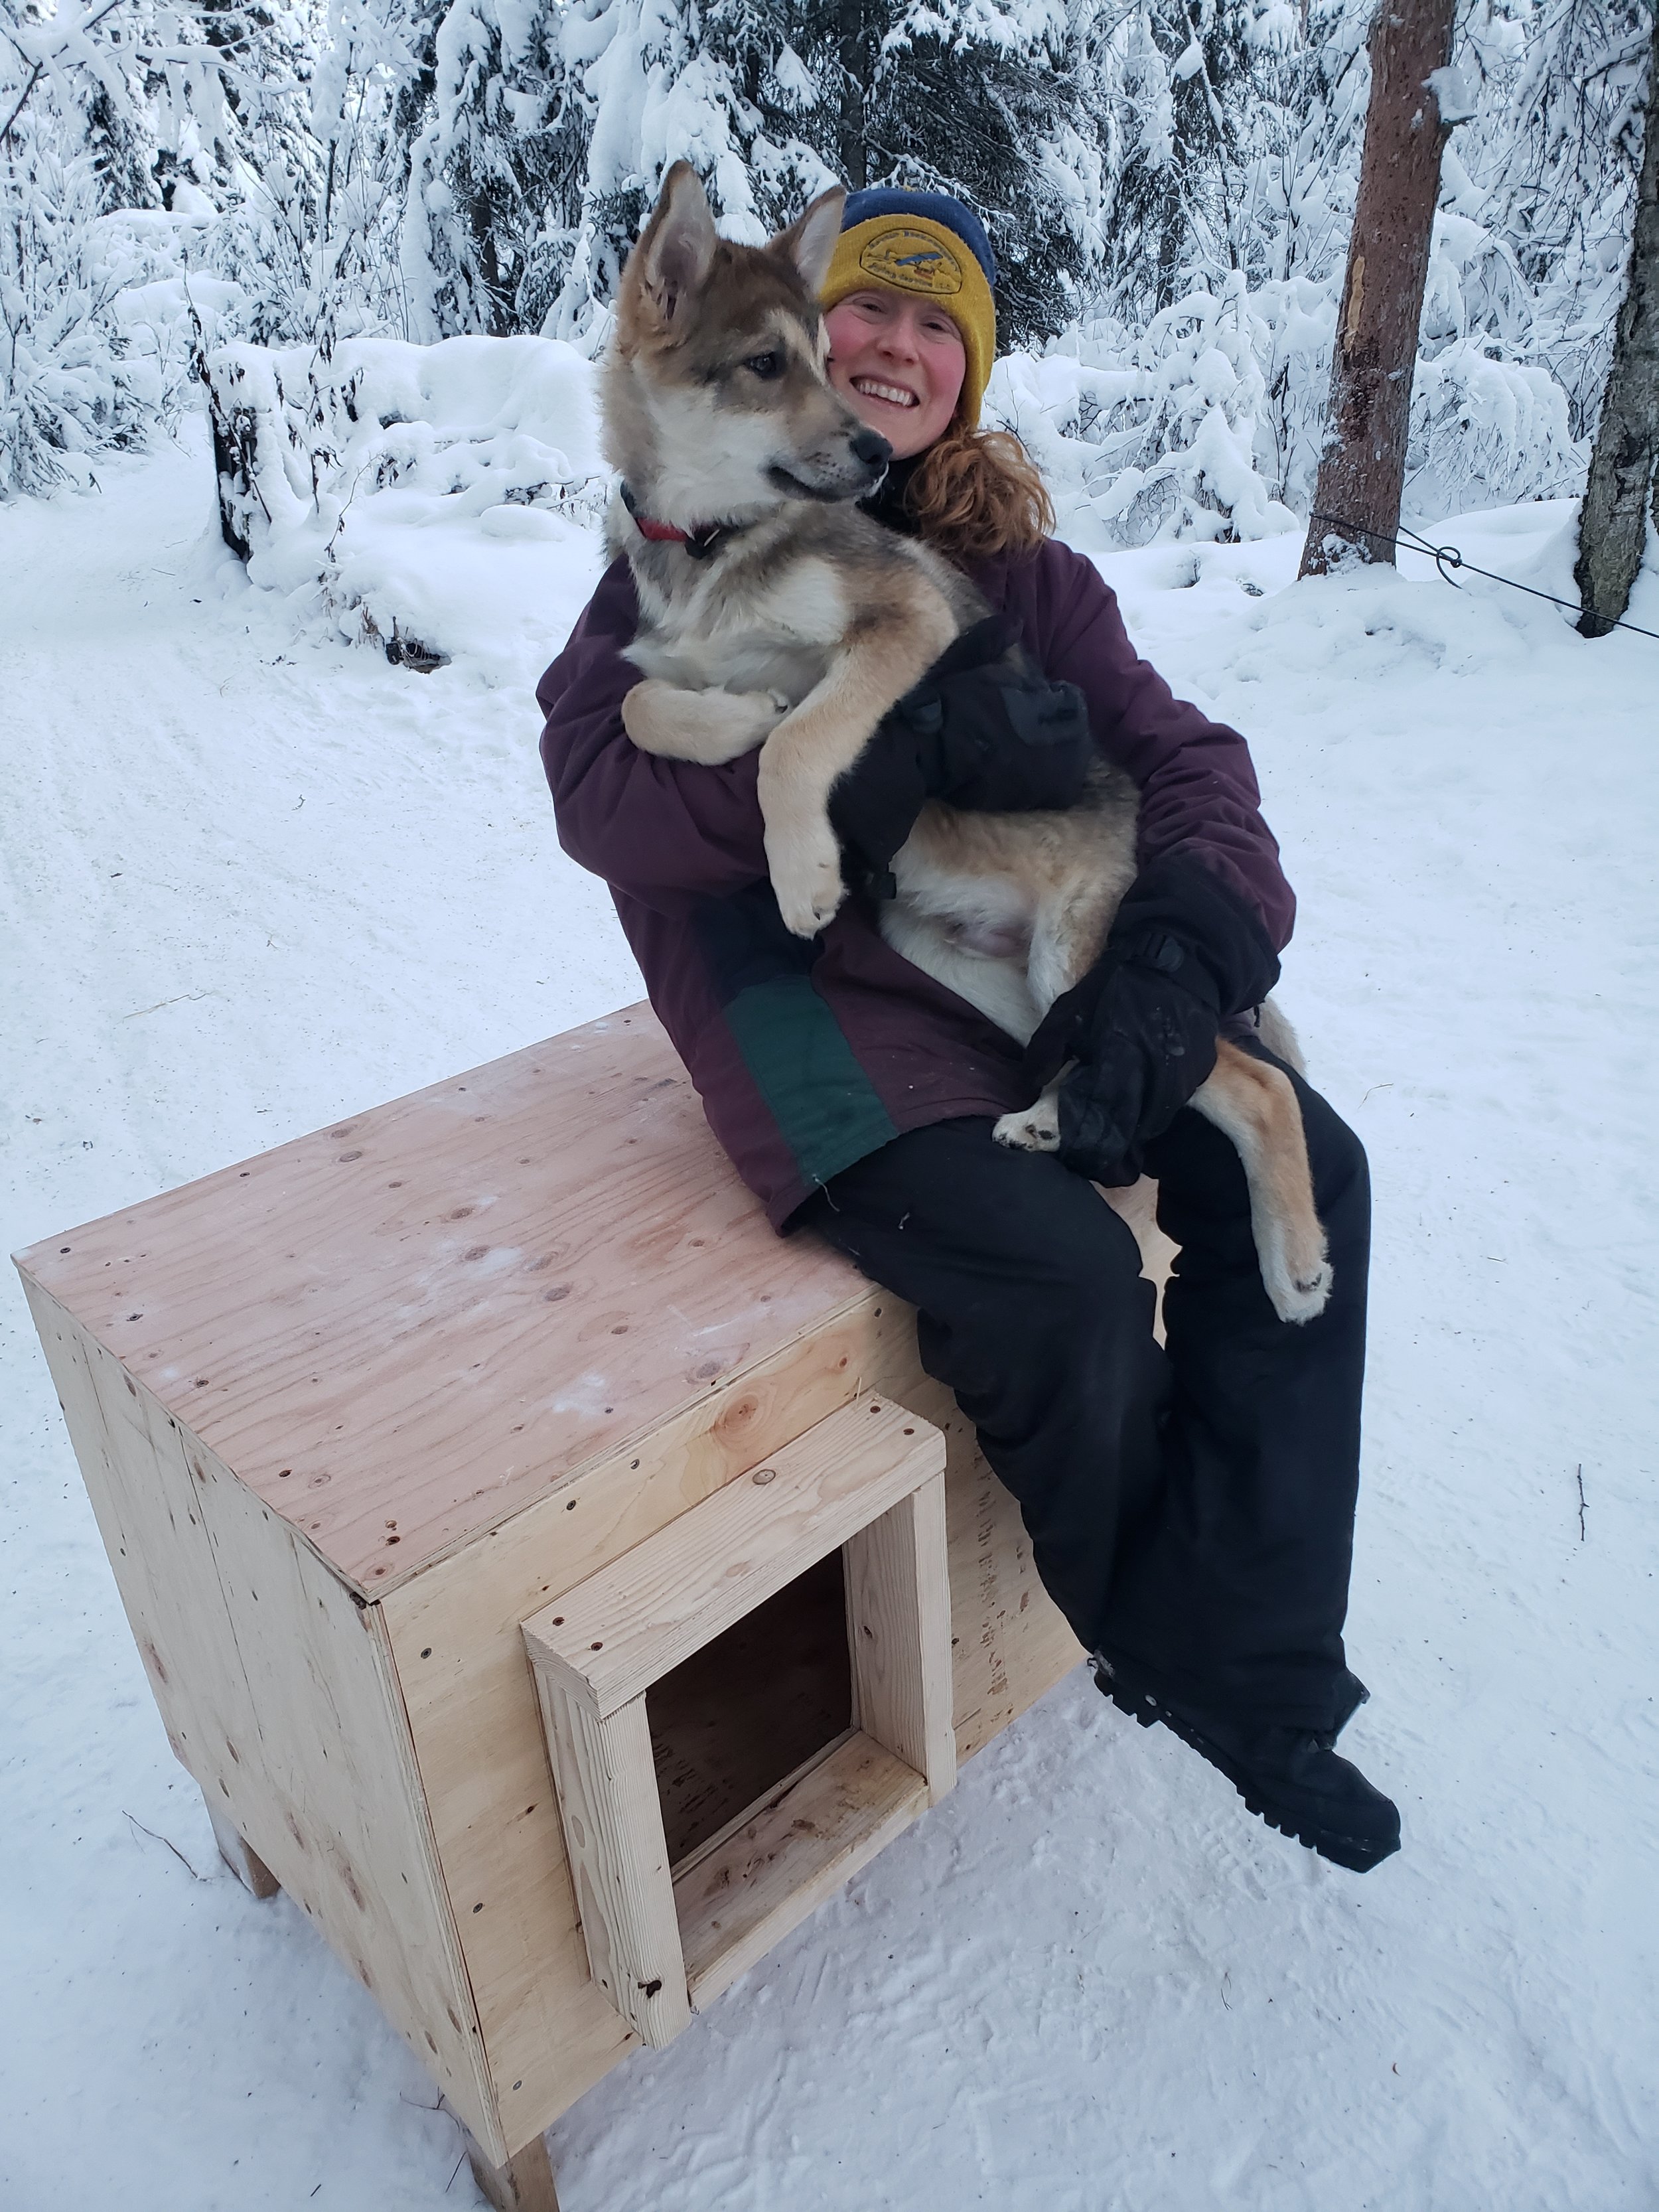
Step 4: Make the door frame- this helps the dogs get in and out of the house. The 4'“ side of the 2x4 should be exposed, check out the photo below. I like to make the top piece cover the endgrain on the pieces below it to prevent rot. Its a good idea to pre-drill your holes when making the door frame, you will need longer screws for this step. I make the frame and then attach it to the house.

Finished box

Step 5: Fill with straw and enjoy!

Cabin #5: Peeling the logs, so many logs

Logs, logs and more logs. We love building with them because they are the “local material” most readily available to us. A little background on the steps that came before this entry…

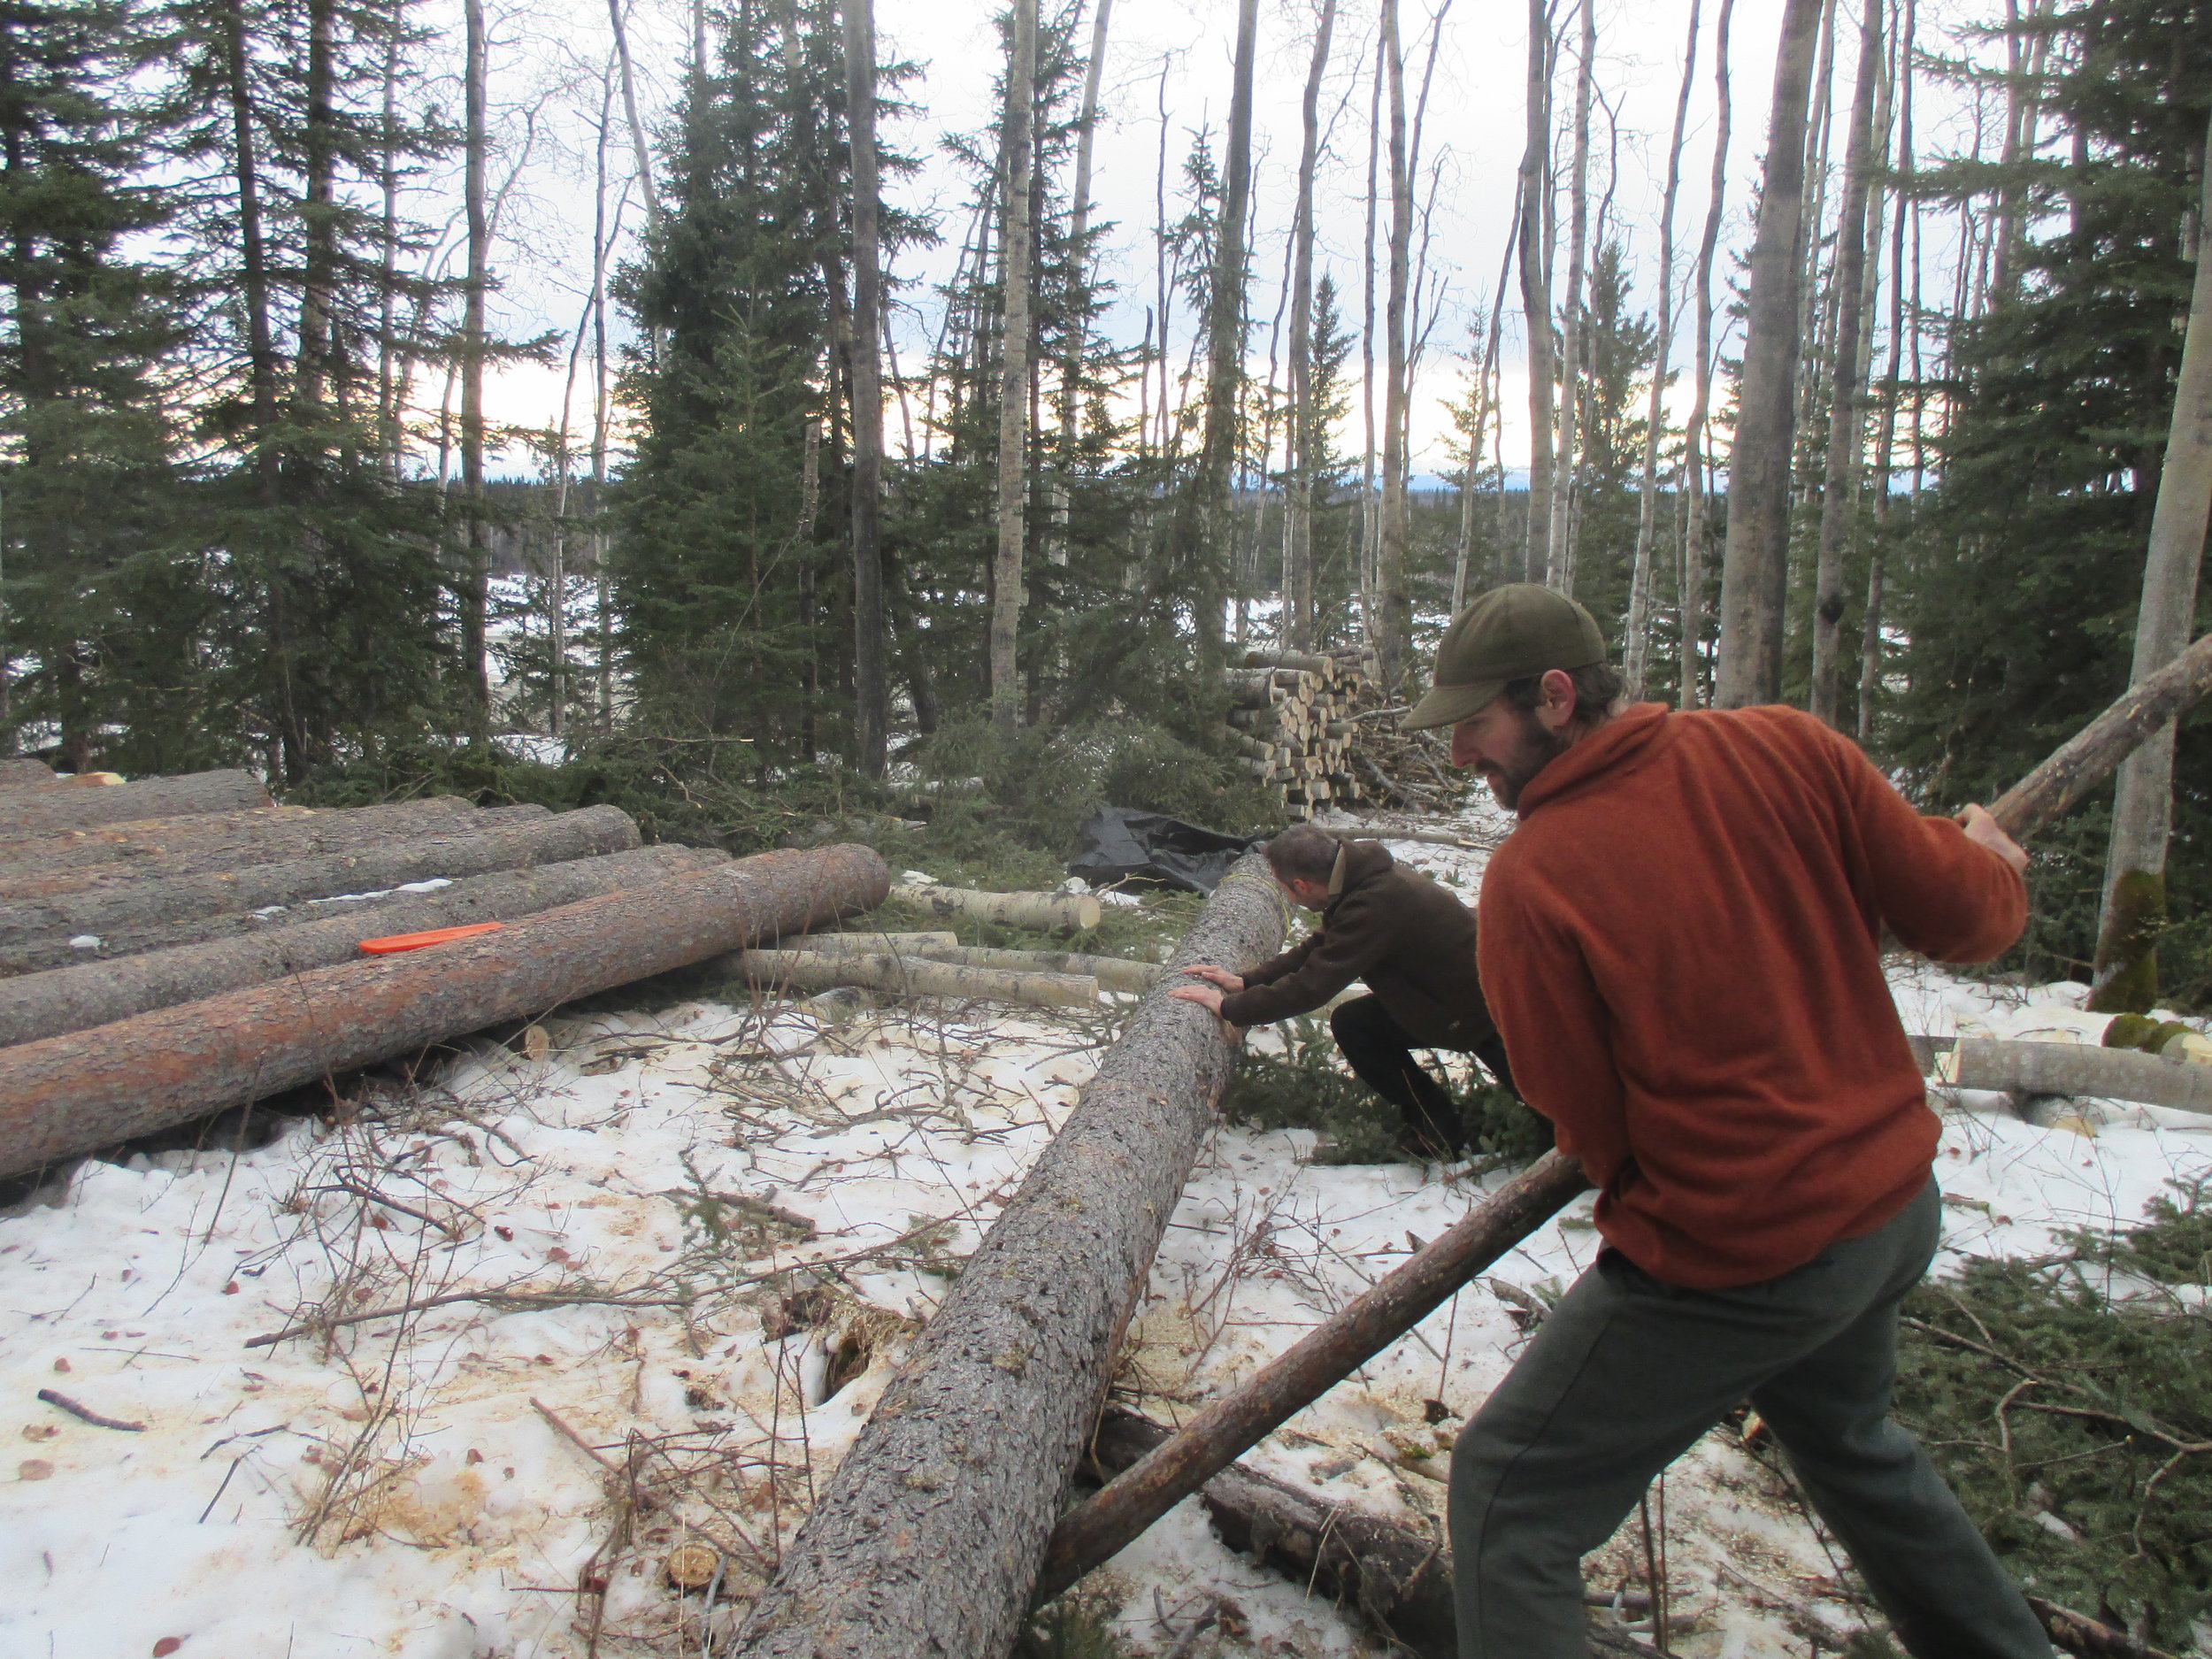
  1. We cut the logs for our cabin in the winter from a nice stand of White Spruce about 1/2 mile above our home and drug them down to the building site using the dogs and snowmachine (see our logging blog entry).

  2. As soon as they warmed up that spring, we used shovels and draw knives to “bark” the logs, basically a quick way of removing the initial bark so that the logs could dry and be safe from insects (see barking blog entry).

  3. Once this was done we had to keep the logs off the ground so they wouldn’t rot. We made a “rack” by placing aspen logs perpendicular to the log raft (see image below).

  4. For the next two years, the logs dried in the sun and we occasionally rolled them to make sure they were drying evenly and not rotting where they touched the log rack. Drying the logs made them significantly lighter and easier to lift onto the cabin. The image below is the “victory moment”- the last peel on the last log. Behind me is the log rack with peeled 25-foot wall logs on it. The logs I am sitting on is one of the 32-footers- the ridge pole, perlins, and plate logs.

IMG_20181023_105634697_HDR.jpg

David has a few log cabin builds under his belt, but this was my (Jenna’s) first one. The first obstacle that I had to overcome as a newbie was figuring out how the heck to move the 25-32 foot long beastly logs. Peeling logs requires moving them from the log pile to the log rack and rolling them around. Brute strength? Not a chance. Moving logs requires some basic knowledge of physics and a lot of mechanical advantage. We used a variety of poles to pry and roll, rather than lift the logs. Luckily we had some really good tools. The top four were:

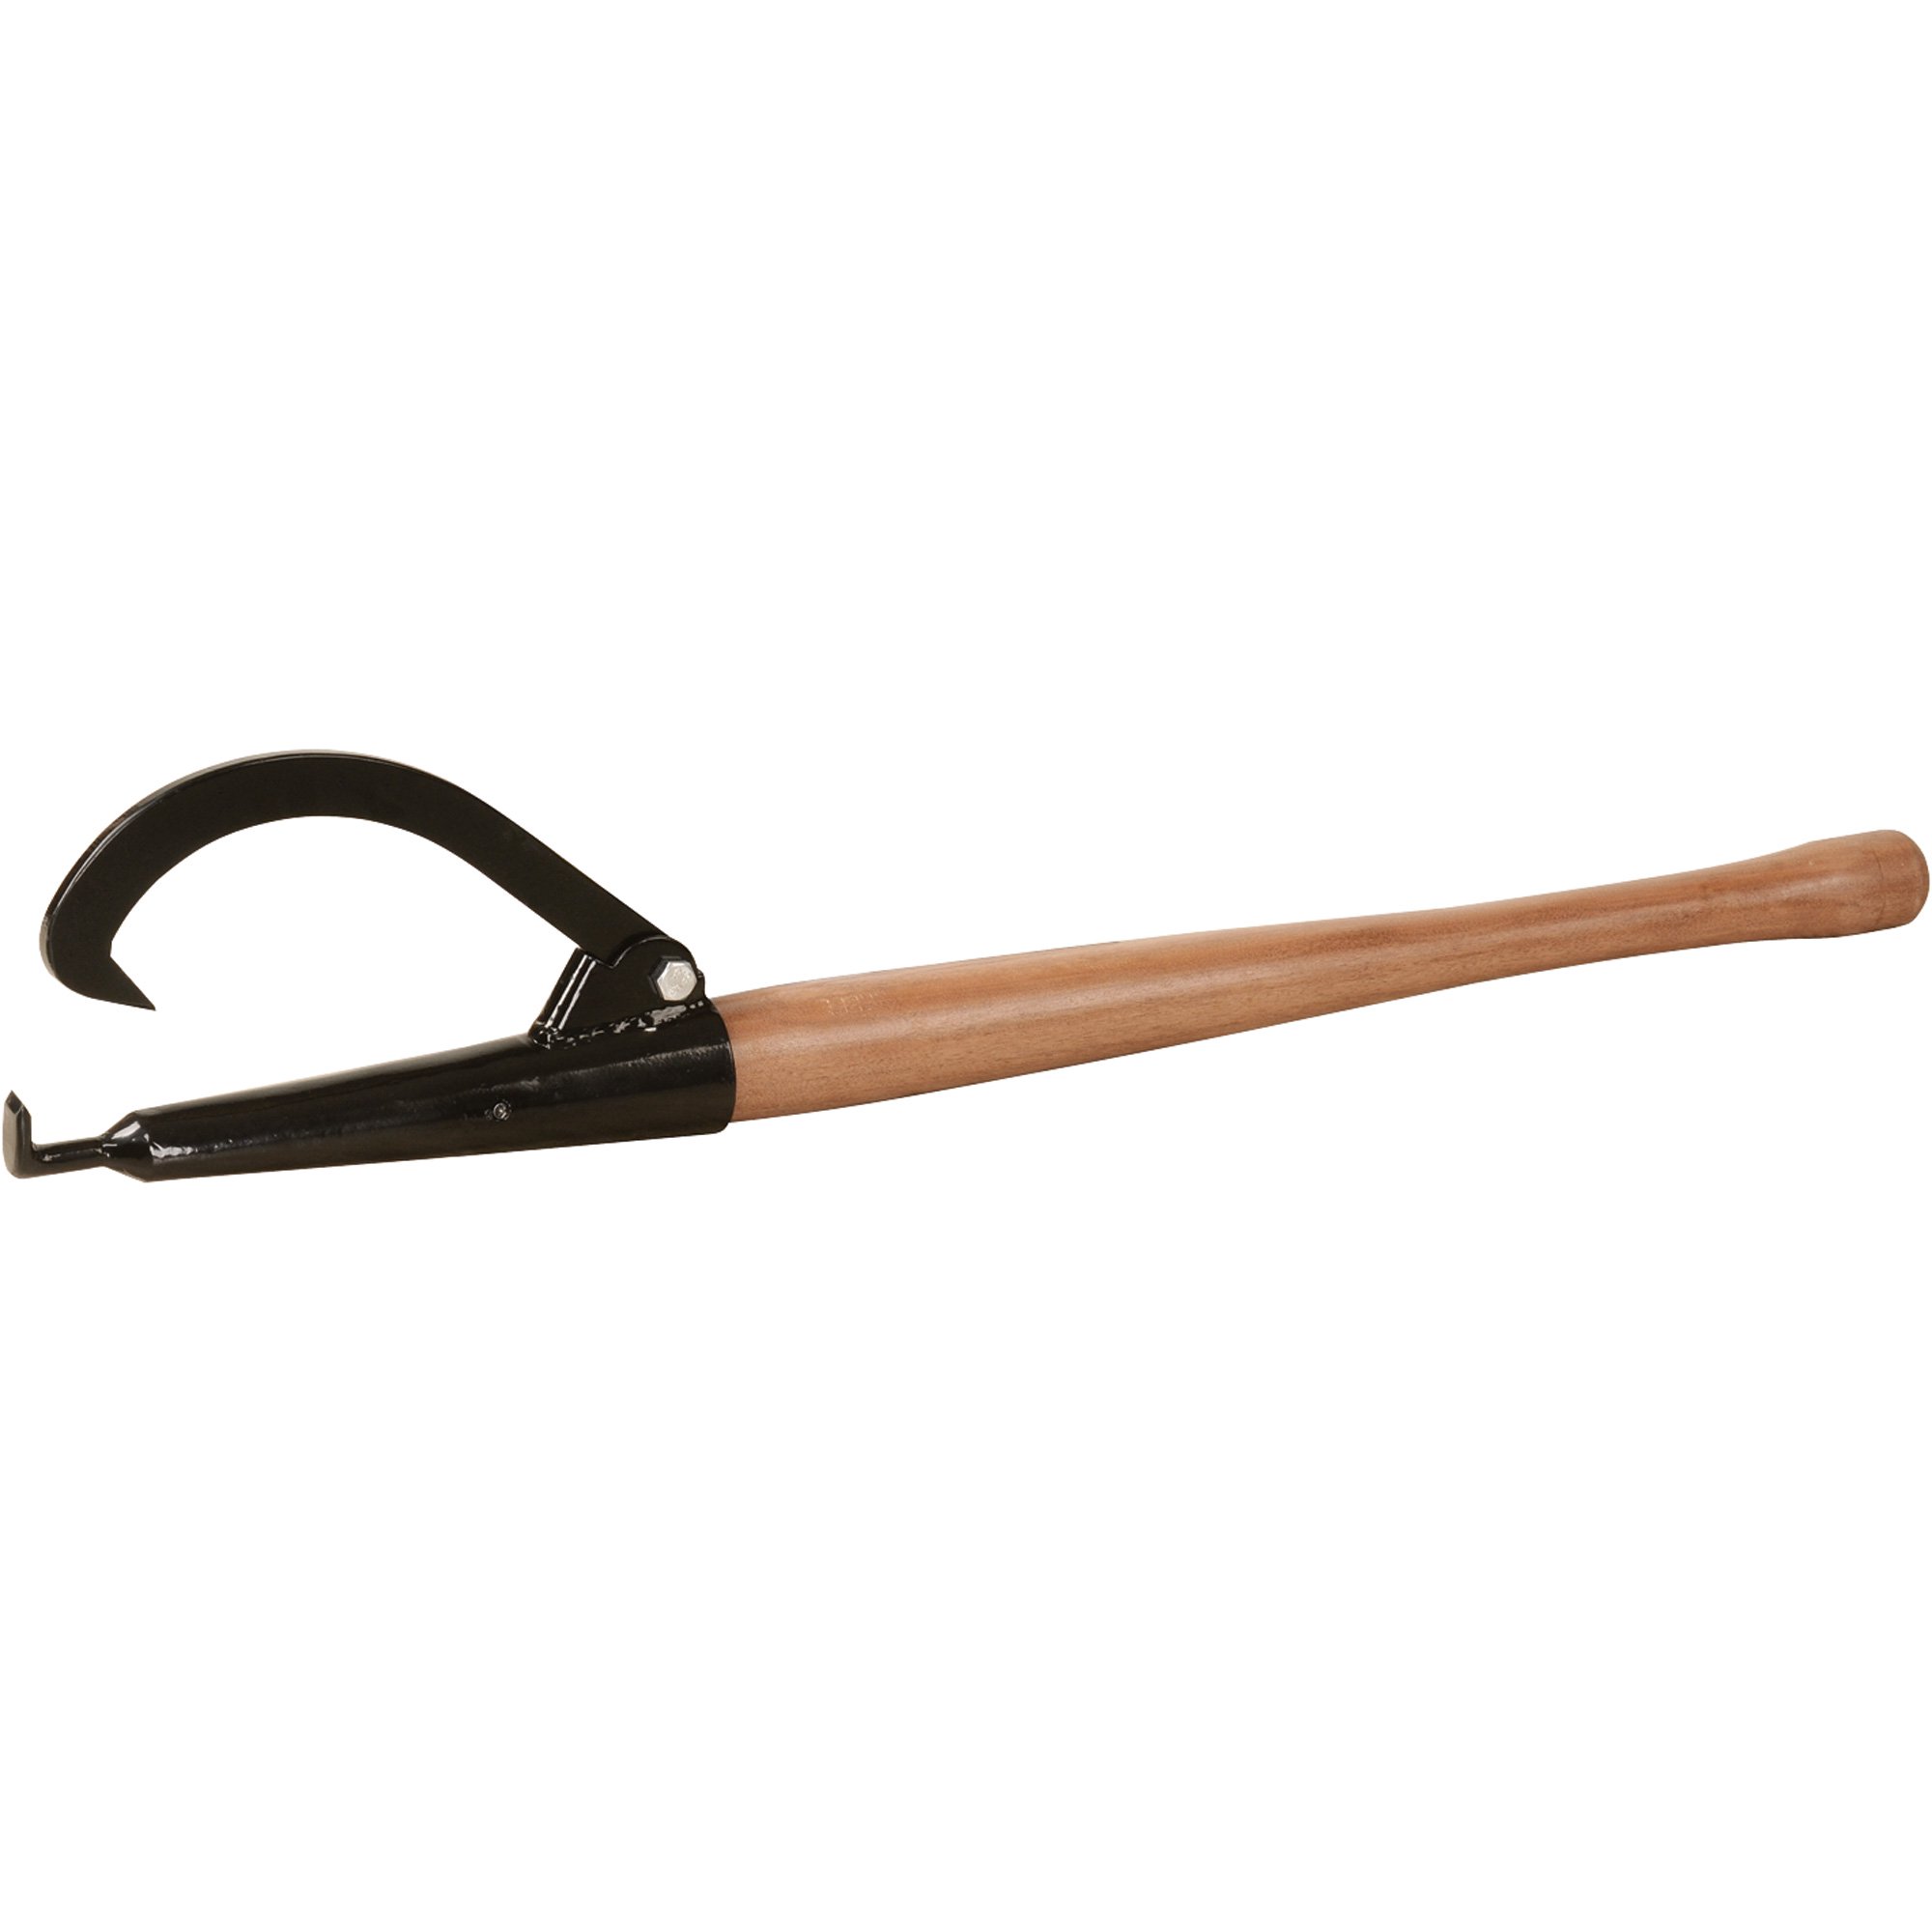
  1. Cant hook (image below on the left)- We used the hook part of this to easily roll the logs and the pole to occasionally pry. Usually for heavy duty prying we would use a pry bar because they were more disposable. The tip of the hook easily sank into the soft wood and made it easy to roll.

  2. Peavey (image below on the right)- We got this tool from an antique store a couple years into the build and it proved to be worth its weight. It is similar to the cant hook except the tip is a sharp so you can easily stand it up in the ground and avoid losing it. Many stressful minutes were spent trying to locate the cant hook when we put it down on the job.

cant hook.jpg
peavey.jpg

3. Pry bars/lever poles (image below on the left)- For this we just used dry spruce poles about 6-10 feet in length. We used these to roll, pry and scoot the logs around.

4. Portable Winch brand gas-powered capstan winch (image below on right)- This is an expensive toy, but honestly if I had to choose between it and a clothes washer (my number one pick for household accessories) I would choose the winch. Having it was like having super powers. I was able to operate it alone and move logs all around the log yard. We also use the winch to haul a cart full of heavy things like gravel for the foundation up our 100+ foot bluff. So for the big moves, this was a really brilliant tool. Here is a link to the one we have: https://www.portablewinch.com/us_en/winches/gas-winches/pcw5000/

IMG_2431.JPG
capson winch.jpg

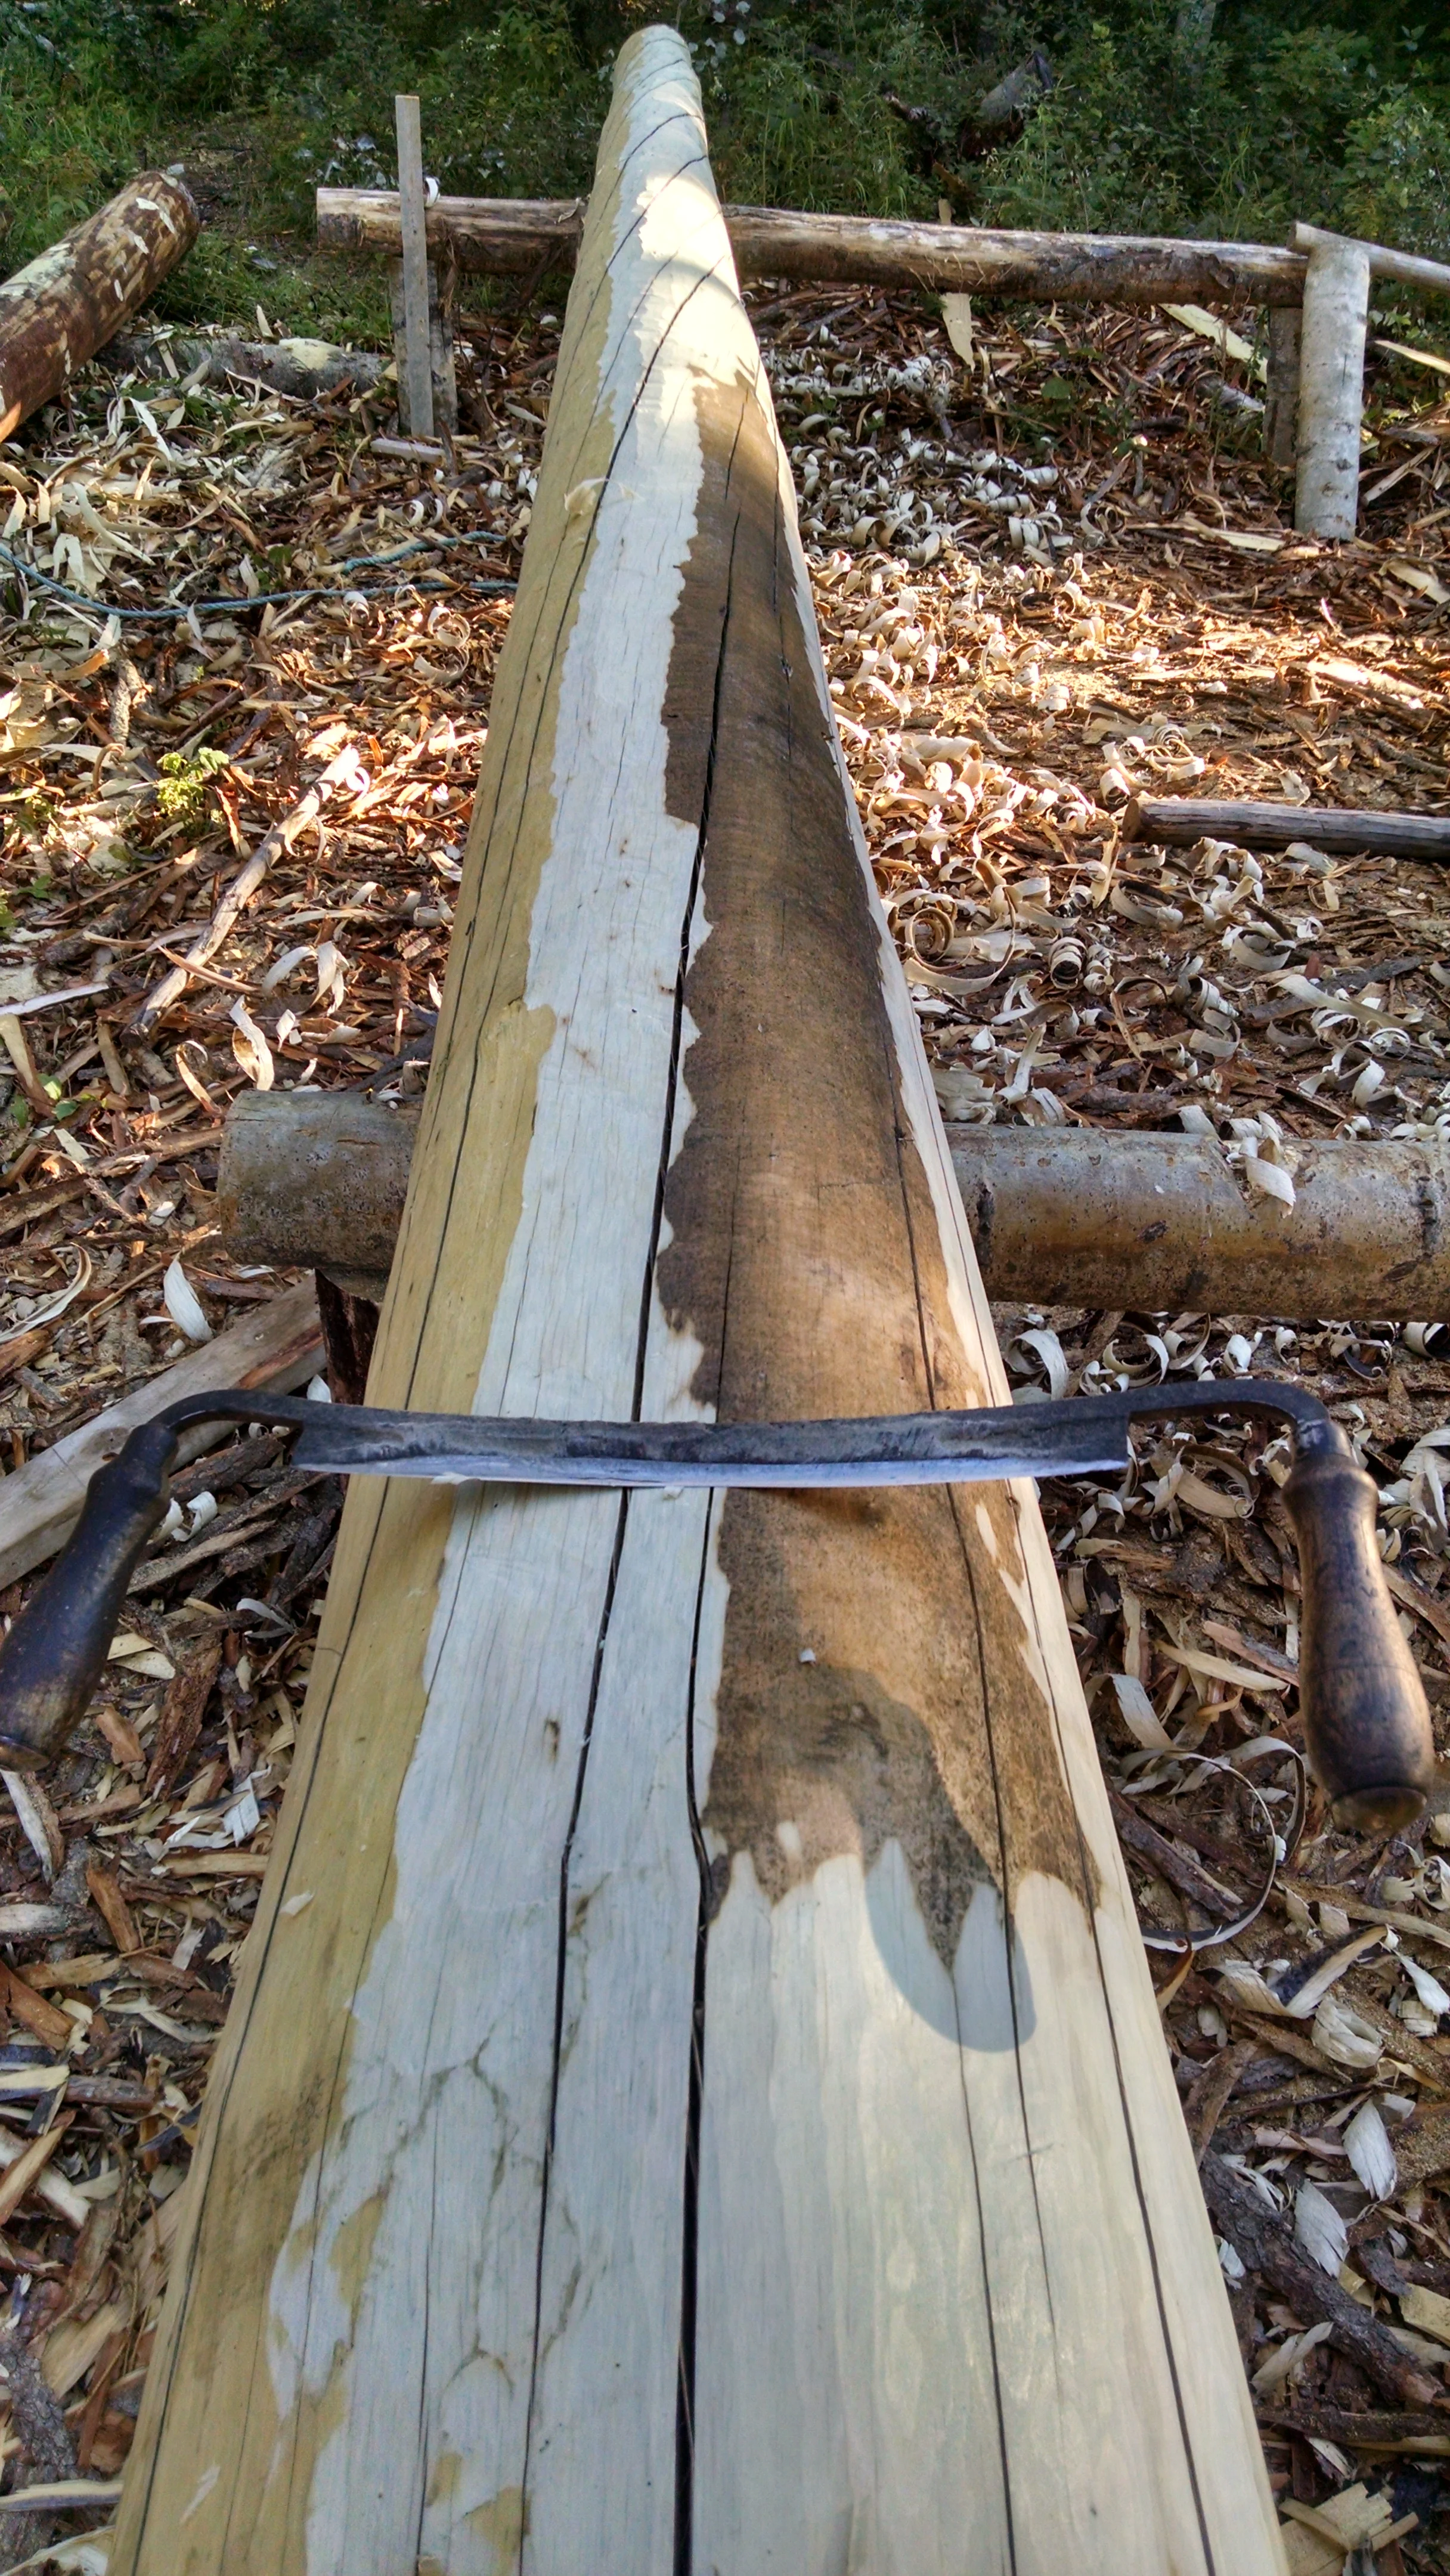
Enough with tools and back to peeling! When it came time to put the logs on the wall, we wanted them to be smooth and light in color. The 1-2 summers that they spent drying turned them colors and we want the interior of this cabin to be as light in color as possible. Thus, the peeling began. In the log below you can see the different colors that the log turned from sun (left), sun and rain (right) and a nice peel job (center). While we made sure to store all of our drying logs off the ground on a small rack, we didn’t do as good of a job as we could have at rotating the logs so that they dried evenly. As as result, the section of the log that faced up to the sky for the longest was a different color and moisture level than the side that was faced down. Also, we got some rot on the logs where they made contact with the rack. Most of this was remedied through the peeling process. We used relatively small draw knives to peel. We had as many as 5 of them on site, but tended to prefer the one in this picture. As you can tell, its gotten a lot of bark miles out of this process and was re-sharpened at least every other day during heavy peeling season.

log peeling

To prepare the logs for peeling with drawknives, we needed to smooth them out and carve down the rough patches and bumps where the branches grew. For this step we used either an axe (left) or power planer (right).

IMG_20170629_194438125.jpg
IMG_20170630_194322736.jpg

Early on, our friend Maureen came out to help and she helped build this log rack. It made it so we could stand upright and peel the logs, which is much more efficient and nicer on your body. In this picture there are roof poles on the log rack and shavings below. We had to rake out the shavings to keep our rack high enough! The only problem with a log rack is that you have to get the logs up onto it. We made ramps on one side and used pry bars and the gas winch to get the logs up. As usual, we found the best way to do this right at the end of the peeling!

IMG_20180517_120002916_HDR.jpg

Some of the logs, like the ridgepole, perlins, and sill logs below (32 ft long) were too much of a pain to get onto the log rack. These logs we peeled the “grunt” method by propping them up on other short logs or rollers and sitting on top of them. This method is what is going on in the photo below.

IMG_20181023_105717380_HDR.jpg

The final step of our peeling process was painting each log with some clear wood preservative to help keep it from rotting and discoloring during the building process. We got a reccomendation for this product from our friend Randy Brown who has used it with good results on his log cabin home. It doesnt keep the logs from graying (the color they turn naturally in the sun) but it does protect them from rotting without being too toxic. We wanted to avoid heavy-duty chemicals. One of the best things about building with local materials is that in 100 years when we’re gone the cabin can decompose and rot away into the landscape. The Tanana River is full of old cabin remnants with trees growing through them. We try to think of this “end” goal when we decide what materials to use and where reasonable, we are trying to avoid bringing in plastic and other non-biodegradable materials. Here is the stuff we went with for painting the logs. So far, so good.

paint.png

A day in the life of Minto: Winter Edition


This is a story about Minto.  Minto (pictured below) is one of our favorite sled dogs.  His main trait is enthusiasm.  Minto meets the world each day with an infectious smile and greets the people in his life butt-first (he really, really likes butt scratches).  This blog entry describes a typical day in the life of Minto.

Minto usually starts out his day with a good 7am howl.  We’re not really sure why it is that dogs howl, sometimes they are talking to other dogs, coyotes, or wolves.  Sometimes they are announcing their contentment after a meal.  Sometimes they howl just because it feels good.  It usually starts with one dog, from there the howl catches on like a contagious bug, they literally can’t resist joining in.  Even dogs in the house will howl (a more subdued version, if they are polite).  One of our most treasured moments is watching a puppy’s first howl.  Since we did not have Minto when he was a puppy, here is a video of puppy Toolik howling.

Anyways, there is a howl, which may be intended to greet the day or to hurry their human caretakers into serving breakfast, or something altogether different. 

If it is cold, Minto will probably wake up inside our cabin, curled up on a doggie bed, cuddling with other dogs.  If its not so bad outside, he likes to sleep in his bed of straw inside a wooden dog house.   When we are on the trail we make him a bed of spruce boughs, cattails or grass.  Here is minto waking up on a camping trip on a bed of spruce.

minto camping

Soon a bleary human will emerge to either let him outside to pee or bring breakfast.  The human will go down to the creek to chop ice to be melted into breakfast dog cereal.  The human also brings firewood inside, and usually a dog or two as well.  Breakfast is dog food soaked in some water.  Often we add something special like mayonnaise, bacon grease, or leftovers.  Nothing is wasted when you have a dog team!  The stinkier the food, the more they like it.  In his younger years Minto was a very picky eater.  He liked only dry food, he held his nose like a cooking show judge at sub-par cooked fish.  Since we had him neutered at age 7, he eats much better.  His favorite dish is cooked up moose meat scraps but he will happily eat anything that the humans don’t want as well including a surprising array of vegetables.  When we cook and Minto is inside he is almost certainly underfoot, waiting patiently for something to be tossed his way. He pulls his weight helping with dishes licking pans clean.  Here is a picture of Minto as a puppy with his littermates in a dog house.

minto pup.jpg

Finally the human emerges from the cabin with a bucket of warm breakfast.  He or she (usually she) walks to teach dog and ladles them out a bowl full.  Minto is usually third to eat, and he lets you know if you mess the order up!  After breakfast there is an inevitable elimination, which the humans get to remove with a shovel and put into the compost. 

Then it is play time.  We let a few dogs inside at a time to relax by the woodstove or romp around the cabin.  They play games like “walrus mouth” where they open their mouths as wide as they can and see whose face fits in whose mouth.  They find this to be great fun.  During the day when they are on their chains there is always something to look at.  A constant stream of bold gray jays and ravens play games of pinball with the dog team in an attempt to snatch up scraps of the dog’s fish meals.  Our puppies also play pinball in the dog yard, learning some social skills along the way.  Squirrels harass the dogs from nearby spruce trees.  On rare occasion a dog catches a squirrel, but I don’t think Minto has ever been so lucky.  Here is a video of puppy Eowyn playing "pinball" with Yawp.

Then the time he’s been waiting for- strangers appear in the dog yard, our tour guests.  The dogs see strange folks and they think “yay! Our massage team has arrived!”  We take guests around to meet (pet) each dog and lavish them with attention.  Minto greets people with his butt out, guess where he wants to be pet? 

IMG_20161222_130455222.jpg

Next is the harnessing.  Minto practically puts on his own harness so we have used him for years as our model dog for clients to try putting a harness on.  He is very patient and very sweet.  A good example dog, he sits on top of his house and awaits his harness.

minto enjoys a pet from a visitor

Now its time to go!  A human walks Minto from his house to his spot on the team.  In his youth, Minto was a lead dog.  He is very excitable and very decisive.  Over the past few years he has gone a tad bit rogue, preferring his own agenda over what the humans had in mind.  For this reason, we now run him mostly in swing (second from the front) position and next to younger dogs to help train them.  He is a very patient teacher and won’t nip at even the most obnoxious trainee.  In swing he can also help make the decision on which way to go if the lead dogs are having trouble.   Here is a picture of Minto (front right) running in swing position.

IMG_20160227_114842450.jpg

The humans get onto their chariot of two sleds hooked together.  Now hook is pulled and the glorious words “ready, HIKE!” are hollered and they are off.  We run teams of 6-8 dogs most days and they take off out of the dog yard like a freight train.  They run fastest when they are excited and they are ALWAYS excited at the beginning.   Paws beating, they sail down the walkway to our cabin, past the woodshed, the driveway, and turn a sharp left “HAW!” onto the trail.  There are many smells to investigate and places that need to be peed on so the dogs are full of glee.  Their ears dart wildly back and forth between listening to the humans and listening for other more interesting things (moose, squirrels, bikers, who knows!)  The pause to inhale tracks of snowshoe hare and moose.  They dilligently re-mark a tree where some other dog has peed.  They run through the woods, across ponds, down an oxbow lake and across a frozen creek.  Whenever there is a turn coming up or a drop or a particularly compelling smell they speed up.  Minto is great at instigating speeding up.  In his youth he was by far our fastest dog.  We would release them all on the shore of the river to run next to the boat and Minto was always first.  He still gives the young ones a run for their money!  Here is Minto teaching puppy Kathul the ropes (how to not chew on them) with David's help.

minto in team

But whew! Its getting hot out here for fuzzy dogs.  The human decides it is time for a break, “woah!” the brake goes on and snow hook goes in the snow.   The dogs turn their attention to eating and rolling in the snow to cool down.  They get additional pets from the humans, again, Minto displays his butt, in case you forgot.  Soon the dogs get antsy.  Ursa and Bruce Lee begin to leap into the air, hoping to kick-start the team.  The human takes note of the restored energy and we take off once more.  Faster than before, we head across the valley floor, turning this way and that on a network of little trails.  We have many different routes to keep things interesting for the dogs.  Some days we go on trips so the whole day is spent on the trail.  Those days are Minto’s favorite.  He has an incredible memory, when we go on trails that he hasn't been on in years he still remembers (and tries to go to) old campsites, rest spots and places that smelled good 4 years ago.  Here he is with David at the end of a day on the trail to Tolovana Hotsprings.

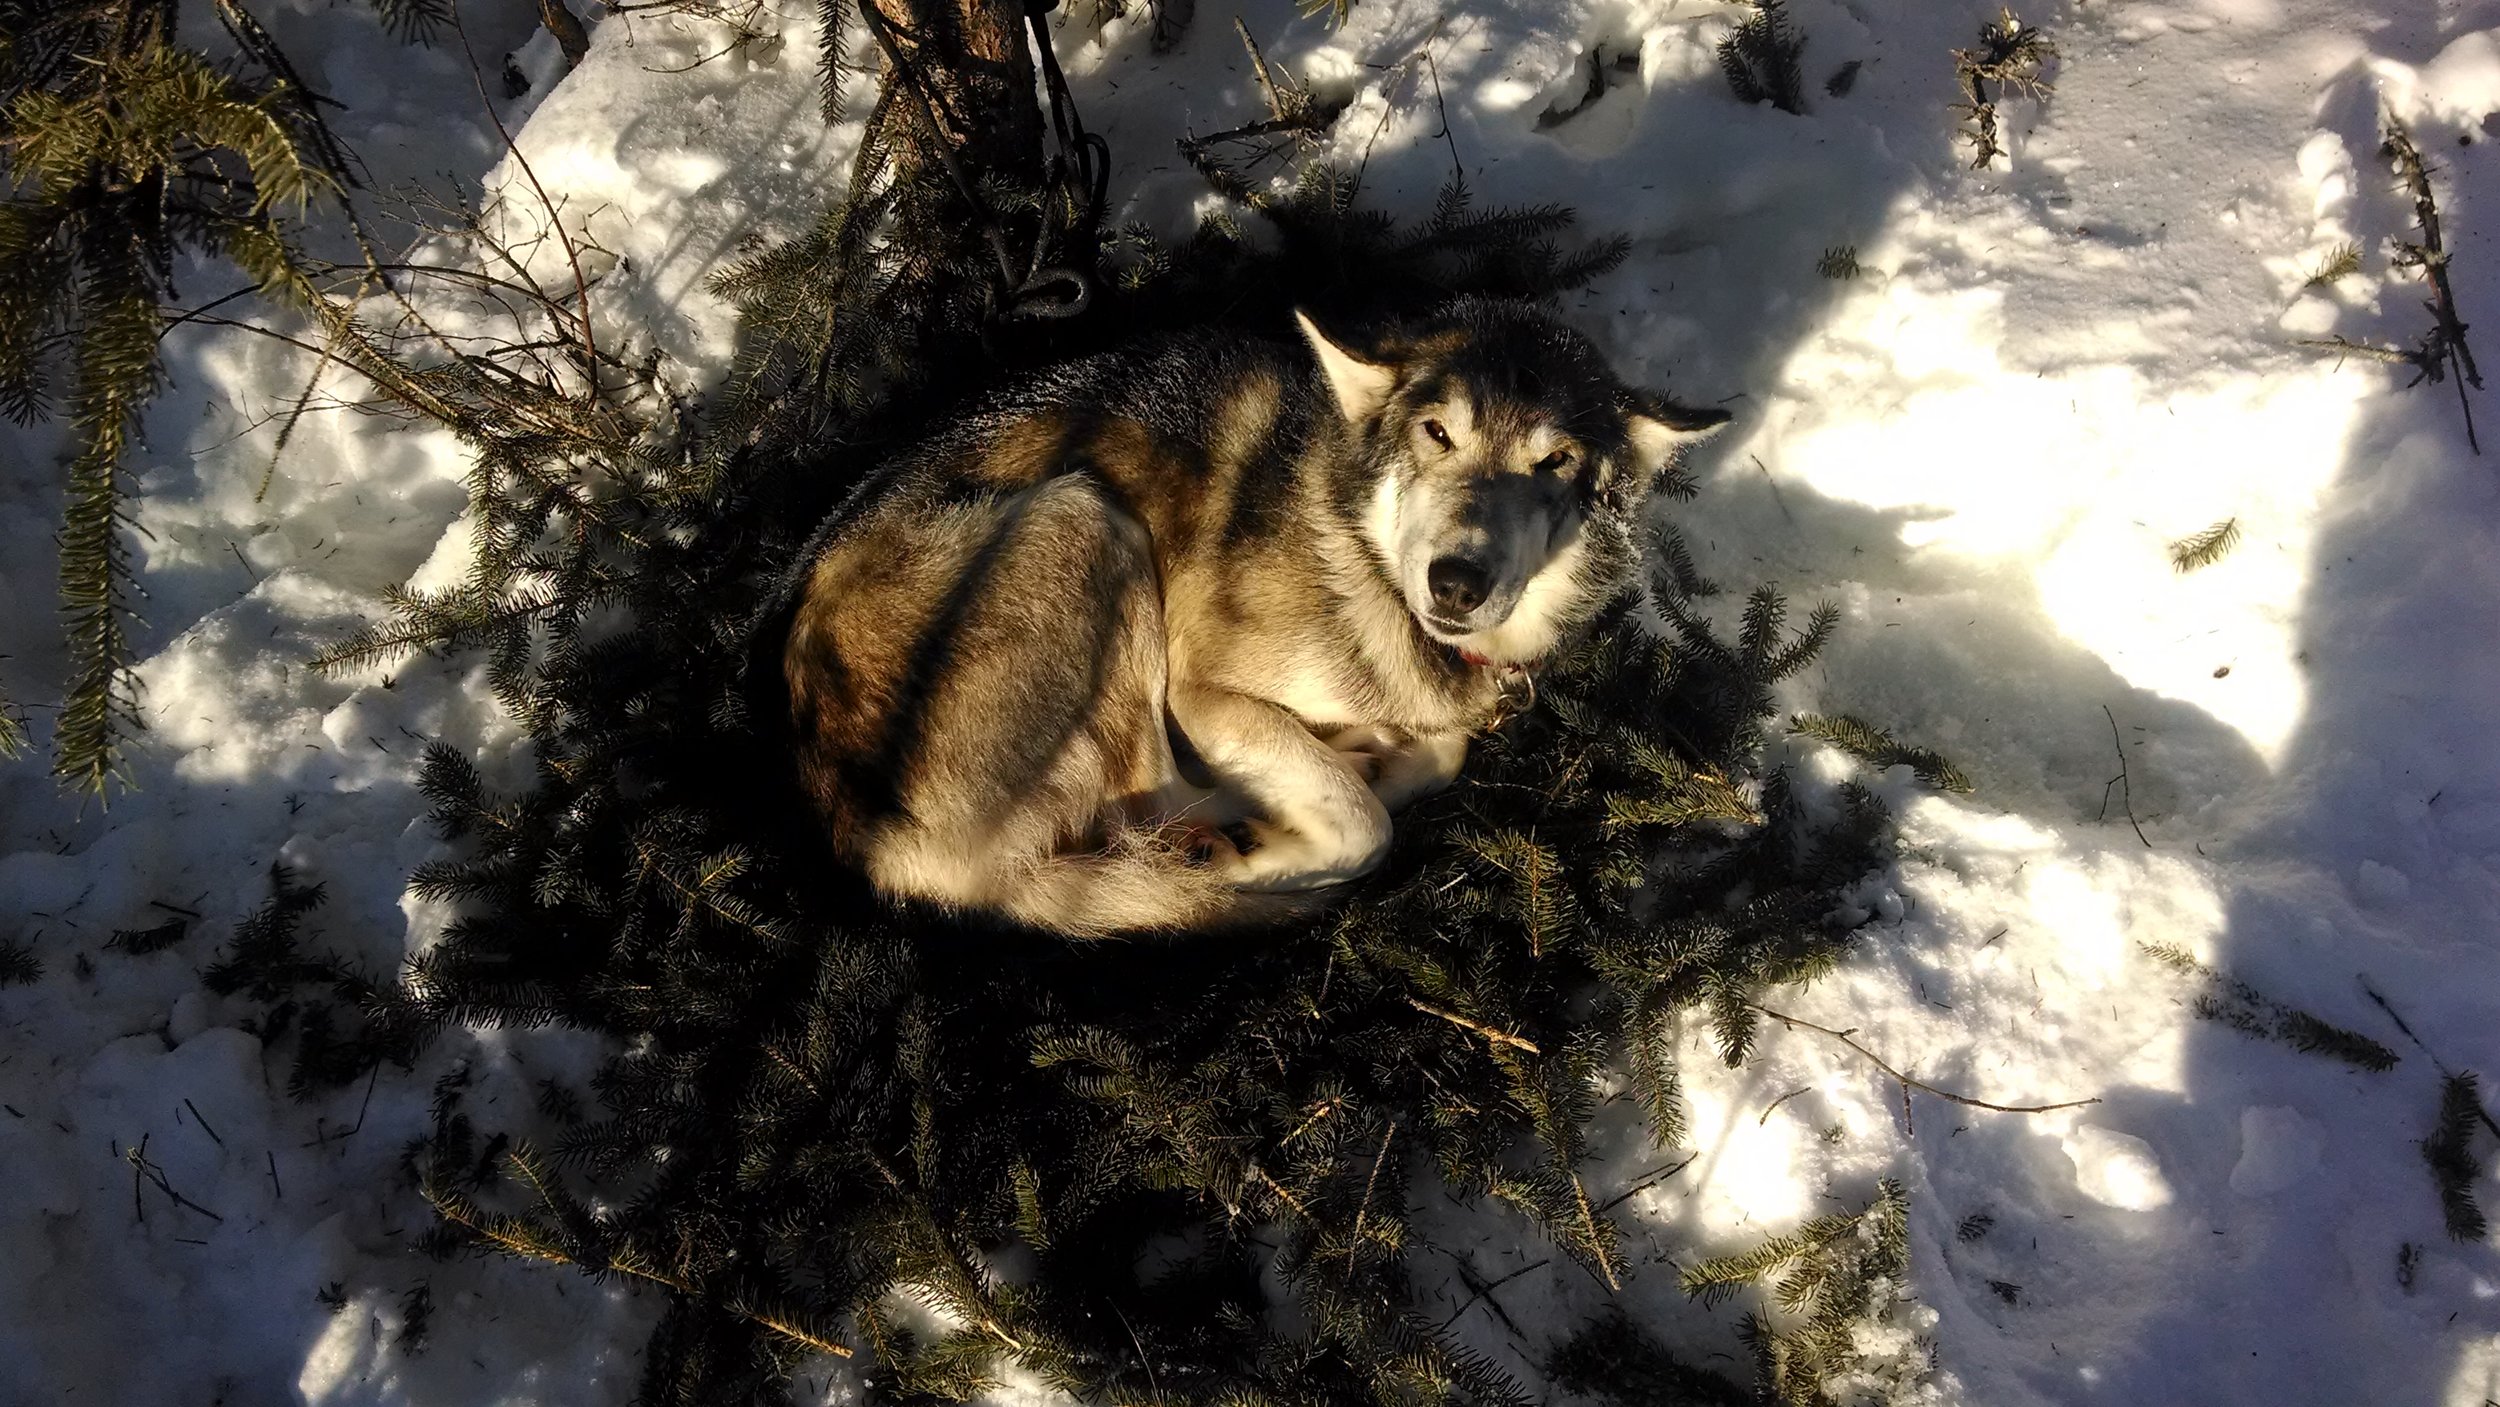
Eventually they make their way back to the dog yard, arriving with flourish because they know its time for treats and rest.  The humans move up and down the line, delivering pets and treats like hunks of frozen beef fat and salmon.  Yum!  They unharness each dog and walk it back to its house for a cool down and a nap.  Some dogs come into the cabin to rest, others (the fuzzy ones) prefer to nap in the snow.  Minto has a medium coat so either option works for him.   

Now it is nap time.  Minto is a very well-behaved indoor dog.  He knows a good thing when he sees it and really likes napping by the woodstove.  When napping the dogs sometimes make noises and run in their sleep.  They also like to cuddle with certain other dogs.  Minto and Tanana are cuddle buddies (see below) and Skookum is sometimes included too.

IMG_20170118_112448266.jpg

Humans are decent cuddle buds as well.  Here is Minto and David cuddling on our bed and couch.  As you can probably tell, we are pretty fond of Minto.  Our favorite Minto story is the day when Minto outsmarted David.  It was about 5 years ago, we were traveling just the two of us from our place on the Tanana to the Alaska Range.  We mushed up the Tatlanika River for about 40 miles, mostly on overflow ice and wolf trails.  As we got closer to the mountains the river got smaller and smaller.  We had to decide which small braided channel to take.  At one junction David decided "haw" and Skookum and Minto were in the lead.  Skookum obediently leaned left but Minto shook his head and threw his weight into a right turn with gusto.  David was half way through the sentence "Come on  Minto, I know what I'm do----ing" when the ice broke under the sled.  He found himself hanging from the sled over a 6-foot drop to the small river.  I was skijoring behind the sled and quickly unhooked.  David managed to do a pull up and get back on the sled.  I found another way around on stronger ice.  But Minto proudly wore an "I told you so" look for the rest of the day.  Sometimes dogs do know best.

IMG_20140117_141357661.jpg
minto on couch

That's pretty much a day in the life of Minto in the Winter.  Stay tuned for a story from his life in the summertime. :)

minto summer

Winter Camping Tricks

David and I just got back from our first camping trip of the season.  We like to get out a few times before our main season with guests to re-remember our systems and tricks so life on the trail is as smooth as possible.  In the interest of not forgetting over the lazy summer months, here are few tips and tricks that we'd rather not live without.  They are somewhat specific to the way that we camp (wall tents, woodstoves, dogs) but some of the principles can be applied more broadly.  We hope this is helpful!

#1: The stainless steel bucket

stainless steel bucket

It might seem crazy, but I refuse to camp without one.  When winter camping with 9 thirsty dogs (or, occasionally our equally thirsty ski companions who know who they are) making water is a constant task.  Ideally we camp by a stream or lake and can chop for water or ice, but often we have to melt snow.  This task is made infinitely better by the bucket.  In former, darker times, we used large stainless steel pots with two handles.  I can feel the exact ache in my lower back from carrying that stupid thing up from a lake, slipping and sloshing precious water all the way.  The bucket has a sensible handle so you can hold it in one hand.  It is tall and tapered so you can fit pots on your woodstove surface. A good addition is a lid (most random lids seem to fit) and a spare stuff sack to use to collect snow and bring it to the bucket.  We also like to stockpile ice chunks or, in the windblown arctic, carved snow chunks outside the tent for easy access.  It gets better, due to some miracle of modern production these buckets cost $12 at Sportsman's Warehouse.  We're going to buy a lifetime supply before they realize what a deal that is.

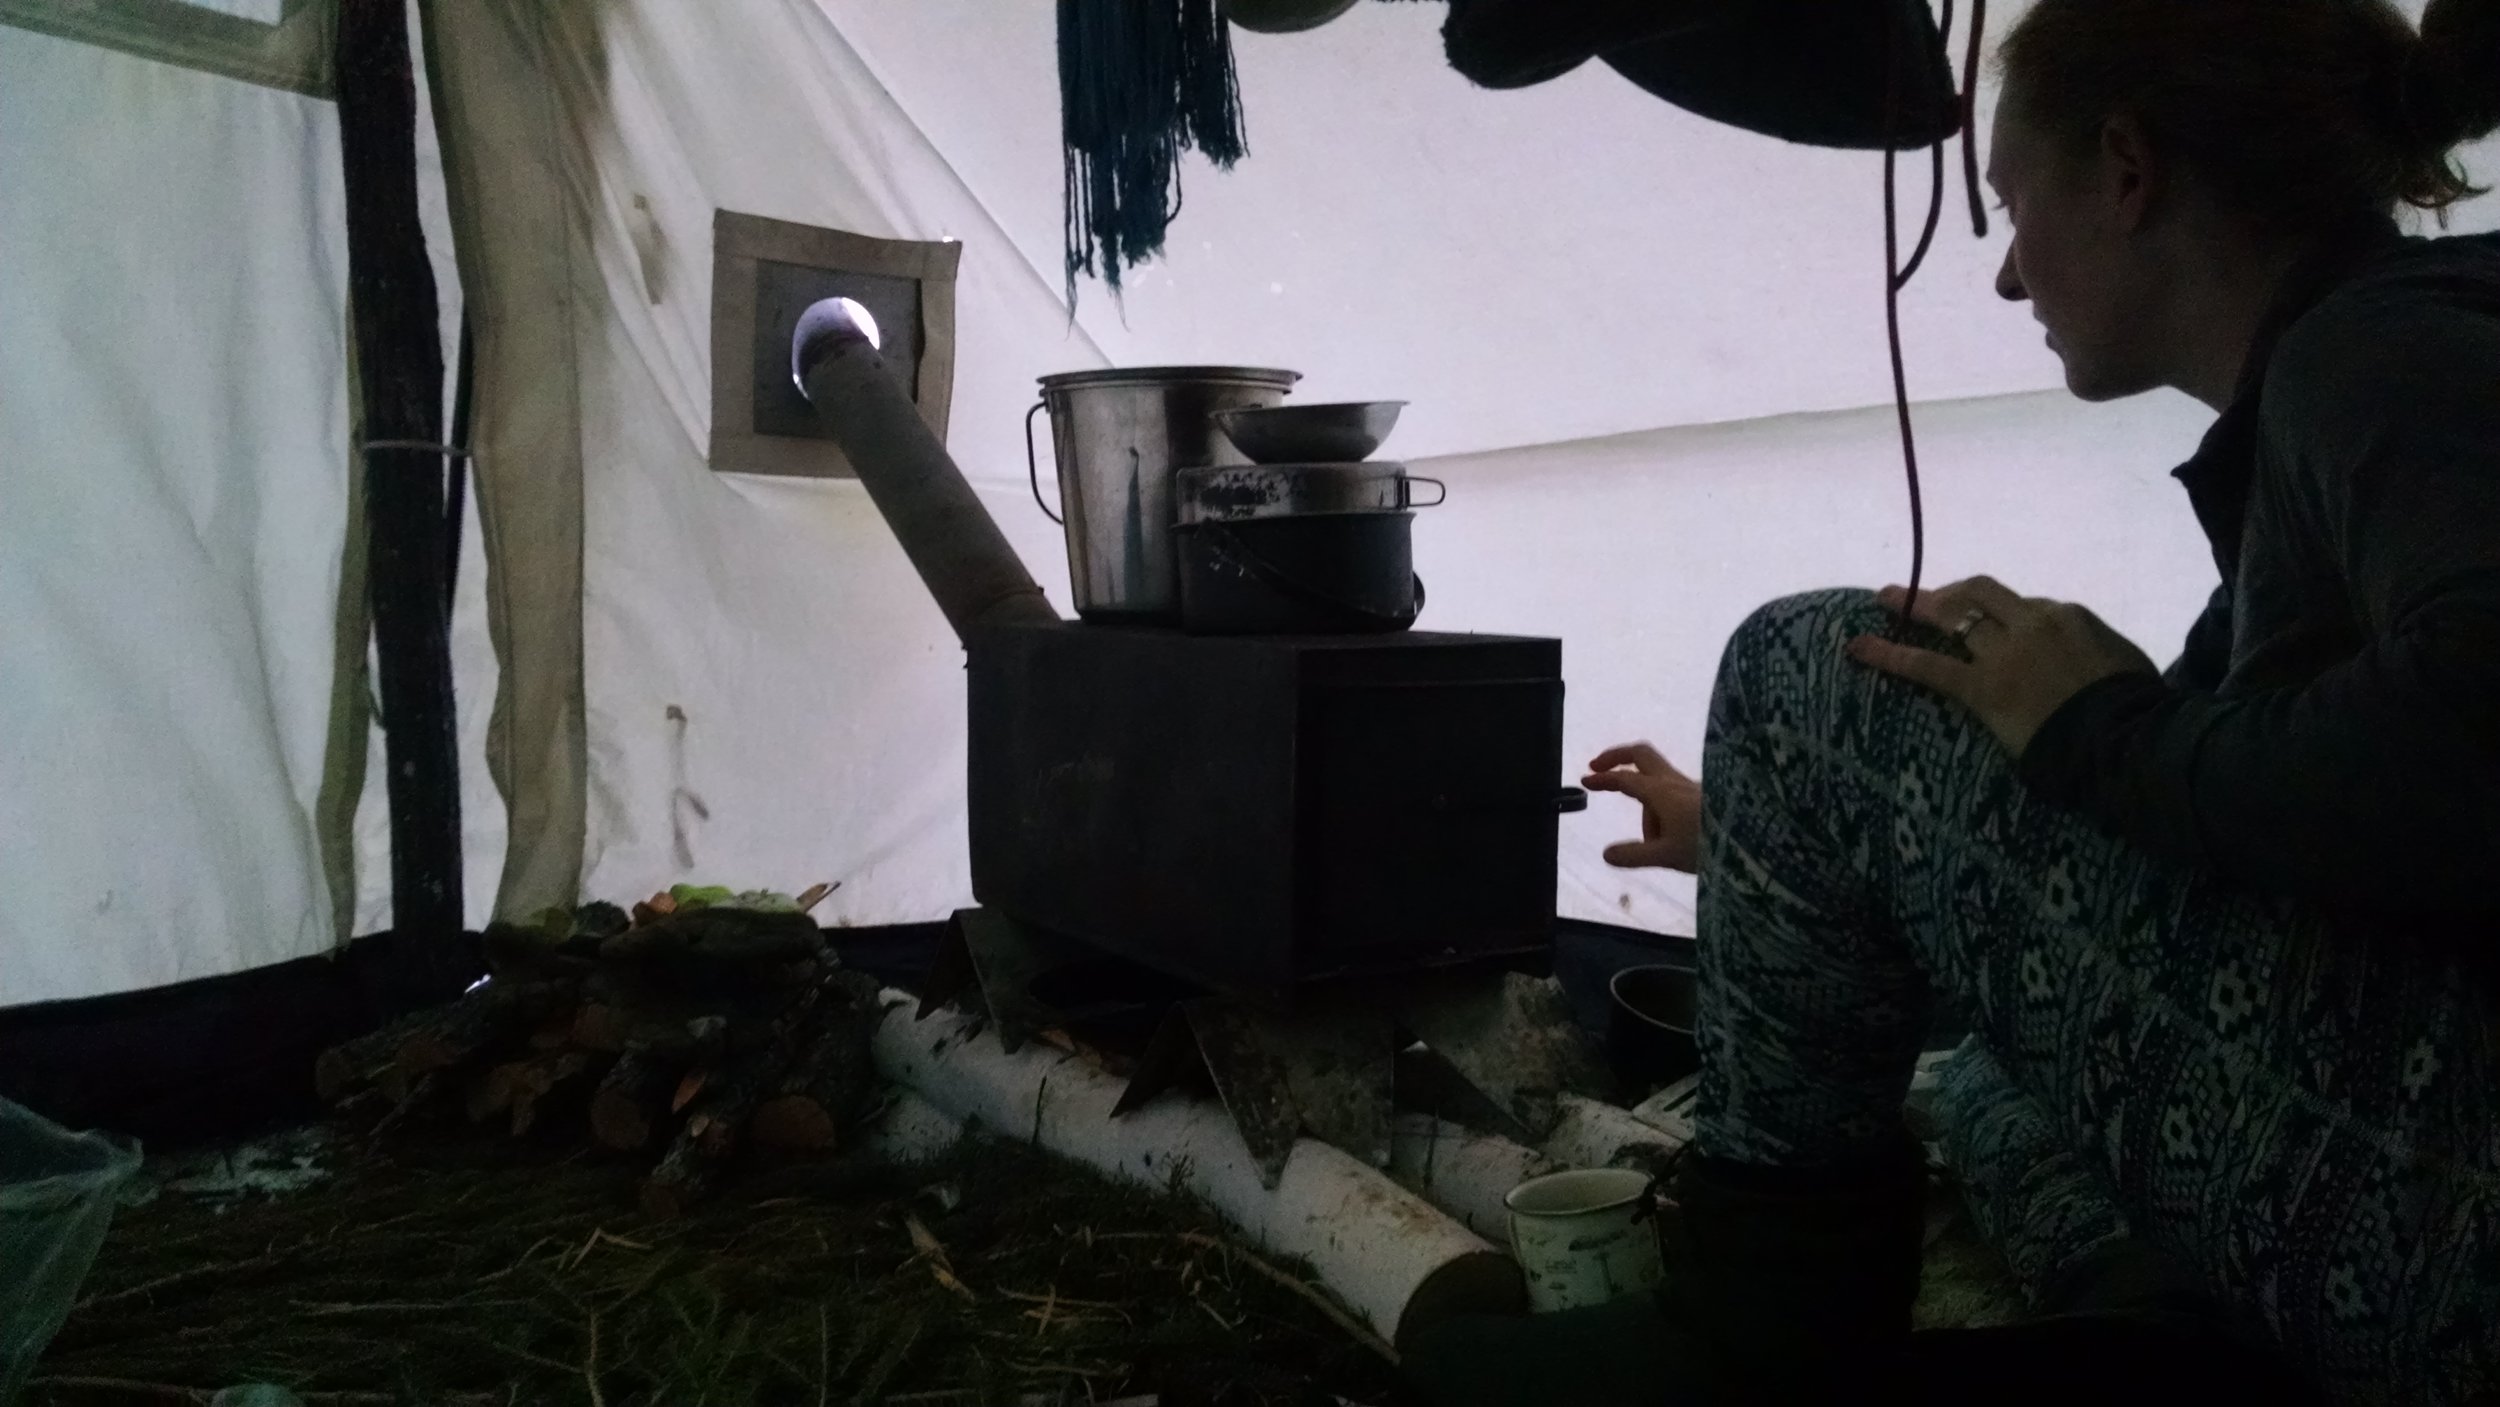
#2: A bomber woodstove setup:

woodstove setup

Lots to say here.

1. We like to make our woodstoves LONG ENOUGH (around 2 feet) to put the stovepipe sections, legs, and elbows INSIDE the stove.  This makes traveling much more compact, cleaner (less soot on everything) and safer (no squished pipe).  Longer stoves also give you more heat,  you have to do less work cutting your wood to fit, and mean you can cook in more pots for faster meals and endless hot water.  There are only 2 pots shown in this photo (1 bucket, 1 pot) but I can fit up to 5.

2. The triple log base for the legs- we cut green wood (birch in this picture) to put under the woodstove.  We use to do just two logs but if you do 3 you get MUCH less melting below the stove and things are stable and safe for days longer.  I also store my skillet under the stove to keep it out of the way and reflect some of that heat. 

3. Wire together to connect your stovepipe sections so they cannot separate on you. It is a really nice peace of mind thing.

4. Big stovepipe is better.  We use 4 inch pipe with most of our stoves.  3-inch periscope pipe (where it gets smaller and fits inside itself) doesn't draft well and soot builds up.

#3: Bright colored parachute cord to tie down your tent (and everything else)

red para-cord

Why bright colored? Because at some point on your journey, you or someone in your party will undoubtedly emerge from the tent early in the morning with a full pot of precious water, on your way to feed the dogs and ka-blam! You will trip over your own tent cord.  For this reason we use orange or red for every line except the one by the door, we use an arctic grade bungee there (it prolongs the life of the zipper).  Parachute cord is worth its weight in gold on the trail.  It can be used for a number of things: tying up sleeping pads, replacing dog lines, making a spare belt, hanging things away from dogs, tying up and caching meat, the possibilities are endless.  We bring a LOT of extra and always seem to use it.  Jenna always has some in her anorak pocket, right there with a fire kit.

#4: A thermos and instant soup for lunch

soup for lunch

The smile in this picture is fake but as soon as he sips that lunch soup it will be real.  We carry a gigantic Thermax thermos, the bigger the better, full of boiling water.  At lunchtime, we produce the thermos, metal cups (not insulated, metal warm your hands up), spoons and soup.  We get various instant dehydrated veggie soups in bulk and also bring miso and ramen (sigh, ramen really is the only instant noodle soup we can find).  Into the soup goes a variety of pre-cut sausage, cheese, dried tomatoes etc.  David likes re hydrating dried fruit in hot water too.  Lunch soup is the melting pot of our trips, it has saved the day many times.  We usually have enough water in the thermos to have tea when we get everything settled in camp, and that is a really nice thing.  The only rule is: DON'T PUT COFFEE IN THE THERMOS!  Use smaller sacrificial ones for that. 

#5: A washcloth

uphill climb

That's right, a washcloth.  As much as we try to not sweat winter camping, you end up getting gritty.  Having a warm pot of water and a washcloth to sponge bathe with at the end of a long day makes all the difference.


50 Shades of White

Tree People in Tundra

***  This post was written in 2015 and accidentally not published, here it is now!

David and I consider ourselves to be tree folks.  We use trees for many of our most basic needs: housing, heating, bowls and spoons, flooring, etc.  We feel safe and confident with trees around.  But when we got an e-mail from Arctic Wild LLC, a Fairbanks-based guiding company who had a client that wanted to walk from the Haul Road to Nuiqsut and needed some dogs to pull it off, we jumped at the opportunity.  While I have always loved the expansiveness of the tundra, the idea of doing a winter trip on the tippy top of Alaska, some 150 miles north of the nearest tree taller than my waist (no joke: Farthest North Spruce: Dalton HWY MP 235, Franklin Bluffs, this trip’s starting point: Dalton Hwy MP 383”) was an intimidating challenge at first.  As our friend Jeff so aptly described Galbraith Lake, just north of the Brooks Range “the world doesn’t make sense anymore.”

My unease with traveling in treeless terrain was about more than gear.  The first time I had spent on the Coastal Plain in winter was on the East side, on a trip up the HulaHula River with a friend from Kaktovik.  We were pulled in a giant sled behind a snowmachine across the 40 miles of coastal plain and my main feeling was that of disorientation.  Were we on ocean? River? I couldn’t tell which way was up.  It’s pretty white up there.

Old Dogs, New Gear

Its not just about aesthetics- our whole winter traveling setup is dependent on a good grove of spruce.  We cut poles to hang our wall tent from, use boughs to make a floor, tie our dogs to trees, and depend on the nearly endless supply of dead standing wood to heat our tent and cook our meals.  Traveling without trees meant we had to carry at least 150 lbs of gear that we don’t usually take: a big, heavy tent (Arctic Oven), fake logs (duralogs), a propane cookstove and fuel (which was actually really great).  We had to carry stakes that we would normally just make out of branches, had to pre-cut small poles to tie the dog picket to, and even carried a spare ski pole when we would normally rely on trees to fashion one if ours broke.  This gear would not fit in the dog sled.  Luckily, not having trees means you don’t have to mush dogs between and over them, so David made a sled we named “the barge”- 10 ft long and 20 inches wide, it rode between the dogs and our usual dogsled and was packed each day to the gills with all of our “tundra gear.” 

We did our best to prepare.   We bought a brand new GPS with topo maps (thus David’s transition from a man solidly in the “map camp” to a mildly obsessed “GPXpert”).  I practiced a GPS game of Marco Polo around town, learning how to follow the GPS.  The client wanted to walk from the haul road, some 70 miles to the village of Nuiqsut and to do so in the straightest line possible.  To make that trail, we had to take turns walking, skiing, or snowshoeing in front of the dog team, compass around our neck and GPS warm in pocket, picking tiny bits of reflected snow or tundra to walk towards and checking our position constantly.  When conditions got really white (20 feet or so of visibility, we let the dogs try their luck at going in a straight line and were amazed at the results.  For the first 30 minutes or so (until they get bored or distracted) they would plod ahead without a trail and go almost exactly, eerily, straight.  

Tuning Our Eyes

And so we plodded ahead, straining in the moist, coastal air to make sense of our surroundings.  With each day, my eyes grew more accustomed to the landscape.  I began to notice patterns in the wind and sun-shaped snow.  It became a fun game to scrutinize every dot of exposed tundra.  Without depth perception, it was hard to tell exactly how far away something was or exactly how large it was.  I once stopped and put a Bear flare in my pocket for what turned out to be an overly-active Goose (“it’s moving like a bird, but is that an arm? The black spot of a Polar Bear’s nose?”)  Another memorable bear sighting of David’s turned out to be a dirty chunk of snow expelled by an industrial vehicle on the road to meltwater (“It looks too big to be a Bear, its not moving…”) While our sense of up and down was certainly getting toyed with, our awareness was also growing.  On the trip back we saw Fox, Arctic Ground squirrel, hundreds of Ptarmigan, a Snowy Owl and all kinds of patterns in the land that we hadn’t noticed on the way out.

While the landscape was what some might call barren, over the course of the trip, we saw it come to life.  When we arrived in Nuiqsut we had just started noticing the migrating white fronted geese who were arriving alongside us, to the joyful anticipation of local hunters.  Soon they were joined by ducks, sandhill cranes, Canada geese and the always-present ones like raven and now (in mating season, we read) exceptionally fearless ptarmigan.  In truth, I don’t think I have ever seen so many birds in my life.  Ptarmigan chatter was absolutely endless, their alien-like voices echoed day and night.  Flocks of geese flew low and circled us.  In the two weeks of our traveling, we got to watch all sorts of life forms return to this rich tundra nursery and the celebration was a joyous one.  We wondered what on earth all the birds would do with all the snow, but when we reached the haul road we understood.  On both sides of the dirt and gravel road, a layer of dirt and dust sometimes 5 miles wide had accelerated the thawing of the snow and each side of the road was hosting a giant trough bird bath.  

Weathering the Storm

Luckily, while we had some very white days and some very blue days,  on the way there we avoided any major storms.  On the way back, however, we found one.  It was our first night on the trip back and we had made good progress, easily gliding over our own trail.  As we hunkered in for the night we noticed the wind picking up a bit, so we took some precautions, using the sleds as a windbreak for the dogs and guying out the tent with another layer of stakes.  Soon the wind grew into a full-on snow-flinging storm.  We went outside repeatedly to check on the dogs and unbury their pads and when we did we’d get blasted with so much snow that we were wet by the time we made it back into the tent.  It seemed highly illogical to travel in this weather, so we read every word of the Tundra Drums newspaper that we’d acquired in Nuiqsut as well as a Dan O’Neil book to stave off tent fever.  David did some snow sculpturing with the marvelous hard pack snow that we were melting for water.  He carved large cylinders to fit over the water pot and slowly melt in.  The next day was more of the same.  We let the dogs run around and warm up, but the idea of packing up and pitching the tent in this weather was not palatable.  Around 8pm, we went to check on the dogs and were stunned to see the storm lifting and a gorgeous sun dog blazing in the sky.  Taking this as our cue, we began packing up and made a break for it around 10.  Traveling in the cold wind was a little tough, and we appreciated our fur ruffs like never before, but were able to get through the storm to calmer country.  As is often the case in the north, the contrasts are what makes the landscape really beautiful.  We could read the storm on the snow as we traveled, seeing where it had struck and blow and where it had been calmer.  Good weather, in contrast to the storm, became a gift and we would gladly take what we got.  Amazingly, the dogs could still manage to follow our trail, although we often couldn’t see it.  As the sun came up around 3am we settled into a nice camping spot in a protected little valley.

Adjusting Our Clocks

Each night when I got up to pee I noted the time and lack of darkness- 1:00 still light, 2:00 still light.  It never- literally never- got dark.  We took advantage of this on our return trip when the increasing sunlight meant daytime temperatures were too hot for the fluffy dogs and too sunny for the Alaskan redhead to move without groaning.  After the day stuck in the tent for the blizzard, we adjusted to an evening travel schedule, moving from dinner time until around 3 am, setting up camp and going to bed by 5 am and sleeping until past noon.  Moving this way, we got to watch the sun set and rise.  As it was setting our shadows elongated over the snow until the landscape was small and our dark reflections were giants.  There was a feeling of calm in the 1-2am stretch, when the sun was in hiding but the light lingered and an incredible feeling of uplift when the sun started stretching back up for the day around 2-3.  

I should mention that it was also perhaps the best cross-country skiing I have ever experienced.  One big carpet of seemless, smooth snow.  You could go anywhere you liked on the wind-beaten terrain, no trails, no fuss. 

And so, slowly, the treeless world began to make sense to us the way a camera adjusts focus until an image is clear. A big thank you to Arctic Wild for giving us this wonderful job and being such great partners.  We can’t wait to pack up our truck next winter and go north again!   

IMG_1302.JPG

Moving the Dogs

skookum in sled

While winter is a the dominant season in Alaska, we do have 4-5 snow-free months each year.  What do the poor dogs do without snow?  Mostly summer is their time to play and re-charge.  For exercise in the summer we let the dogs run around with us one or two at a time. 

Ursa and puppy Bruce Lee explore the willow bar below our camp just after spring breakup.  Lots to explore!

Ursa and puppy Bruce Lee explore the willow bar below our camp just after spring breakup.  Lots to explore!

We also boat the dogs to various islands in groups of four to play and stretch their legs.

Dogs explore "sled dog island"

Dogs explore "sled dog island"

They like getting in the river to cool down and drink.

They like getting in the river to cool down and drink.

This works great...mostly.   Three of our dogs- Yawp, Eowyn and Bruce Lee enjoy swimming and if they see something particularly alluring, say a dead fish, they are apt to swim the river to get to the other side!

The dogs really like riding in boats, but to do it safely we need to tie them in so they don't all run to one side of the boat at the same time and flip it.

167A1621.JPG
dogs in boat

Especially clumsy non-swimming dogs sometimes get a lifejacket.

jenna and polar in boat

In addition to moving them around for fun and exercise, moving the eight dogs in the summer between our cabin in Fairbanks and homestead on the Tanana River is a logistical challenge.  Step 1: Load the cars into their dog boxes in the trailer and drive them to the river.  Here is an image of our old set up (left): dog box on truck. That worked well for years but it gets hard on the dogs to jump all the way up into the boxes and hard on the truck's suspension.  Our friend Anita gave us a trailer which David converted into a dog trailer (right).  We really like this system because it gives us more space in the truck and is easier for the dogs to get in and out of.

Old system: Dog box on truck.

Old system: Dog box on truck.

New system: Dog trailer pulled by truck.  2 sleds can be mounted on this as well as a storage container.  It now has 8 boxes.

New system: Dog trailer pulled by truck.  2 sleds can be mounted on this as well as a storage container.  It now has 8 boxes.
While the boxes are made for one dog, sometimes two try to jump in the same box!

While the boxes are made for one dog, sometimes two try to jump in the same box!

Step 2: Drive to the boat launch and load the dogs into 2 boats.  Tie them in!

all dogs in 2 boats

The dogs really enjoy the ride downriver, lots to smell.

alex and dogs in boat
eowyn steve boat

Of course, we can't always travel the river.  During fall and spring when the river is freezing up or breaking up we have to take dogs on our overland trail out.  This year we left on October 17 to go to town and get a puppy.  We pulled the boats out of the water but hadn't gotten snow yet.  Our options were to walk dogs 2-3 at a time, some on a leash, some running free but this would take multiple trips and we had heavy gear to get to town..so we hitched them up like it was winter. 

IMG_20171017_112609739[1].jpg

It worked great on the uphill trail but there was no way the break would work on the downhill.  We released the dogs a few at a time and Jenna put them in the dog box at the bottom of the hill.  David then mushed down with just Eowyn pulling.

Moving around 8 dogs is a lot of work in the summer, but having them with us is worth the effort...especially in winter.

chandalar shelf
PHR_6199.jpg

Cabin #4: Foundation

There are a lot of clichés about "a good foundation." After building our current home on rocks (99 of them to be exact, lovingly lugged up the bluff 2 at a time by Jenna), we realized that if we wanted to build a cabin that would last, the foundation was going to be a beast of a project.  We wanted to do a root cellar under the cabin, so in order to not freeze the cellar, the cabin had to be built on the ground rather a floating foundation.  We wanted to keep the logs off of the soil but have the heated space start at ground level so we have the warmth of the ground (rather than -40 degree air) under the cabin.  In theory, this will save us on cost and materials in floor insulation and the warmth of the cabin will keep the root cellar from freezing.  There are a lot of sentences in that paragraph that begin with “we want.”  This may be why this became such a headache.

But back to the project- the first thing we did was to install the root cellar walls.  We built these the previous fall out of pressure-treated plywood.

David screwing the walls into the root cellar.  We used pressure treated plywood to line the root cellar and assembled this in 4 pieces, it was heavy.

David screwing the walls into the root cellar.  We used pressure treated plywood to line the root cellar and assembled this in 4 pieces, it was heavy.

So root cellar, check.  Once the root cellar was secured, we built a form to pour the concrete into. David built this creation and the puppy spent a lot of time sleeping in it.

Puppy Bruce Lee (6 months in this picture) sleeping in the founcation form.

Puppy Bruce Lee (6 months in this picture) sleeping in the founcation form.

We debated concrete mix vs. local gravel and Portland cement.   We could buy concrete mix in town that comes from the Tanana River and snowmachine it out.  David did many a load this way on the last legs of snow and got help from our friend Glenn as well, but with every re-calculation we seemed to need MORE concrete and inevitably, it was spring.  The nice thing about spring is that the water level post-breakup is generally very low, exposing all sorts of gravel.  We decided to get the rest of the gravel from the river and buy bags of Portland cement in town and boat them out.  This process quickly became quite the workout plan.  Here is how it went:

Step 1: Boat to the island right across from our place, we call this Gull island because glaucous gulls nest here and it is gravel and sand rich.  Find a nice gravely spot.

Step 2: Shovel gravel through screen to sort out rocks that are too big.

Step 3: Shovel the pile of sifted gravel into buckets, move the buckets into the boat.

gravel in boat

Step 4: Boat back to the base of our bluff, move the buckets into the 3-wheel cart, run up the bluff and run the winch.

Step 5: Unload the winch and empty gravel into bin.  I don’t want to count, but this process involved lifting a bucket of gravel may a time.

The bluff that we're building on.  You can see the track where we've been pulling and the cart on the bottom.  It actually is steeper than it looks in this picture.

The bluff that we're building on.  You can see the track where we've been pulling and the cart on the bottom.  It actually is steeper than it looks in this picture.

So gravel, CHECK!

David and puppy Bruce Lee relax in the gravel bin.

David and puppy Bruce Lee relax in the gravel bin.

Enter our friend Heike, who came out to help us for the weekend.  On the canoe down, Jenna discovered two new facts about her friend: she was formerly a structural engineer and worked at a concrete plant!  Friends are handy.  She took a look at our plans and made some really helpful suggestions.  Now we needed MORE concrete to make additional 3’ x 3’ corner pads/footings.   And we needed to dig holes to make forms for the pads.  Like I said, foundation = a lot of work.  The main thing that she helped us with was calculating the weight-bearing capacity of the ground that we were about to build on.  Silt, it turns out, is not as solid as we thought (“like Jello” was Heike’s phrase).  We found come calculations that silt can support +/-2,000lbs/ft2.   We figure that the two-story log cabin will weigh something like 40,000-60,000 lbs with (hopefully) 75%-100% of that weight resting on the corners.  With the additional corner pads the foundation now has 9-12 ft2 of surface area in each corner,  which should support 18-24,000 lbs… plenty.

We worked together to pour the corner pads.  Each took about 16 bags of concrete mix.  We mixed them 2 at a time in a wheelbarrow. 

the footings

So pads, check. 

Then we called in the big guns (friend help) and got 4 people (thank you thank you thank you Heike, Jeff, Heather and Mike) to come out for the big pour of the rest of the foundation.  With all that arm muscle, we did it in a day. 

The process was pretty easy. 

Step 1: Suspend rebar in the form.

Step 2: Mix gravel, portland cement, and water in wheelbarrow to desired consistency (just like baking).

Hanging the rebar in the form.

Hanging the rebar in the form.

the ingredients
Heather working her abs while David practices...?

Heather working her abs while David practices...?

David and Jeff mix loads of concrete in wheelbarrow.

David and Jeff mix loads of concrete in wheelbarrow.

Step 4: Get the most attention-to-detail person in your crew to tap, vibrate, and smooth the concrete in the form.  Cover with plastic.

Heike smoothing the top and "vibrating" it even.

Heike smoothing the top and "vibrating" it even.

Step 5: Drink! After a long day of mixing and pouring concrete, we celebrated with scotch and hot tubbing to celebrate "a good foundation".

booze toast

Cabin 3: Digging the Hole

When we decide to build a cabin, I foolishly thought to myself "great! no digging!" Unlike the sun lodge, which is dug into the hill, I presumed the cabin would be made with more log and less shovel.  Think again.  This fall we worked on preparing our building site.  This involved:

1. Clearing the site.  The cabin will be 20' x 20', so we cleared a 40' x 40' area in the forest.  We cut down trees and stacked them into future firewood piles, used our new toy- a portable winch to pull out the tree stumps, then chopped the rest of the roots out by hand.  We removed the top layer of sod and stacked it on the side for the future green roof.  Then, we removed even more soil, digging down to firm loess along the perimeter where the logs will rest.

But David the level master was not satisfied with the silt we dug to.  We decided to dig our root cellar in the center of the cabin and use the really nice silt and shale that we removed in making the cellar hole to create a level area for the cabin. 

Once we got a few feet deep we set up a tripod and pulley system to get the buckets of silt up.  As we dug down 8 feet we encountered different layers of silt and even some rock (quartz and shale).  We spread and tamped this material to create a level foundation.

The final step in the root cellar was to reinforce the walls.  We used pressure-treated plywood to make a reinforced "box" to line the root cellar and stapled spare tarps to make a vapor barrier.  No pics were taken of this as we were racing the snow!  The root cellar is 6' x 6' and 8' deep.

Cabin 2: Barking the logs

This spring we rushed back from a traveling and hunting in the Arctic with an important task in mind-to protect our logs.  As summer sets in, numerous insects were hoping to call our pile of cabin logs their new home.  We had a bunch of logs that looked like this...

That we needed to look like this...

"Barking" the logs is the process of roughly removing the bark so that the wood can dry quickly and without becoming damaged by insects or rot. 

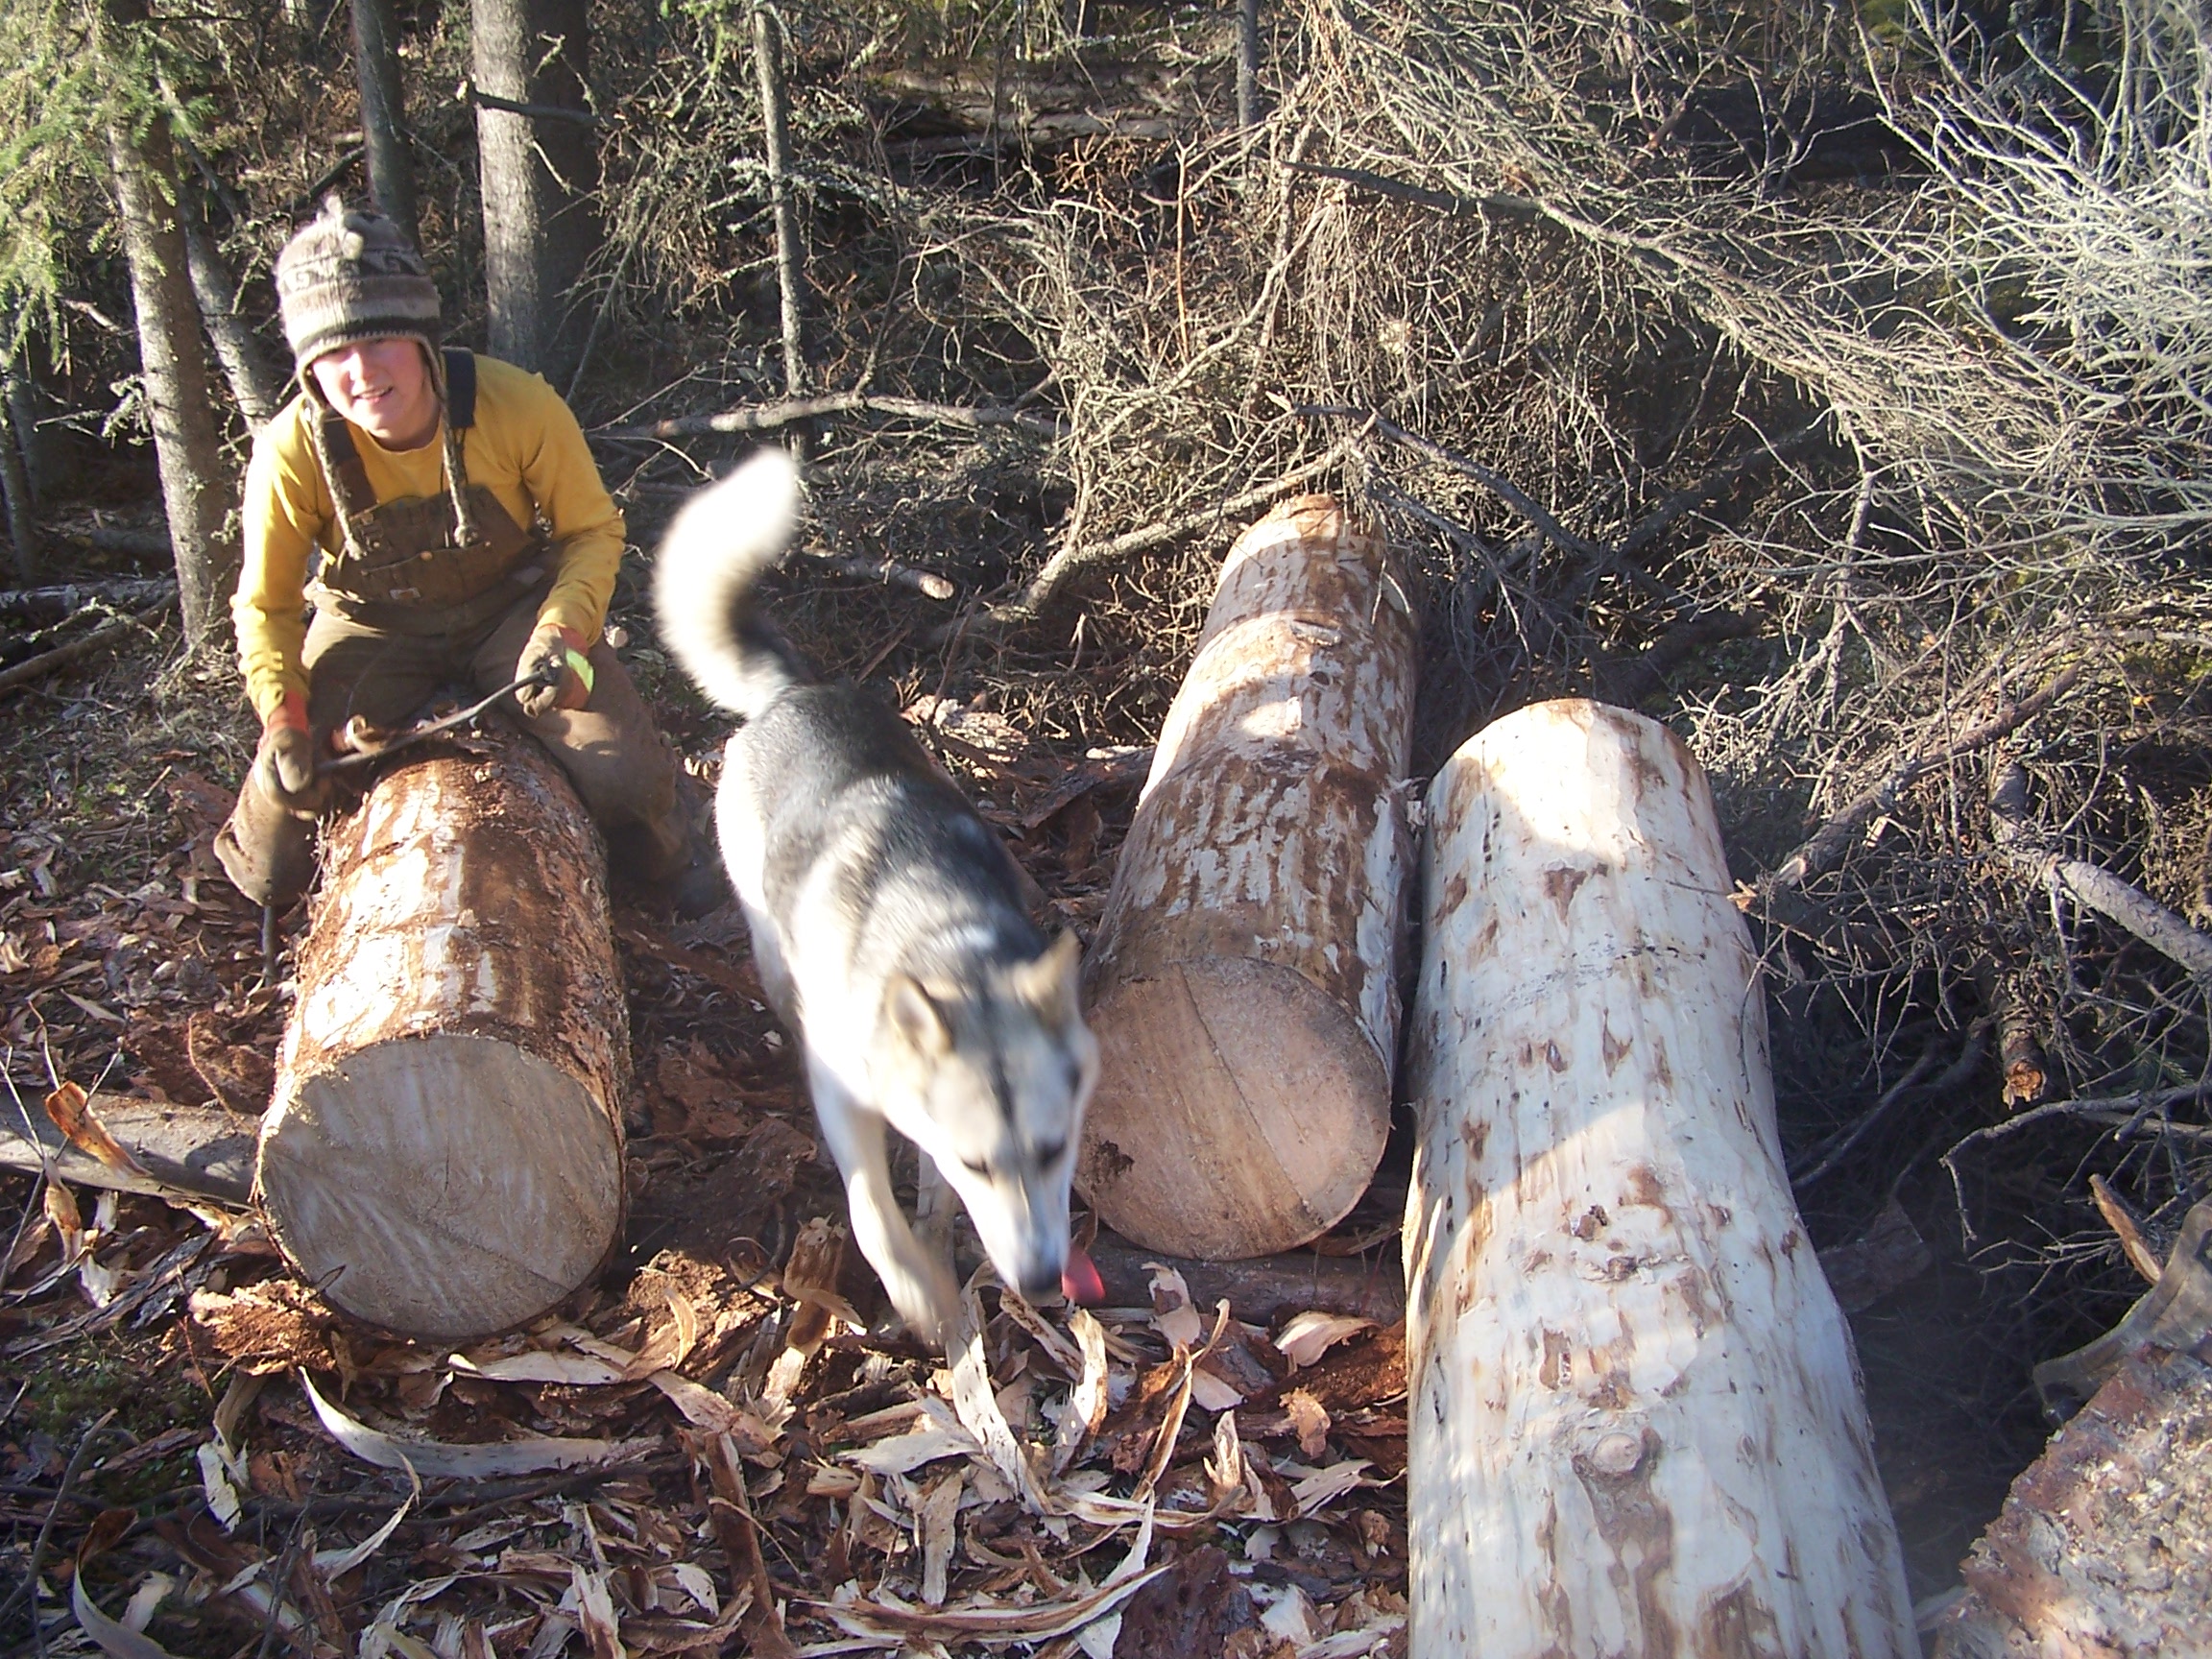
Luckily, we are no strangers to getting bark off of logs.  There is a magical time window in the spring when it is easy to peel green logs.  Using mostly shovels, and sometimes drawknives, we were able to shovel, peel, pry and push the bark off our logs.  Check out the video above to see how it works.

IMG_20160508_121321648.jpg

Once the logs are barked we rested easy, knowing that they would spend the summer drying safely. 

Note to the wise- It is a bad idea to sit on the logs while you are peeling them.  Jenna knows this, but did it anyways, finally doing in some already very patched-up pants.

IMG_20160508_123959497.jpg

Cabin 1: Logging

This winter we decided to begin building a log cabin at our Tanana River homestead.  I say begin because unlike our fish house, sun lodge, or wall tent cabin, this one will take longer than a month.  In order to build where we want to, we'll need to cut trees, drag them 1/2 mile to our location, peel the bark off them, let them dry for a year, notch them, and assemble them into a cabin.  Plus things like roofs, floors, doors, etc.  We're envisioning a 20 x 20 ft 2 story cabin.  You've got to start somewhere, so this is what we did this winter.

Stage 1 is gathering the materials (24 foot, 12-16inch diameter spruce logs) to our building site (the bluff 1/2 mile down the hill). These logs were a LOT bigger than the ones we used to build the sun lodge and moving them was a challenge.

Step 1: Finding the right trees- We were looking for trees that were really straight, the proper diameter, close to our main trail, safe to take down, not rotten, and pleasing to David's sense of aesthetics.  It took a while.

Step 2: Felling the Trees- This was the fun part.  We used a chainsaw, wedges, and an axe.  Windy days slowed us down a bit.

cutting down trees

We eventually wizened up and bought a second chainsaw.  Now that we didn't have to fight over the saw our speed and relationship improved.  Jenna used the Shindawa and David got a new Stihl.

Step 3: Prepare the trees for hauling- Once the trees were down we used axe and chainsaw to limb them and then used a block and tackle, rollers, a cant hook, lever pole, and the power of prayer to move them into a reasonable position and haul them back to the trail.  Some of the trees had rot in them, which we cut off (photo on right).

cutting off rot

Step 4: Hauling the logs- We started using our dog team, a log hauling sled, and attaching the dogsled behind the log for a brake.  Our friend John Manthei came out and gave us some tips on sled modifications that greatly improved our process.

David came up with the "death saucer", a green birch sled that we placed under the rear end of the log that greatly (too much) speeded up hauling so we could do it with 2 dogs, not 6. Frozen green birch slides like greased lighting, in case you were wondering.

dog hauling

We progressed to using snowmachine to haul a log down to our cabin site.  Praise the lord for the iron dog.  This allowed us to haul with one person so the other person could prepare the trees in the meantime.  Jenna, who really really hates to waste things, ran around like a banshee between hauls making firewood stacks.

Step 5: Rolling logs into place on the storage rack-  We also had to clear an area for the log storage.  They should dry quickly at this sunny cabin site.

rolling logs

Viola! A pile of logs. Now for steps 6-200....

david, jenna, polar, logs

Building the Denali Pink cabin

In the fall of 2014, we had two wonderful young people named Jasper and Pip stay with us.  They helped initiate the building of our second structure- the "Denali Pink" wall tent cabin.  

Note the bucket of moss in the foreground,used for chinking the cracks between the logs.  You can also see the birchbark sheets that are keeping the logs from direct contact with the earth.

Note the bucket of moss in the foreground,used for chinking the cracks between the logs.  You can also see the birchbark sheets that are keeping the logs from direct contact with the earth.

David milled out 4"x12" beams for the basewalls out of several dead standing white spruce with his Chainsaw mill.  He used hand tools to make the dovetail corner notches.  The boys leveled the spot and carried up gravel from the river to keep the wooden beams off of the dirt. They also gathered moss and used it to chink the cracks.

Several dozen large sheets of Birchbark, stored flat under weight, so they don't curl.

Several dozen large sheets of Birchbark, stored flat under weight, so they don't curl.

We used large sheets of birchbark to protect the wooden walls from the earth that is backfilled on 3 sides.  The frame was made from straight, dry spruce poles, which Jenna and the boys harvested and peeled in the forest nearby.  

denali pink structure
frame

The Denali Pink frame fits our 10 x 12 wall tent.

tent on denali pink

To save the tent for traveling use, we decided to use 12oz. untreated canvas to cover the structure.  This was about 1/4 the cost of the tent, and is arguably nicer for several reasons. The roll of canvas was 48" wide, so by making the rafters and frames 24" or 48" apart, we easily stretched and tacked the canvas to the frame without much wasted fabric.  Unlike draping a tent over the frame, this skin is drum tight and cut-outs for the doorway and windows are easily and neatly made.

David the "Human Ladder"for Jenna so she can reach the peak to lag bolt the second ridge pole in place.

David the "Human Ladder"for Jenna so she can reach the peak to lag bolt the second ridge pole in place.

On top of the main frame are three long ridge poles that keep the fly a few inches above the canvas, allowing it to breathe and creating a dead air space for a little better heat retention.

A handmade barrel stove heats the place with gusto.  Over the winter we put in a window, door, floor, desk and shelving unit. 

And viola- a simple, breathable, inexpensive structure made from mostly local materials.  We love this cabin because it has some of the benefits of a tent- bright, quick to heat, as well as some of the comforts of a cabin-  window, door, floor, hooks, bed and stove.  Much to David's dismay the name "Denali Pink" (coined by Jenna) has stuck,  but one can't argue that Denali can be seen quite clearly at times from the doorway.

Our dogs eat salmon

Boat full of fish!

Boat full of fish!

We feed our sled dogs a mix of chum and coho salmon caught in the Tanana River.  They're hungry puppies, and the fish this far upriver are not fatty enough to supply all of the dog's nutritional needs so we supplement the fish with fat and rice.

david checking net
set net

We primarily fish with 4 and 6 inch set gill nets.  We check the net with our riverboat or canoe.

David, Jasper and Pip cut fish in the river on a hot day.

David, Jasper and Pip cut fish in the river on a hot day.

We start fishing in late August and keep going until the river starts flowing ice.  For the first few weeks if the temperatures are warm we cut the fish to dry and hang it in our smokehouse.  We keep a smoky alder fire going in the fish house to keep flies away and help the fish dry so they are preserved for winter use.  We cut fish in many different ways with homemade knives.  When we are cutting fish to dry, the dogs feast on cooked up fish guts and eggs.    We cut the largest fish in a special way so we can tan their skins.

Chinook salmon tlabaas and chum strips

Chinook salmon tlabaas and chum strips

A large chum salmon cut to save the skin.

A large chum salmon cut to save the skin.

We also pick out some fish to dry for ourselves as salmon strips or freeze as fillets to eat during the long winter.  When cutting strips to dry, we choose the nicest fish and carefully slice them into many strips, brine them, and hang them in the fish house to dry for a few days.

David with some fish strips.

David with some fish strips.

Fresh frozen whole whitefish 

Fresh frozen whole whitefish 

Once it gets cold enough (consistently freezing at night), we can hang the fish to dry without cutting and scoring them.  We call these whole fish.  This is how we prepare the majority of the dog fish.  It is much easier than drying them and allows us to keep all of the guts and moisture in the fish for canine consumption.  All we have to do to cut "whole fish" is slice a hole in their backs so we can hang them on sticks for storage.  In a good season, we can provide enough fish to feed our dogs (and ourselves) salmon all year long.

Top left quadrant is dry fish, all others are whole fish.  Skookum the dog is exercising great restraint.

Top left quadrant is dry fish, all others are whole fish.  Skookum the dog is exercising great restraint.

hanging fish
the dogs haul their own food.
cutting fish to cook

Staying 98.6 in -40

Disclaimer: This article addresses some things we’ve learned from traveling in very cold temperatures.  These temperatures are not necessarily the temperatures we take clients out in.  For our guided tours we pick locations and times of year that allow us to travel more in the 20 degrees above to twenty degrees below range.  We do, however, live in the interior of Alaska and on our own trips like to experiment with colder temperatures, or whatever Mother Nature provides.

david mushes the dogs along the much cooler than everywhere else Tanana river near manley alaska

david mushes the dogs along the much cooler than everywhere else Tanana river near manley alaska

When moving outside in the 40 below zone, it feels like your body is a precarious little bubble of warmth in a landscape of cold.    By traveling I mean going from one location to another, when you’re outside for 12 or so hours a day and not darting back and forth from a heated cabin.  It’s a glorious feeling when you’re underway in a landscape and your body is producing and pocketing its own warmth.  And traveling in the cold comes with all sorts of special treats.  For one, the colors look different- more chalk-like as if someone sketched the mountains and the rivers with a silvertip pen.  Cold almost always means clear, so you tend to see more northern lights.  Cold also has its own sort of weather pattern- its constant.  Cold rarely combines with wind in the interior, and -40 is too cold for snow.  If there were clouds up there, they would probably raise the temperature. 

I get the feeling that people who say that anything below -20 F is pretty much the same don’t spent much time outside in anything below -20.   There are lots of differences between -20 and -30 and -30 and -40 and so on.  One thing I learned on this past trip about the difference between -30 and -40, for example, is that at -40 when you snap off spruce boughs to make camp they shatter a bit.  Having wooden skis has taught me the vast difference between trudging at 40 degrees, gliding at zero and trudging at -40. Wood, plastic, metal, they all work differently at different temperatures, so when Alaskans obsess about the temperatures, we’re not always showing off, we’re figuring out what to wear and what sled to take.   I practice telling the temperature by which part of my face the air bites.  Nose, cheeks, eyes, it’s all different. 

Jenna all bundled up

Jenna all bundled up

Keeping that bubble of warmth requires a lot of self-awareness.  If you’re out all day you can’t afford to not put on another layer when you need to, can’t get too hot, and can’t lose any clothing.  It’s an art learned with practice.  I (Jenna) am writing this article to share a little of what I’ve learned.  We’re not racers or mountaineers, but we do stay pretty safe and comfortable and enjoy winter.  There is always more to be learned and I welcome your suggestions and thoughts.  Without further ado…my top 5 tips on staying 98.6 in -40.

When David and I pulled into Manley the thermometers were reading -45.  I needed to work on my eyelash frosticles.

When David and I pulled into Manley the thermometers were reading -45.  I needed to work on my eyelash frosticles.


1. Fight the frost!

In -20 F and colder temperatures, your breath quickly freezes around your face, causing frost to form on hair and clothing.  While a frosty face may make for an “epic” looking photo, the reality is that when you’re outside for 12 + hours, frost on your clothes is a bad deal.  After a few hours, frost can clog your facemask, turning it from something soft and warm to harsh and cold.  It becomes uncomfortable on your eyelashes and if you have a mustache, clearing frost can cause you to chap your lips.  It is important in cold temperatures to periodically clear your face of frost.  In -20 and warmer, a handkerchief works fine, colder than that and it really helps to have a small towel or washcloth in your pocket.  On our last trip, David and I cut up an old quick dry camp towel and that worked wonders.  It is nice to have this on hand in an outer pocket so you don’t end up just transferring the moisture to your mitts or whatever else you use to clear frost.  For the bearded types, David highly recommends what I loathingly refer to as a “goat man” beard- trimming your mustache short and keeping the rest of a beard at an inch or two.  This lets you keep warmth on your chin without chapping your lips.  Fight the frost!

A lunchtime fire- Rejuvenating!

A lunchtime fire- Rejuvenating!

A takedown fire- very handy!

A takedown fire- very handy!

2. Make Frequent Fires

I live with fire almost every day, but I never appreciate it more than when it’s really cold out.  On this last trip we made fires at every opportunity.  Having a fire is the difference between taking a rejuvenating break and a painful, rushed one.  Fires are easy to make provided that you keep a fire kit with matches, candle, and some birch bark on hand.  We carry such kits in the pockets of our anorak and the sled bag, so they’re always close by.  For lunch we choose a spot with close-by easy to break firewood.  You don’t have to get out an axe to have a warm fire, a small one with hand-broken pieces of alder, willow or spruce works fine. 

The hardest part of winter camping for me is usually untying the wall tent and packing the sled once the woodstove is removed and dumped.  On a recent trip, David went up three notches in my book by tossing our extra firewood on top of the ashes when dumped the woodstove.  This way we had a happy fire to warm our hands as we completed these tasks.  This allowed us to dry our mitten liners before leaving camp as well so we hit the trail already in warmth surplus, not deficit.

Beaver mitts with deerskin and sheepskin liners.  Fox and wolverine ruff, marten hat.  All made by David.

Beaver mitts with deerskin and sheepskin liners.  Fox and wolverine ruff, marten hat.  All made by David.


3. Fur is Good, Fashion is Optional

For true cold temperatures, there’s nothing that beats fur clothing.  The most important items to keep warm are your head, hands, and feet.  David makes most of ours from animals he has trapped.  Since we make the gear, we can design it to do what we like.  Very high on the list of things we like is clothing that comes apart easily so we can hang it in the wall tent to dry.  For example, he made me mittens that have fully detachable sheepskin liners and beaver, canvas, and smoke tanned leather outers.  They are easy to separate and turn inside out.  Another item I can’t say enough about is a canvas anorak with a fur ruff.  This breathable but windproof outer layer keeps you snug and warm, does wonders in the wind, and dries easily.  Under the anorak we wear layers of thrift store wool sweaters for warmth and insulation.  On the bottom I like wool long johns, fleece pants, down pants, and then wool pants if its really cold, topped with canvas pants if its windy.  All of this layering means that your clothing has to be big and baggy.  It might not be an image out of the patagucci catalog, but we stay warm when it counts.

David eating lunch- ignore the funny face and focus on the neatly organized grub- we're trying tins for this next trip!

David eating lunch- ignore the funny face and focus on the neatly organized grub- we're trying tins for this next trip!


4. Do things Fast and keep essentials handy

When it’s cold, my natural reaction is usually to try to sneak deeper into my clothes and endure.  I have to keep on myself to stay active, move quickly, and remember that work = warmth.  After riding the runners and running all day, it’s amazing how much warmth I can get from doing camp chores like gathering spruce boughs and firewood.  It is important to know what chores need to be done and just keep moving. 

It seems like most of the difference between tasks seeming easy and impossible comes with good preparation.  Whether it’s cold or not, I try to travel with “extra” and essential items quickly accessible.  I keep 2 pairs of spare wool liner gloves, an extra face mask, chap stick and a fire kit in the pocket of my anorak, so I can easily change into spare items throughout the day.  When it’s really cold, even simple tasks like digging something out of the dogsled can become daunting, so we work hard to keep lunch, the thermos, dog coats, lines, camera, puffy down jackets, spare mitts and other items that we expect to need during the day organized and in containers that are easy to open, at the top of the sled bag.

This goes for food as well.  While the idea of slicing cheese sounds very appealing on a summer’s day on a gravel bar, the idea of using a knife and baring your hands is not so ideal on a cold day.  For really cold weather its best to cut everything- cheese, butter, etc. into bite-sized pieces ahead of time and pack them in a container that is easily opened.  I draw a line with some foods: banana bread is delightful when it’s above -20 but a chilly brick when it’s colder…dipping it in hot tea is nice.  Cookies, crackers, dried things are easier to eat in the cold.  A hot thermos and hot soup is a must, just don’t tighten the cup lid or it will freeze shut and you’ll have to bang it to break the ice loose.

manley hotsprings, yum!

manley hotsprings, yum!


5. Find some hot springs

If you’re going to spend some of the day really cold, you need to balance it by spending some of the day really warm and comfortable.  On the last two trips we did, we accomplished this by visiting hot springs, which is a tried and true tactic.  But on a day-to-day basis, we plan on being very warm and comfortable in the tent at night.  David made our wall tent with short walls so its peak is about 5’5 but most of the inside is just right to sit in.  This keeps the heat concentrated.  We also made a woodstove to fit a 4 inch stovepipe, which really lets us keep roaring fires as opposed to 3 inch pipe, which makes for less draft and clogs quickly with creosote.  While we seldom cut enough firewood to burn all night, we do keep fire starting materials right by the stove so we can make a fire in the morning while still in the sleeping bag.  Oh yes, and we carry 40 below rated down sleeping bags.  If you have to spend money on something, get a good warm sleeping bag. Good sleep in a warm bag keeps you happy and relaxed so you can get up and keep your warmth all through the next day.  Or, you know, you could move somewhere warmer :)

hotsprings 2


Building the Sun Lodge

At the end of September in 2013, we decided that there might be alternatives to living in a wall tent for another winter.  The berries were picked, fish mostly hung, and we had gotten a wonderful moose close to home, so we actually had time to consider a building project.  David had made several cabins and earthlodges before, and keeping in mind the late season, he created a design on paper.  It would face due south, for passive solar gain, and be dug deep into the hill, to take advantage of the relative warmth of the earth.  The roof  would be covered in sod for insulation. Building in October in Alaska is risky business.  We knew that any day the river could start freezing up, the ground could freeze, and snow could cover our plans.  Nevertheless, we started out by gathering materials that we needed the boat to access. 

Unloading freshly-milled boards for table and shelves just in the nick of time.

Unloading freshly-milled boards for table and shelves just in the nick of time.

The boat often looked more like a raft!

The boat often looked more like a raft!

Step 1: Gather materials.  Mostly, we used sticks and stones.  We boated along the river and collected 99 flat rocks on which to rest the vertical poles and to create a fire hearth area.  Next, we harvested about 12 large dead spruce logs and 150 mostly green spruce poles.  All materials were harvested close by and lugged on our shoulders.

Jenna and minto model the very large pile of small poles

Jenna and minto model the very large pile of small poles

Jenna hauls rocks up the 60-foot bluff.  99 times.

Jenna hauls rocks up the 60-foot bluff.  99 times.

Step 2: Process materials.  As in, peel the poles.  All the poles.  We listened to a lot of public radio during our daily peeling sessions.

David split this large spruce with a small chainsaw.

David split this large spruce with a small chainsaw.

Jenna peels some of the larger front wall pieces.

Jenna peels some of the larger front wall pieces.

Step 3: Dig a hole.  David described it as equivalent to digging twenty outhouse holes. The footprint of the lodge is about 14' X 18'.  The back wall of the hole we dug was about 5.5' tall.   Luckily, the soil is loess (wind blown silt) and the largest rock we encountered the whole time was smaller than a penny.  We sharpened our shovels and got to work.

David takes a bite out of the silty soil.

David takes a bite out of the silty soil.

At its deepest, the hole was just over 5 feet (Jenna is 5'5)

At its deepest, the hole was just over 5 feet (Jenna is 5'5)

Step 4: Build the frame.  We dug holes and buried our 5 big post poles about 5 feet deep.  We did a LOT of tamping to get the powdery silt to compress and secure the posts .  We cleverly scheduled our digging so there was still solid high ground to stand on in order to get the beams on top of the 8 and 12-foot tall posts.  

The frame!

The frame!

Step 5: Lay on the poles! We did this in a day and it felt great.  David added additional braces inside for strength and a frame for the stovepipe to exit the cabin.  We used 12" spikes to hold the frame together.  We also fitted large logs to make the front wall and David framed out the window and door.

fort sun lodge!

fort sun lodge!

David exercises good balance while nailing in spikes

David exercises good balance while nailing in spikes

Bracing and "chimney box"

Bracing and "chimney box"

extra braces for strength.  Note the small burl on the wall.

extra braces for strength.  Note the small burl on the wall.

Step 6: Unroll the vapor barrier.  If we had planned ahead we would have used birch bark panels for a vapor barrier but we did this one with a very durable pit liner from Alaska Tent and Tarp.  This accounted for $750 of the just under $1000 we spent on the project.

Hauling logs up the hill method 1- muscle powered.

Hauling logs up the hill method 1- muscle powered.

Hauling logs up the hill method 2- block and tackle, comealong, and old dogsled.

Hauling logs up the hill method 2- block and tackle, comealong, and old dogsled.

Step 7: Back fill and cover it with dirt!  At this point, it was getting pretty chilly so we used dirt leftover from digging the hole and didn’t get to covering it fully with sod until spring.

The lodge pre-window and door.

The lodge pre-window and door.

Step 8: Finishing touches.  We put in recycled windows (very interesting getting them up the hill).  David milled up some spruce boards and made a door with wooden hinges and curved birch branch handle.  We stuffed moss into the cracks to seal the front wall. 

door
insulation

There were enough boards to also make a bed, table, and a few shelves. 

45.JPG
bed

David made a big woodstove from an oil drum that we rescued from the river and….

Making the woodstove from this recycled barrel

Making the woodstove from this recycled barrel

This is the"stove jack" box

This is the"stove jack" box

Viola! A cozy, warm, inexpensive, and totally homemade home in less than two months.  If you want for more details, send us  an email. borealjourneysak@gmail.com 

earth lodgefamilypic